by Steven D. Johnson
Racine, Wisconsin
This month:
•
Of Yourself, By Yourself… Making A YouTube Video
•
Cheese Plate
•
Technology Update For Woodworkers
•
Spring Shop Organization Time
Of Yourself, By Yourself… Making Of A YouTube Video
Click on any picture to see a larger version.
Can you make a video of yourself, by yourself?
You can, but it's not easy. My last name isn't Spielberg, but in the next few paragraphs I will give you some tips and tricks that are guaranteed to make your self-made videos look and sound better!
Years ago I worked for a guy that in today's vernacular we would call a "Serial Entrepreneur." He started a business, got it running, then turned it over to someone else to run and moved on to start another. I was a guy he picked to run one of his businesses. He moved on. In a lot of ways, he was sort of a perfect boss. As long as you made money and didn't break any laws, he pretty much left you alone. Except me, for some reason. He kept getting me involved in his other business ventures. Of course, I had to still make money in the business for which I was principally responsible.
|
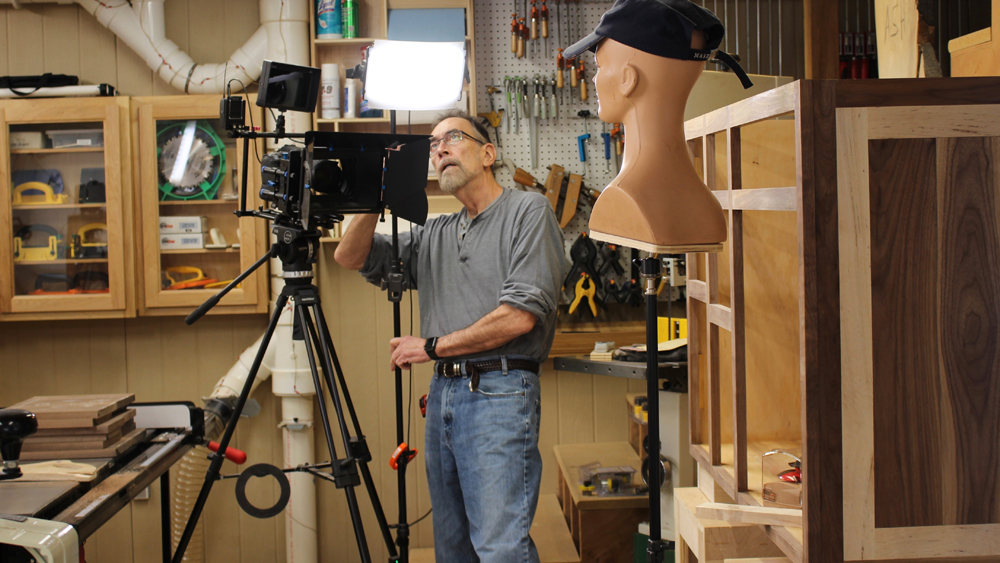
Figure 1 - Making a video of yourself, by yourself, requires
some creativity. How do you focus on yourself when you
have to be at the camera to adjust focus? Well, meet Focus
Freda, my focus "stand-in."
|
In retrospect, the overwork and long hours were a good experience. I was exposed to a lot of different things and learned a lot. At the time it seemed like "drinking out of a fire hose," but… I learned a lot. One of his business ventures was as a movie producer. I wound up spending time on the sets of two different movies, and since one of my hobbies was photography, the technical aspects of making a movie fascinated me.
I read recently that the product placement fees charged to companies for products featured in the latest installment of the 007 movie series totaled a whopping $45 million. The product placement fees, the article said, offset one-third of the cost of making the movie. I shared that arcane bit of trivia with a few people and they each had similar reactions... "It costs that much to make a movie?" Well, yeah, it does.
I once watched our crew set up for a shot that lasted about 35 seconds on the screen. It took some twenty crew members three days to get the site ready. It was to be a night scene with a scared woman running through the trees, being chased by a villainous creature. First they cleared a path. Of course it needed to be cleared enough for her to run, but it couldn't look "cleared." That took some creative work. Then they laid down what essentially was a miniaturized version of a train track, curving and winding through the woods. On the track was a trolley with a camera, cameraman, and other bits of equipment.
When all of that was ready, it took two more nights to practice the shot, get the lighting and sound correct, and make sure the camera movement was smooth and fluid. The script called for the scene to occur during a rainstorm, so on the night of the shoot, giant fire hoses sprayed water up into the air… of course these had to be aimed correctly and had to pace the running woman. Lots of people, lots of money.
|
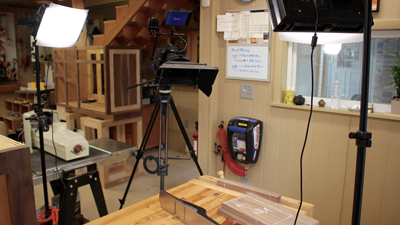
Figure 2 - Self-made videos don't require big crews,
but they do require careful, time-consuming set-up…
and lot's of light!
|
It took three takes to get the shot "just right." In between takes the woman's wardrobe and makeup had to be refreshed. More people, more money. I'm summarizing the effort involved, but you get the idea… 35 seconds of movie took a week and countless people to accomplish. The movie was close to two hours long, so you can easily imagine the cumulative cost.
I love Martha Stewart. How's that for an abrupt change of subject? Well, it's not, really. Ms. Stewart is immensely talented, infinitely likeable as an on-screen persona, and the production value of her show is very, very high. Now you might watch her show and think, "Okay, that's pretty simple… she stands in her kitchen and shows us how to cook." Well, it ain't that simple. If you are curious, watch one of her shows and pay close attention to the credits at the end. One web site I found lists 84 people involved at one time or another in the production of various Martha Stewart television shows, including 3 producers, 5 make up artists, 16 in the camera crew, and 12 handling the sound.
So you think you want to make a YouTube video? Perhaps you have something to say, some special woodworking talent, skills at communicating, you look good on camera, or you just want to see yourself on YouTube… whatever your reason, that's okay, and YouTube (and all of us woodworkers) will welcome you. But do you have a crew? Do you have equipment?
Can you really make a video of yourself, by yourself?
Well, you can, but it is very difficult to do well, and it takes time and money.
A sage and immensely talented individual told me, "Each and every year go back and look at a video you made one year ago… you will be embarrassed, humbled, and astounded at how bad it was. Do it this year, do it next year, do it ten years from now, you will still think the video you made one year ago was crap."
He was right. Particularly when you are doing it all… lights, camera, sound, script, editing, and on-screen talent. With each passing year your skills in different production areas will improve. With each passing year you will obtain better equipment, learn new techniques, and learn from prior mistakes. So here's the bottom line...
If you are thinking about making a video, just do it. We will watch it, and we will appreciate the effort and never criticize (well, at least most of us will never criticize). And if your first effort doesn't look like an episode of Martha Stewart's Cooking School, don't worry. A year from now your videos will look much better and a year from now Martha will look back at one of her year-old videos and say, "That was crap." Okay, I really doubt Martha would use language like that, but you get my drift. Your "year one" videos will not look as good as your "year two" videos, and by "year five," your videos will probably look five times better than your "year one" videos.
I can't begin to tell you how many people have suggested I do a video series about "how to make a video." I have absolutely, steadfastly (but nicely) refused. The reason is simple… I'm not that good. Oh, for a one-man production crew I guess I do okay, but I set my own standards pretty doggone high, and it would be presumptuous and ridiculous to make a video that in any way suggested I know any more than the average "Joe" or "Jane" about making videos. However, I have learned enough over the past few years that I might (emphasis on might) be able to impart some tips that can get you from "year one" to maybe "year three" right off the bat.
Get Rid Of The Shakes
Camera shake and movement, while it can have a theatrical effect in certain special circumstances, is not the way our eyes normally see things. Want proof? Go to the woods or your local park, run across some uneven terrain, and while running fix your eyes on something ahead of you… it's not shaking! Moving, perhaps, but not shaking or jittering. Our eyes have the miraculous ability to "steady" what we see and present a stable clear image. Well, the camera is the viewer's set of eyes, and if the camera shakes or moves in an unnatural way, it will be distracting and disconcerting. You need a tripod… or as the professionals say, "sticks."
If you want to be in your own video, you can either get someone else to hold the camera (not always practical) or you will have to get a set of "sticks." So you might as well plan on getting a tripod as your very first purchase (after the camera, of course!).
A set of "sticks" need not be expensive, but like everything else, you get what you pay for. A twenty-dollar tripod will do for a lightweight camera or even your smartphone shooting in video mode. More expensive "sticks" will hold more weight, be more stable, allow for smooth pan and tilt moves, and more… but to start, just get sticks… any sticks… and use them. My first tripod cost $19.95 and I still use it… well, sometimes.
|
|
|
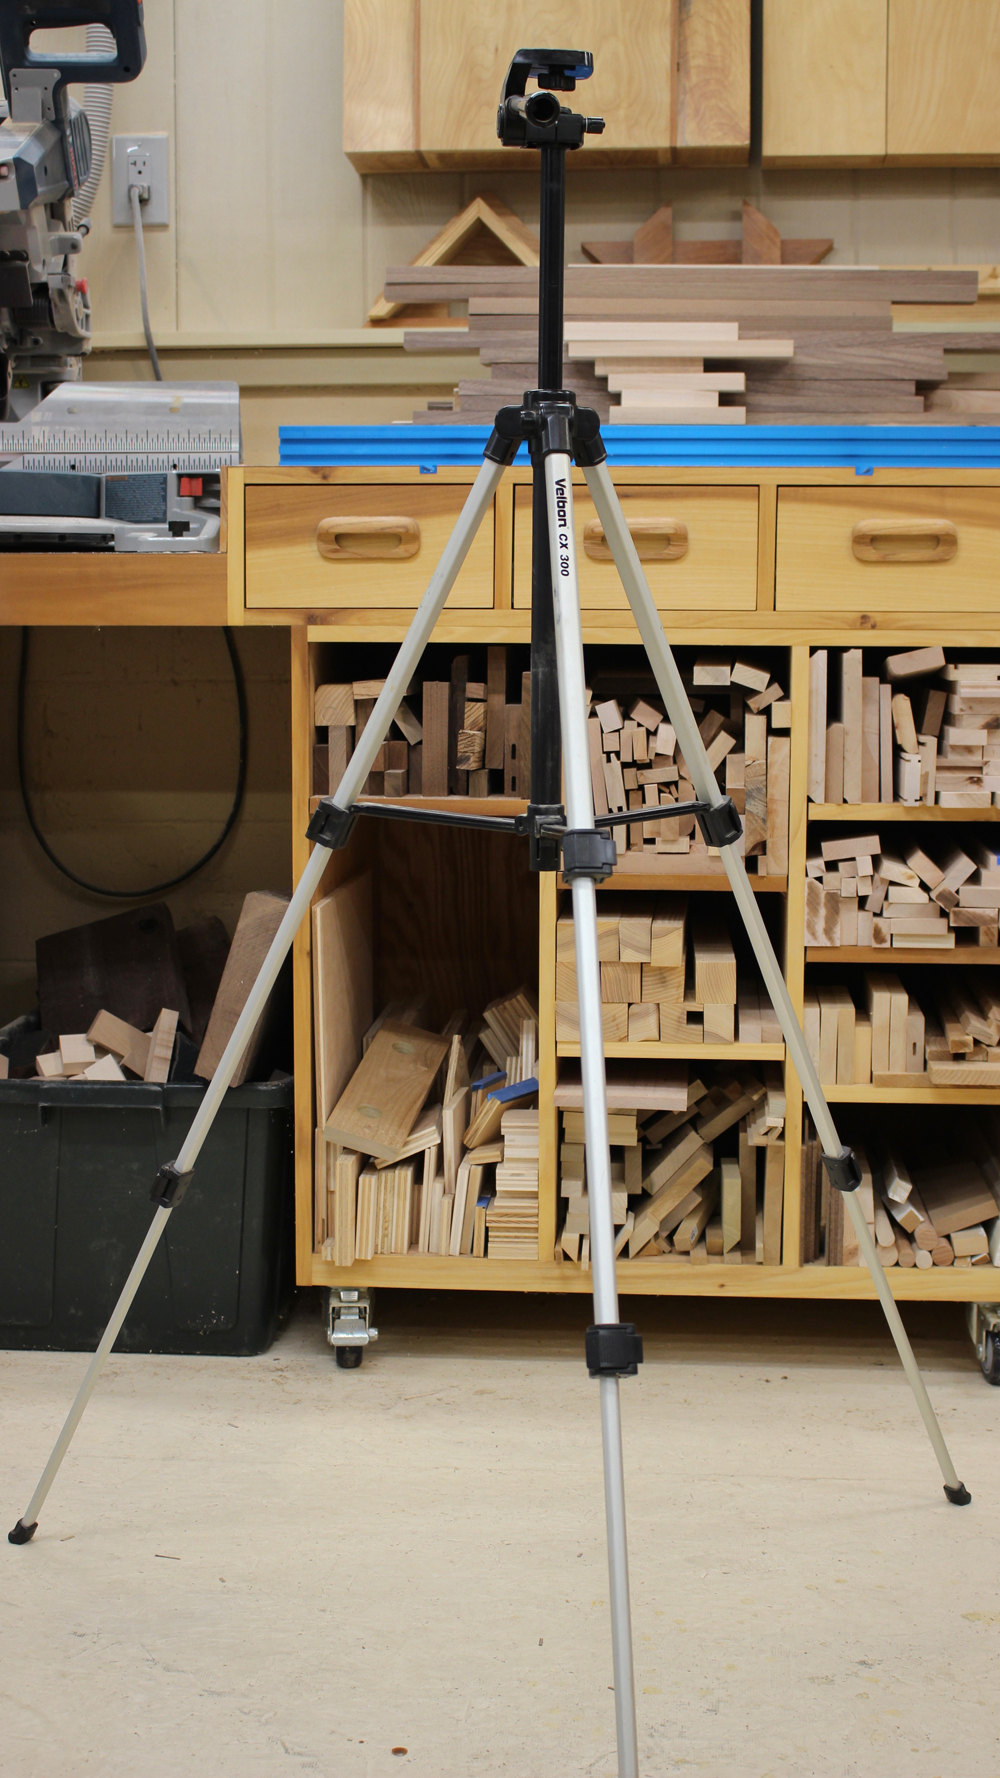
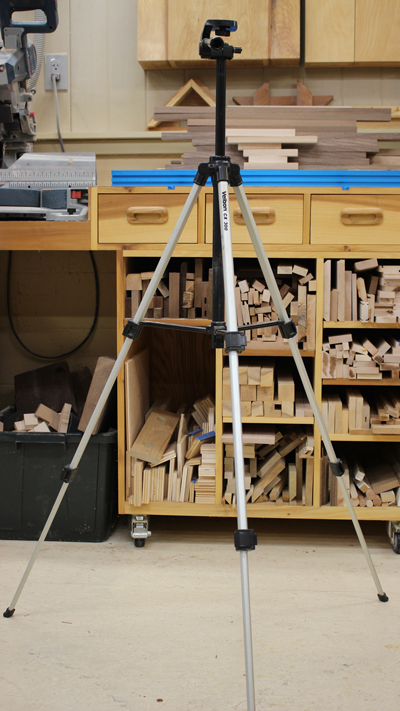
Figure 3 - This $20 tripod will only
safely support about 1.5 pounds
|
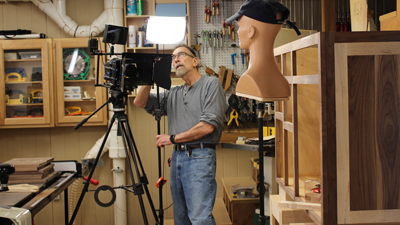
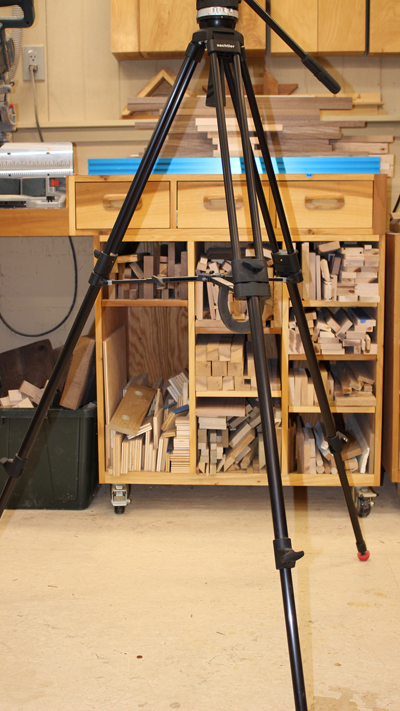
Figure 4 - This $600+ tripod will
support 8.8 pounds & has a fluid head
for smooth pans & tilts
|
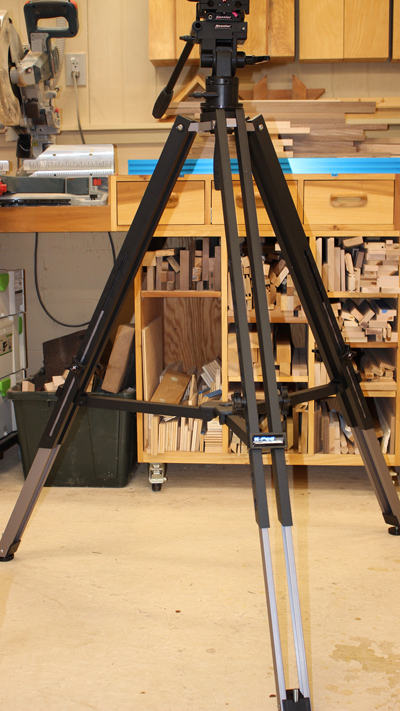
Figure 5 - This beast supports 500
pounds. We will just keep quiet
about what it costs!
|
Focus, Focus, Focus
It is impossible to stand in front of the camera and simultaneously stand behind the camera and set the focus. To get around that problem, I use a focus target. You can see "Focus Freda" in Figure 1 above. I did a little dumpster diving (see Jim, I can do that, too!) outside a beauty shop where I spied Freda. Freda apparently started her life as a wig model. She was a little beat up, but far from dead. I brought her back to my shop, attached a base and a 1/4-20 threaded nut, and now she is attached to the top of a light stand, adjustable to my height. A perfect stand-in for me to get the focus set.
A lot of people will depend on the camera's autofocus system. That's generally a bad idea. To satisfy the widest array of situations, most camera autofocus systems are "center-weighted," meaning that they focus principally on what is in the center of the viewfinder. If you want to exercise any creativity with off-center subjects, if you want to use the tried and true "rule of thirds" in image composition, or if you simply need to focus on one specific thing in a clip, you need to be able to manually focus. If you cannot manually focus or override the autofocus system, see if the camera focus "weighting" and focus target area can be changed.
Another aspect of focus is depth of field (DOF). Depth of field is the range of distance from the camera lens within which an image will be in focus. No need to get really scientific here, just remember that the wider the aperture in the camera (to compensate for lower light levels) the shorter the depth of field. The smaller the aperture opening (to compensate for higher light levels), the greater the depth of field. Bottom line, as a general rule, more light equals greater depth of field. This is one of the reasons the next section is so important…
Light It Up
Automatic exposure and digital enhancement can lull a person into thinking that video can be shot under any lighting conditions. There are, however, trade-offs when lighting conditions are less than ideal, and each of those trade-offs can, and almost always do, degrade image quality. As the camera "works" to achieve an image in low light, clarity and resolution diminish, color saturation decreases, and "graininess" appears in the image. You need light, and lots of it.
|
|
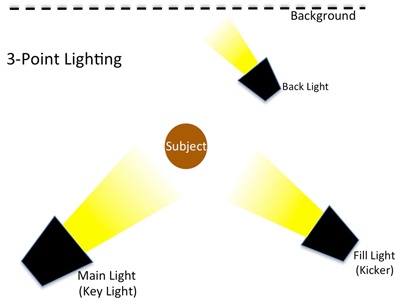
Figure 6 - Three-Point Lighting
|
Lighting need not be expensive. The spring-clamp metal-reflector work lights from the big box store are cheap and work pretty well to start out. A well-worn but standard and infinitely valid technique is called 3-point lighting. A main light, called the "key" light, on the subject, a second "fill" light, or "kicker," from another direction (usually a slightly weaker intensity and set to fill in the shadows made by the "key" light), and a third light on the background or toward the subject from behind (the "back" light) is the basic set-up and is appropriate for lighting people or objects. Typically the main light will be the brightest, the kicker will be the second brightest, and the third background or highlight light will be the third brightest. It can be as simple as putting a 100 watt-equivalent bulb in the main light, a 60 watt bulb in the fill light, and a 40 watt bulb in the background light.
|
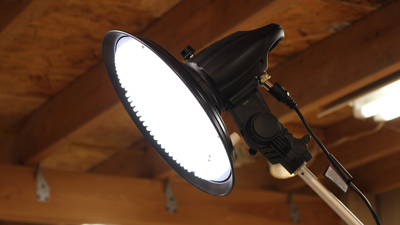
Figure 7 - This circular studio light has 500 LED bulbs
balanced to 5600K daylight, is dimmable, remote controlled,
and can be run on mains current or a special battery pack
|
Price-wise, the sky is the limit with lighting, like every thing else. More money will get you better color rendition, color adjustment capability, brightness adjustments, the ability to add gels and diffusers, etc. Expect to pay $500 to $1,000 for just one good quality LED studio light with adjustable brightness and color.
Light stands are not required, but make positioning and aiming lights easier and allow more flexibility. Light stands can be purchased for as little as $20 apiece and can range up to the thousands. With each increase in price you get more weight-carrying capacity, height, and features.
Sound
Almost any camera you pick up to shoot video will record sound, too. It will be terrible. This is an area I have struggled with, so I know. I also know exactly what I need to do to take the sound quality of my videos up a notch, and the bits and pieces I need cost over $1,000… not in the budget right now!
There are, however, ways to incrementally improve the sound quality of your videos without spending a fortune. In order to make small but noticeable improvements, it is first necessary to understand why the sound quality recorded by the camera is so bad.
First, the microphone in the camera is tiny, cheap, and "in the camera." Tiny and cheap is sort of self-explanatory. "In the camera" simply means that any sound made by the camera is picked up by the microphone in the camera, so the recorded sound is noisy, dirty, nasty.
Second, the audio processor inside most amateur and so-called "prosumer" cameras is included as a convenience only, and it is cheaply made. The tiny signal from the cheap microphone is amplified ("gain" is added) and digitized before it is recorded, and in these processes the sound quality is seriously degraded.

|
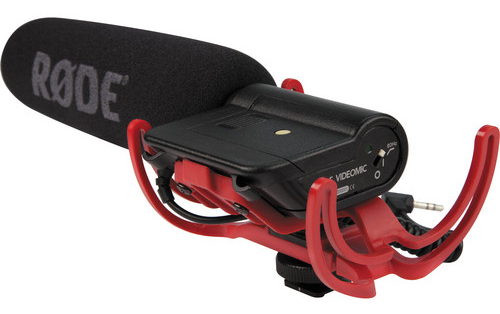
Figure 8 - A great "starter" microphone for $150.
Plugs directly into most cameras, uses a common
9 volt battery, and can be mounted on top
of the camera or on a light stand.
|
In order to get high quality audio, a separate microphone and recorder is preferable. Of course this means that after the video is shot, it is necessary to "sync" the video and audio tracks during the editing process, but the extra work is worth it.
Before taking that expensive and complicated plunge, try these incremental steps. They will definitely help.
If the camera has an input for an external microphone, use it… get a separate microphone. A fair quality microphone can be purchased for around $60, a good mic for about $250, and an excellent mic will cost about $500. Even a $60 microphone will be about 1000-times better than the microphone built into the camera, so this is a relatively inexpensive audio upgrade.
Better microphones usually require what is called "phantom" power, meaning that there is an external power source, usually provided by the recorder itself. Some newer microphones can run off either phantom power or an internal battery. Choose one that accepts a battery if you are going to connect the mic directly to the camera.
Any really good microphone will have balanced (XLR) connections, so if the camera or recorder you are using only accepts a mini-plug, an adapter will be necessary (and will degrade sound quality a bit). Any microphone with power, i.e. phantom power or a battery, will produce its own "gain" so the audio processor in the camera can essentially be bypassed, further improving audio quality. Do that by turning the internal camera audio gain down to zero or one notch above zero… the camera instruction manual will usually tell you how to do that.
Another advantage of an external microphone is that many are "directional," meaning that they reject or limit pickup of sound from anywhere except where they are designed to pick up sound… usually where they are "pointed."
It might seem blatantly obvious, but try to limit any external noises that the microphone can pick up… buzzing fluorescent ballasts, outside street noises, the neighbor's radio, barking dogs, etc. If necessary, do your video recording at night when there are (hopefully) less ambient outside noises.
Of course this only scratches the surface of "sound." Microphones come in a dizzying array of pickup patterns with obscure labels like omni-directional, cardioid, super cardioid, hyper cardioid, etc. There are also wireless options, lavalier (lapel) microphones, and more. There is a reason that the "sound" folks get their very own credits at the end of a movie!
Editing
Video editing programs are included with many computer systems now for free. Apple computers come pre-loaded with iMovie, a wonderful editing program that is easy to learn, intuitive, and free (did I mention that already?). While free editing programs do not include a lot of bells and whistles, they will all allow you to cut and rearrange clips, add transitions, titles, and even some limited special effects. Most will also do some limited color and exposure correction and rudimentary audio balancing.
After learning a program like iMovie, you may want to move up to a more robust non-linear editor (NLE) and at that point the learning curve, software, and computer costs get very steep, but the potential for improvement to your video effort is vast. Invest in the biggest, baddest, fastest computer you can get. The editing program and the videos you edit chew up hard drive space quickly… you will need lots of storage… lots and lots of digital storage space. We're talking terabytes here, not gigabytes. I have 20 terabytes of storage on three separate high speed drives, a full backup RAID array, 3 terabytes of internal hard disc and off-site cloud storage… And I've got to add additional storage very soon.
Editing is critical and time-consuming. Plan, at least initially, to spend as much time editing as you spend shooting video… or more. In time editing will get a little faster, but you will also learn more "tricks;" so while you may become more efficient, the additional editing features you learn to use may cause you to spend just as much time editing as you did when first learning the programs.
Summary
That's pretty much it… I've exhausted almost all the knowledge I have, but if you pay attention to the things listed above, you will be able to make good… perhaps even excellent… videos. You will notice I have said almost nothing about cameras. That's because with today's technology, almost any camera will shoot respectable video… assuming you pay attention to stability, lighting, sound and post-production editing. And frankly, the sky is the limit with how much money you can spend on camera equipment. If you force me to make a recommendation, it would be to get a fair quality DSLR camera and spend the big money on "glass"… lenses will have a more profound effect on video quality than the camera itself and will give you more creative freedom. You can use wide angle lenses, telephoto lenses, and special "macro" lenses for super close-up work to enhance your creativity and the range of subjects that can be filmed.
I hope a hundred or even a thousand more woodworkers
start making videos for YouTube
. I watch, I learn, and I am always entertained. And who knows, maybe one of you will be the next super star that gets a contract from a network to make a weekly woodworking show… stranger things have happened!
(Page 1 of 4)
1
2
3
4
Next Page
Return to
Wood News
front page