|
|
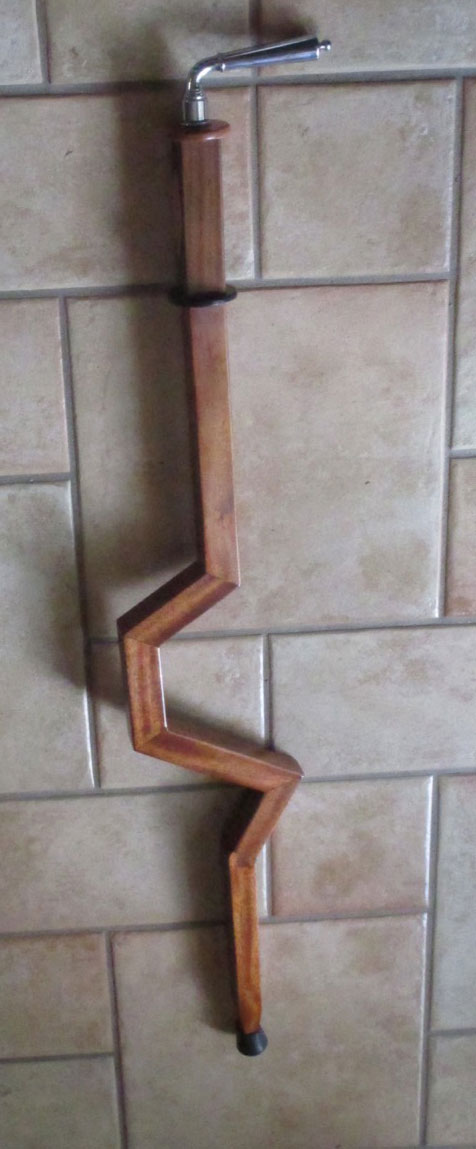
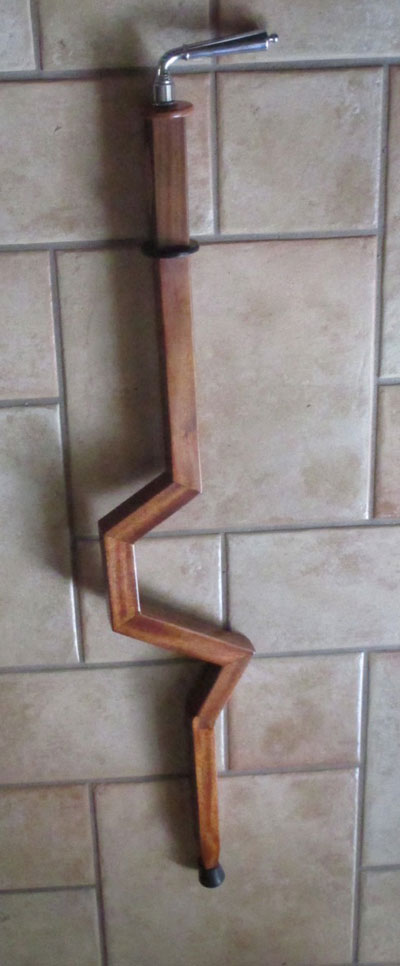
Figure 1 - The completed
project
|
I have found that in my woodworking "career" I get into one thing or another and
stick with that until it starts to bore me or I get the bug about something else. I have
gone through a pen-making stage, a bowl-turning phase, a boomerang phase and a
Platonics-solids phase. Lately I've been in a walking stick phase and my most recent
project was a "crooked cane." It's great for rough roads and broken sidewalks in
case you were wondering.
It is mainly made of 1-1/4" square mahogany but the top square section is walnut.
The upper round disc is 1/4" by 2-1/4" diameter tulipwood and the lower round
disc is ebony. The handle is a recycled door handle from a local building materials
recycling center. As usual, I "signed" it with my branded maker's mark. This time,
though, I added a copper plaque with my email address just in case I walk off and
leave it in a restaurant someplace.

|
|
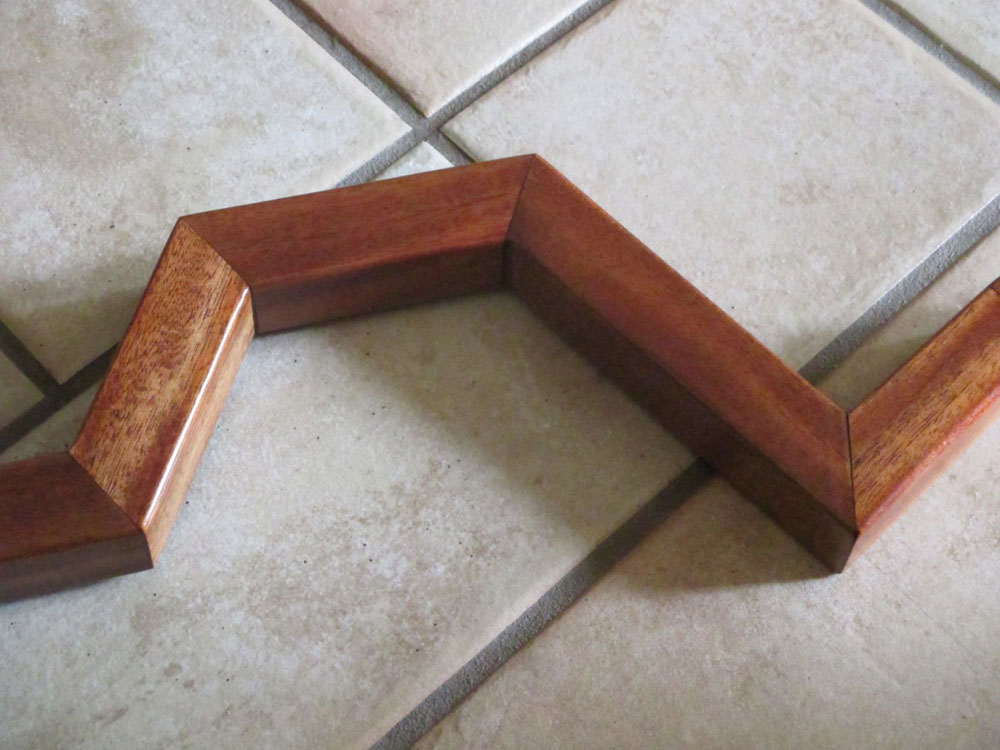
Figure 2 - Detail
|
Early on, I knew that I would need to reinforce the various joints in the piece.
Wooden dowels were the obvious choice but I decided that I wanted to be even
more certain of the strength of the joints. Instead of wooden dowels I decided to use a
3/8"-16 threaded steel rod. For those fellow woodworkers who may not be familiar
with it, this is a steel rod threaded all the way from end to end. It is sometimes
referred to as "all-thread." It is available in various sizes at most "serious" hardware
stores. (Be on the look out for my future article on threading, tapping, tap drill sizes, etc. It should be of interest to many
woodworkers).
To start, I drew the walking stick full-size on a large sheet of paper. Doing this
enabled me to determine the various section lengths and to set my bevel square to the
angles of the different sections - and from there to the miter gauge on my table saw.
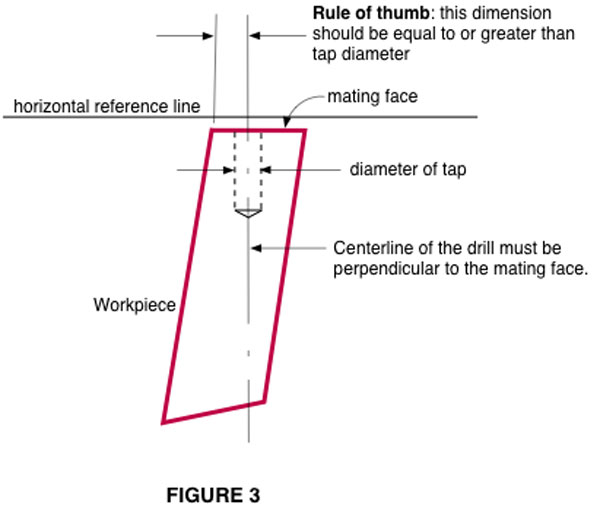
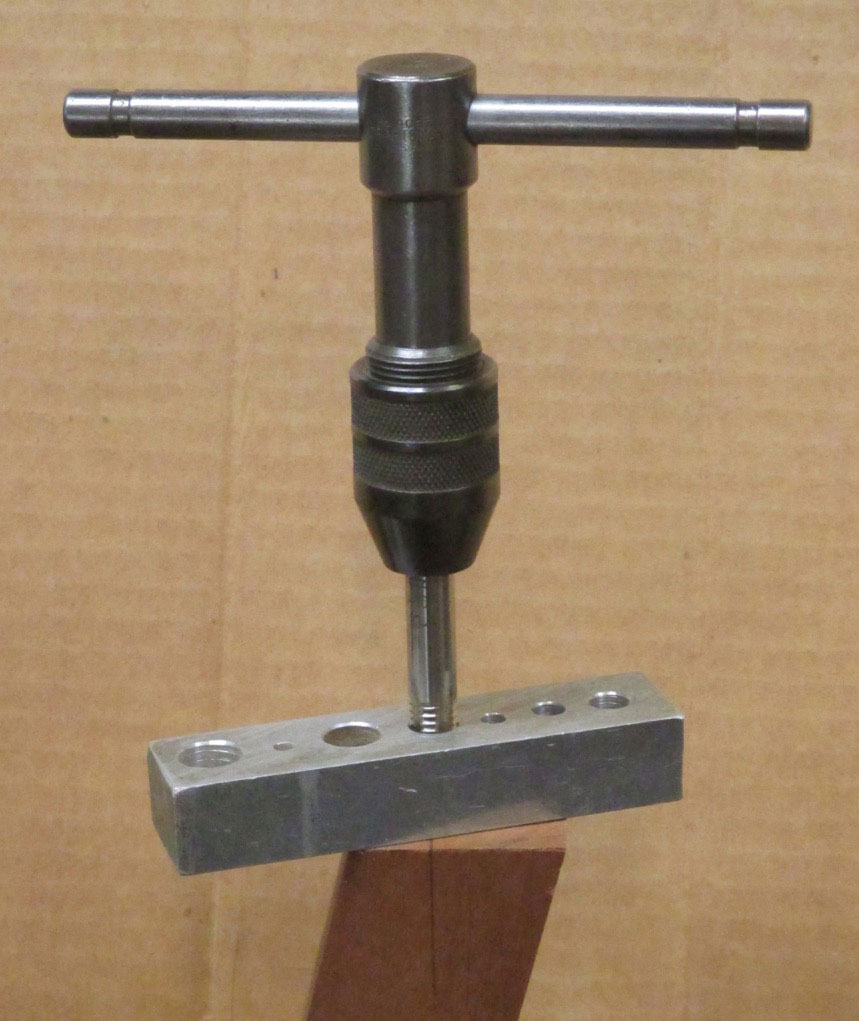
After cutting the various sections, it was time to drill and tap each section for the
threaded rod. The hole location for each section varied depending on the angle of
the section but was determined by an old rule of thumb as shown in Figure 3. Note
also that the hole size (also referred to as the
tap drill size
) for the 3/8"-16 threaded
rod is 5/16".

|
|
Figure 3
|
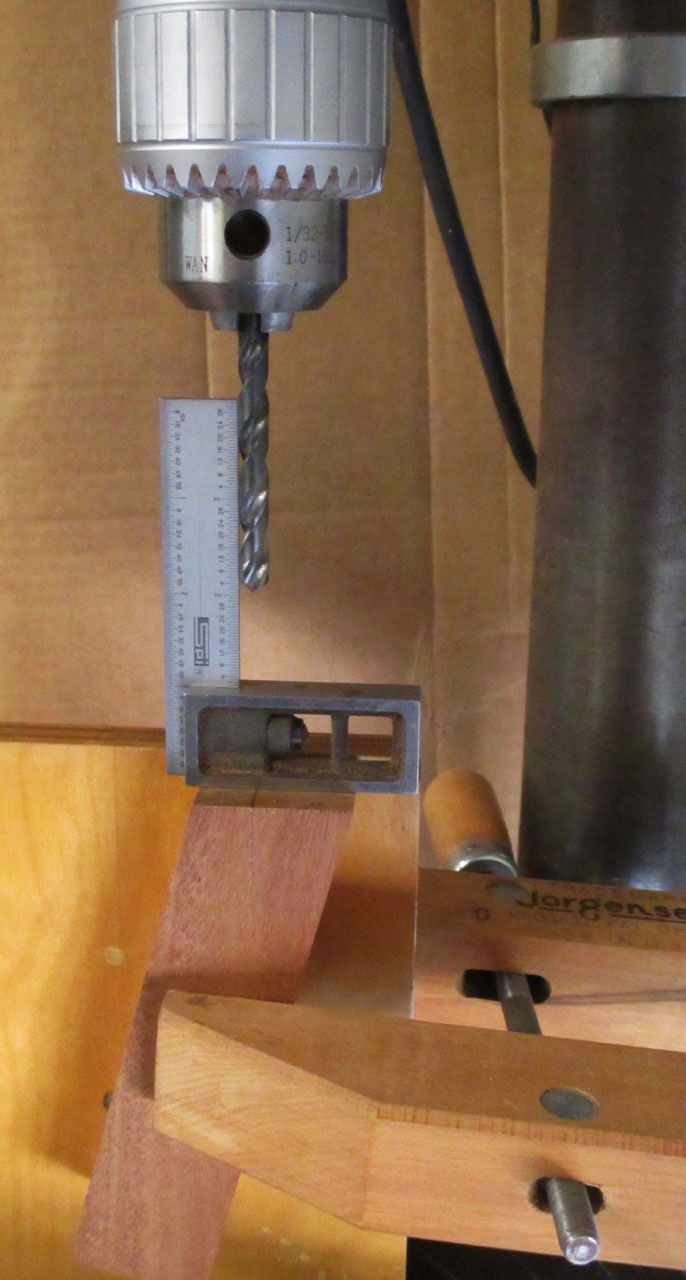
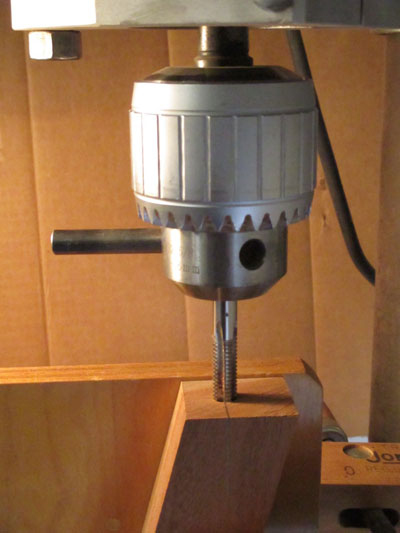
It was also very important that the hole and the subsequent tap be perpendicular to
the mating surface of each section. See Figure 4 for the drill press setup that I used. I
used the
Starrett Double Square from Highland Woodworking
to align
the work surface perpendicular to the drill. I drilled the hole about 1-1/2" deep in
each cane section. (Note: the depth will also depend on the angle of the section. You
don't want to break through the side, of course).
|
Figure 4 - Note that drill must be
square to mating face.
|
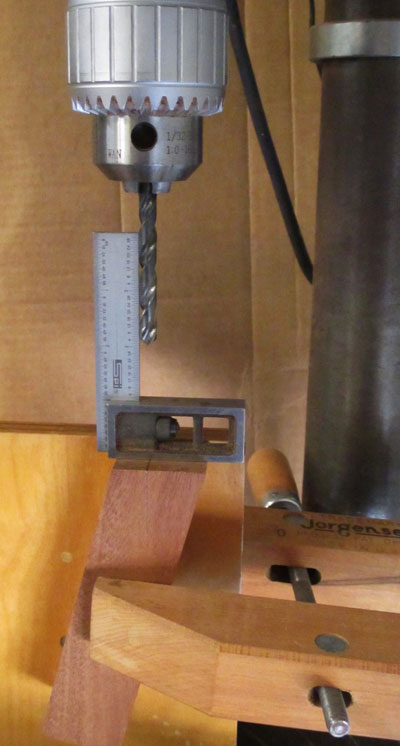
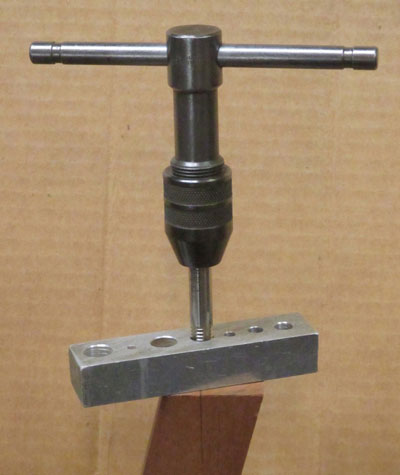
While I still had my work-piece clamped in place for drilling I left it in place so that I could tap it using the same setup. I replaced the
5/16" drill with a 3/8"-16 tap and tapped the hole as shown in Figure 5.
Do not do
this by turning the drill press on!
Simply use the drill press down-feed lever to
maintain a steady, even pressure while at the same time turning the tap with a pin in
one of the chucking holes. Alternatively, you can assure that the tap is square to the
work surface by using a simple tapping block as shown in Figure 6.
|
Figure 5 - Turn the tap using a pin
while maintaining a steady
downward pressure on the drill
press down-feed handle.
|
|
Figure 6 - Homemade tapping
block (about 1/2" thick) helps keep
tap perpendicular to the work.
|
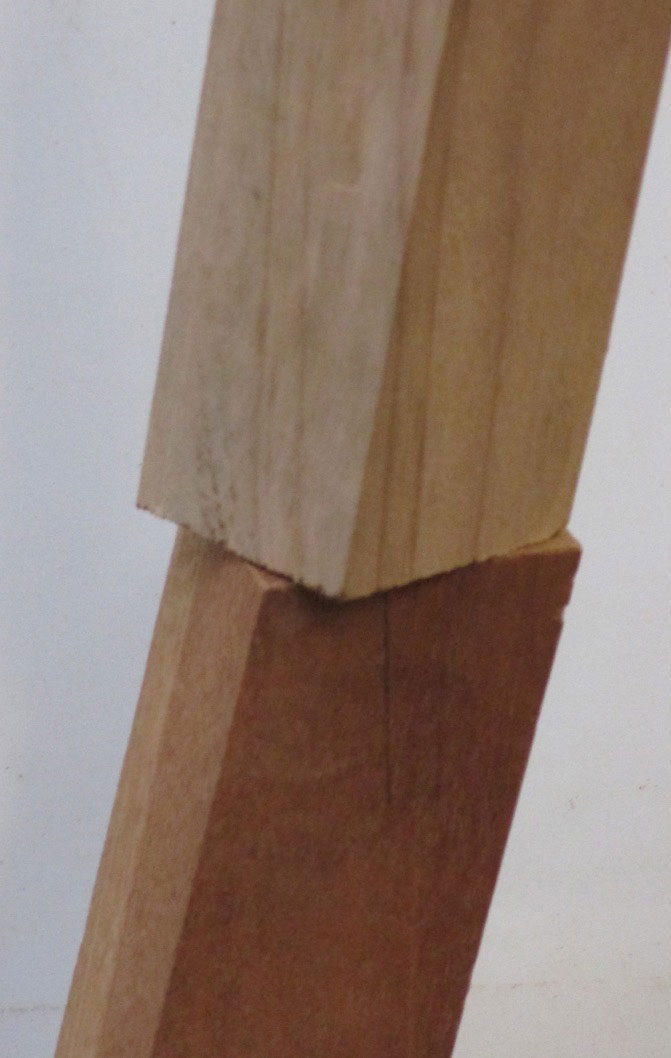
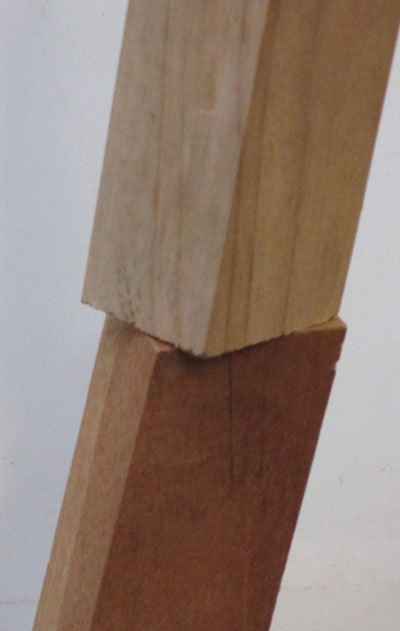
When all of the cane sections have been drilled and tapped, cut pieces of 3/8"-16 to
length (mine are about 2" long) and insert them into the various cane sections. Then
test assemble each section. Note: the sections will probably not thread together in
the proper orientation for the finished cane. Do not force them to do so; if you do,
you may strip the threads. Instead, carefully sand or file a small amount from one of
the mating surfaces until you get the desired orientation. See Figure 7.
|
Figure 7 - Mating sections may
not align properly when threaded
together. Sand or file mating
surfaces until sections align
properly.
|
When you are satisfied that all the joints meet with the proper orientation, apply
System Three T-88 Epoxy
to the holes and the threaded rod
and screw them together.
I mounted the cane handle using the same drill, tap and threaded rod technique that I used
for the cane sections.
I drilled the cane end from a short piece of 3/4" dowel and added a crutch
tip, which is available at most hardware stores.
You can email Paul at
pburri@cox.net
.
Return to
Wood News
front page
|