|
A lot of woodworkers think the caliper is for metal working and is overkill for woodworking, but I disagree. It is actually one of my favorite measuring tools because of its accuracy and flexibility. Using the caliper you can make outside, inside, depth and stepped measurements very quickly and with a high degree of accuracy. I'll explain each of these shortly but first a little bit about the tool itself.
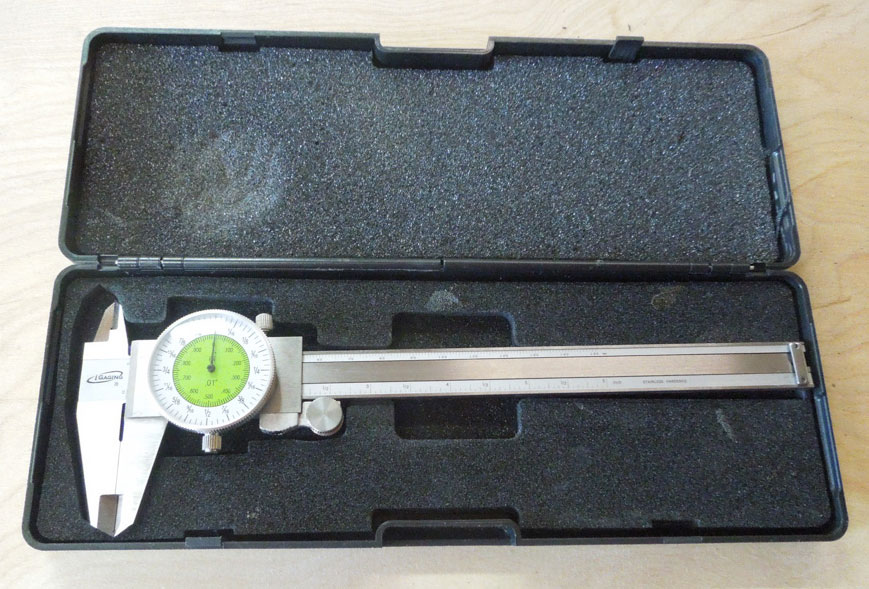
The Woodworker's Dial Caliper comes in a hard plastic case lined with a hard foam with cutouts to hold the caliper. The tool is well protected in this case.
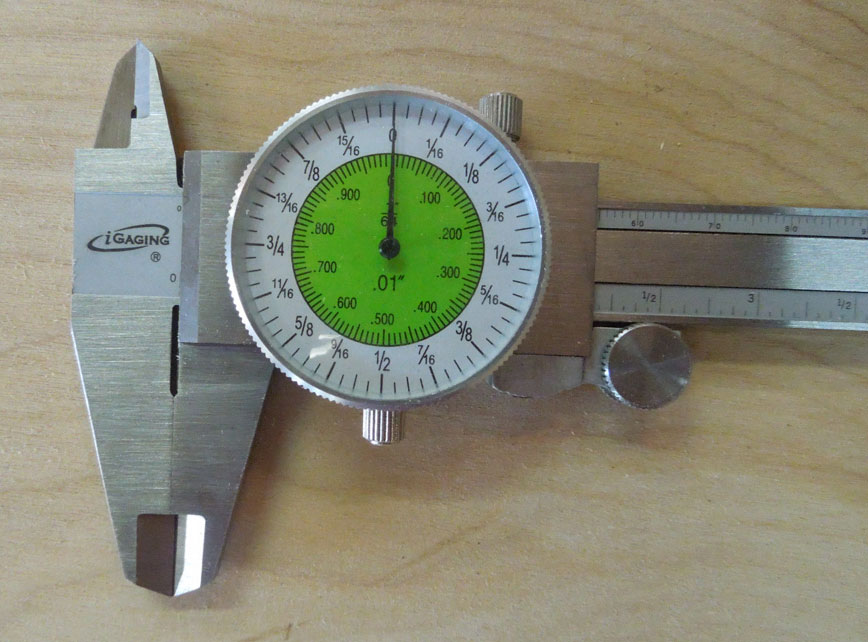
The Woodworker's Dial Caliper has two scales around the dial. The first is a fractional scale set on a white background and the second is a decimal scale set on a green background. The fractional scale is calibrated in 64ths of an inch, with major divisions marked every 1/16th of an inch: 1/16", 1/8", 3/16", 1/4" and so on around the dial. The face is large (1-3/8" diameter) which allows you to estimate between the 64ths so dimensions as small as 1/128" are possible. The inner scale reads in hundredths of an inch, which is useful for machine work and for those of you who like decimals instead of fractions. Finally, the scale on the bar shows mm on the top and sixteenths of an inch on the bottom. When measurements are greater than one inch you will use both the bar and dial in combination. The bar shows when you pass a major inch (eg, 1",2", etc.) and the dial shows the fractional inch.
The bar is made with stainless steel. Both the bar and dial appear to be very sturdy with no wiggle or slipping. The lower jaw slides very easily along the length of the bar.
There are three 'knobs' on the caliper used for calibration and control of the measurement head. The small knurled knob under the dial is used for calibration. After loosening the knob you can rotate the dial in order to 'zero' it. Just close the caliper jaws all the way and then rotate the scale so the zero mark lines up with the needle, then tighten the knob to lock it in place. The small knob above the dial locks the movable head in place. This is used to set the head at a particular dimension (setting) and then lock it. I'll show you how I used this feature a little later in this review. Finally, there is a large knob mounted to the right of the dial and is used to move the head.
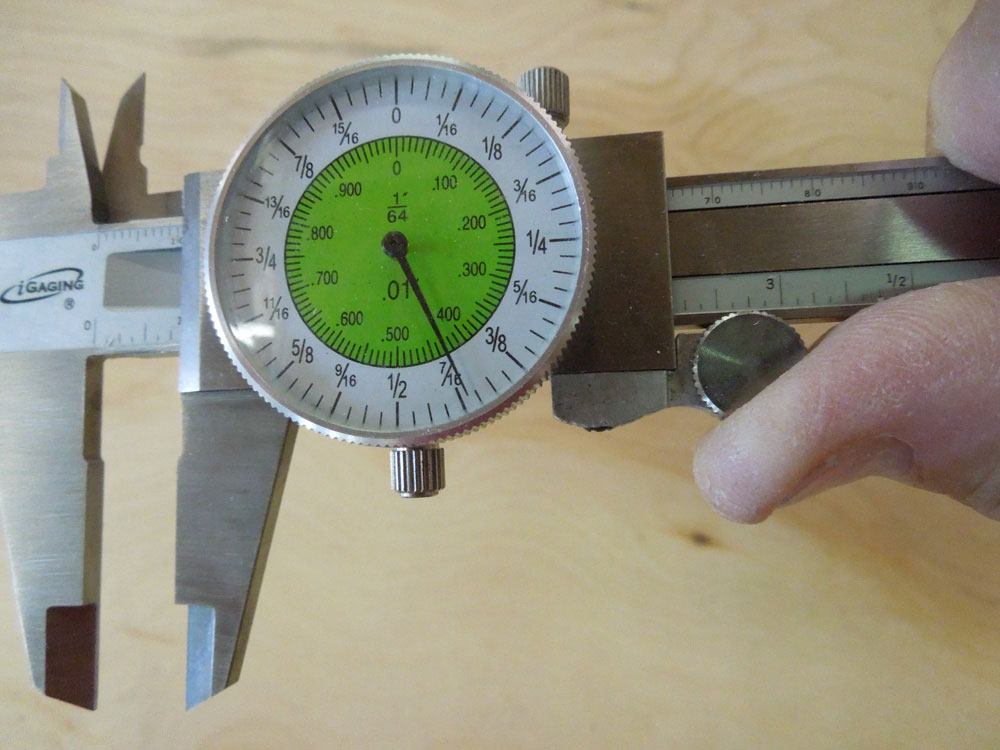
As you see in the picture, you can use your thumb to rotate this knob which moves the lower jaw back and forth along the bar. It is used for precise setting of the jaws of the caliper.
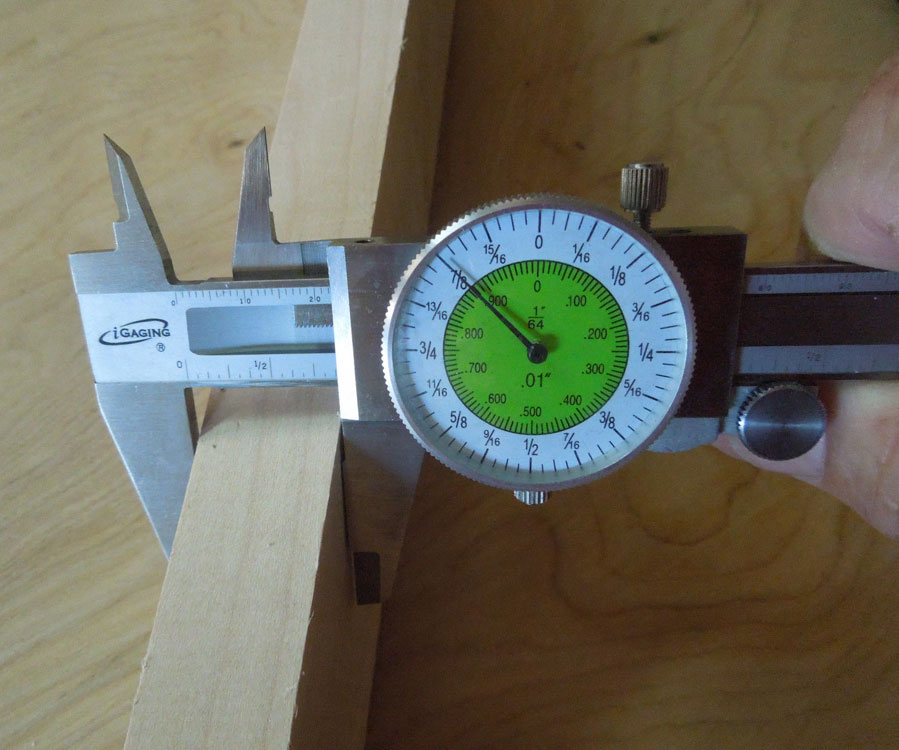
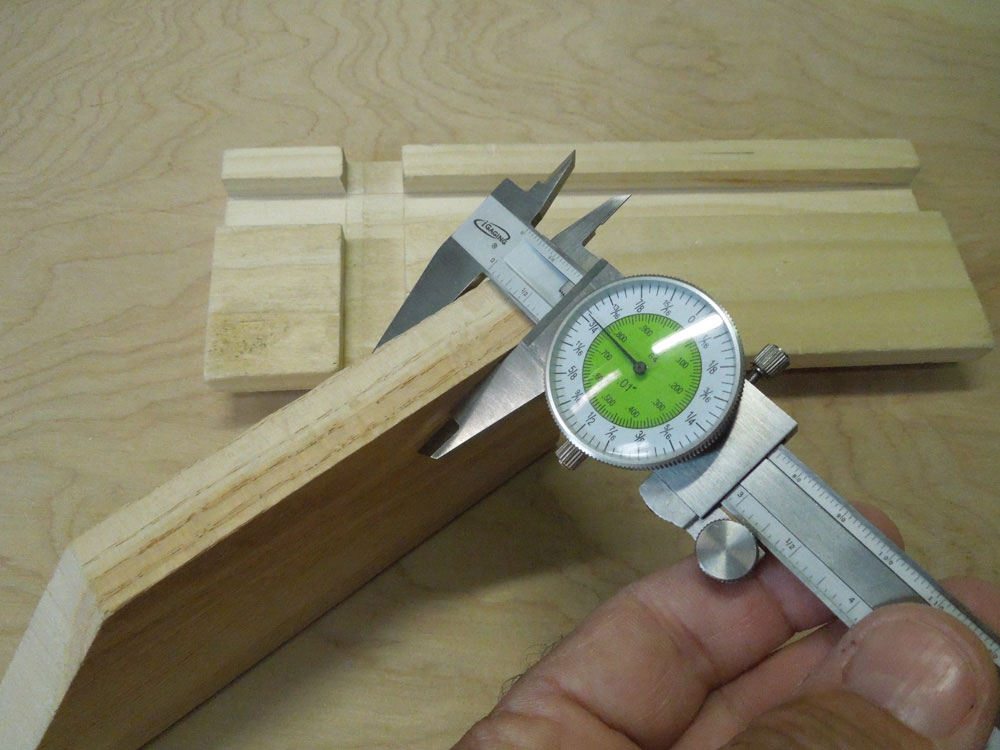
The first thing I do with any measuring or marking instrument is to check for accuracy. I zero the caliper and then set it a known distance on a trusted ruler. In this case I used a Woodpeckers Rule and set the caliper to 1-1/4". The caliper was right on! You can see I am past the 1 inch mark on the bar and on the 1/4" mark on the dial.
You can use the caliper to make four different measurements: outside, inside, depth and stepped. I'll explain each of these and how I use them.
The outside measurement is the most common and probably the one everyone thinks about when they see a caliper.
Here I'm measuring the thickness of a board which is 7/8" thick. I also use the outside measurement on my lathe when doing spindle turning.
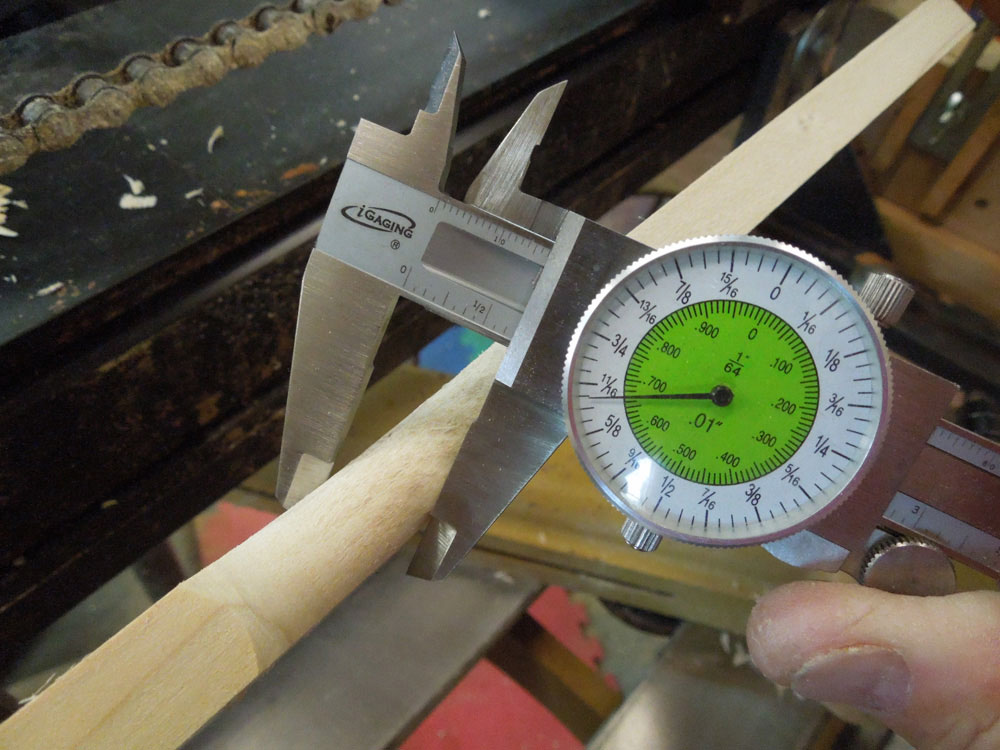
I've turned a section of a spindle and it is measuring a 64th under 11/16". Be sure the lathe is turned off when you make this type of measurement so the sharp corners of the jaws don't catch on the turning wood (I won't tell you how I know this!). I also use the caliper when defining a specific diameter on a spindle. I can use the pointed 'teeth' on the top of the caliper to set a specific distance from a layout.
Once I have the jaws set I can lock them using the knob at the top of the caliper. This setting is now reflected in the lower jaws as well. Once locked, I can use this setting and the lower jaws on my spindle by doing repeated measurements as I turn the spindle down to size.
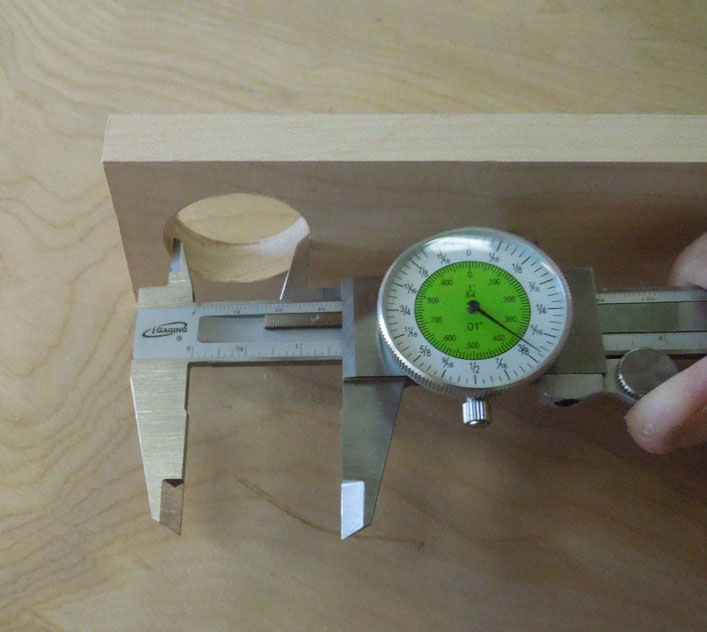
The top 'teeth' are also used for the next type of measurement, the "inside" measurement.
As you can see above, you can measure the inside of an opening. In this case it is a hole but it could be a mortise length or width, a dado or groove width, or even an irregular shape with repeated measurements.
I use this measurement type when fitting a shelf into a dado. It is actually one of the cases where you can use the caliper as a 'sizing' device and not really care about the exact measurement. What do I mean by that? In the following picture I measure the inside measurement of a dado and lock it in with the locking knob.
Once I have this measurement locked in I can use the jaws to size the shelf to fit. With the jaws locked in place I can plane and sand my shelf, using the jaws as a guide, until it slips between the jaws. The shelf should now fit snugly into the dado.
This method works especially well when the dado is in a large cabinet and not easily moved whereas the caliper can be kept close at hand.
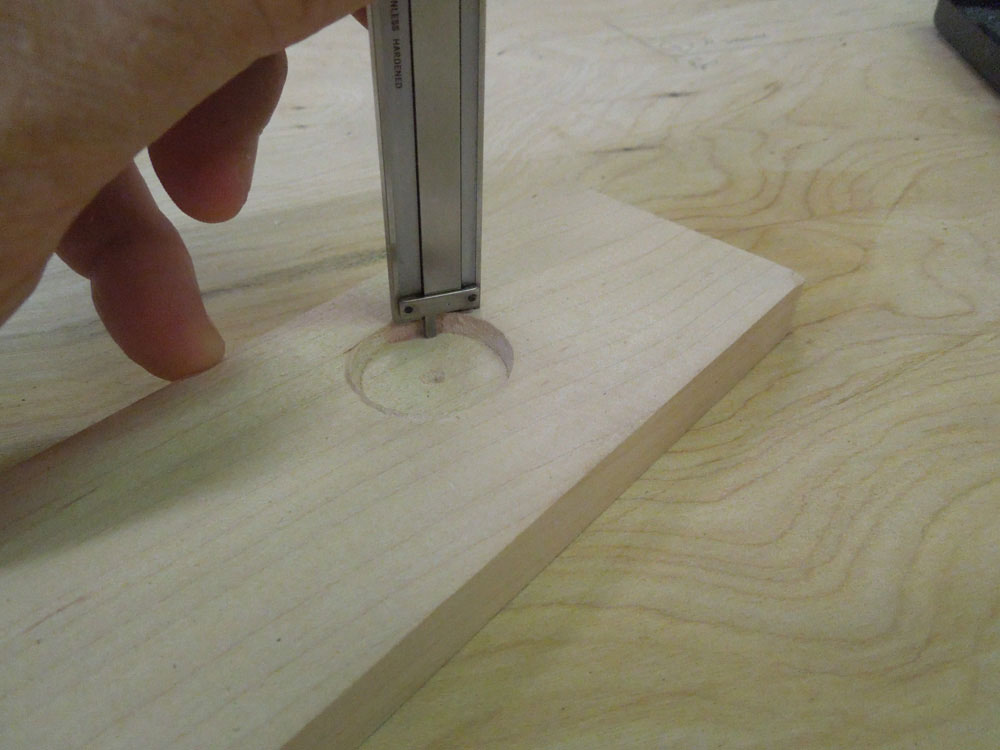
The third type of measurement is a depth measurement. When you move the lower jaw along the bar to open the jaws the center part of the bar extends out of the bottom of the caliper. You can use this to measure a depth as shown here:
Rest the outer portion of the bar on the surface and the center part moves down into the hole, in this case, then just read the dial as in any other type of measurement.
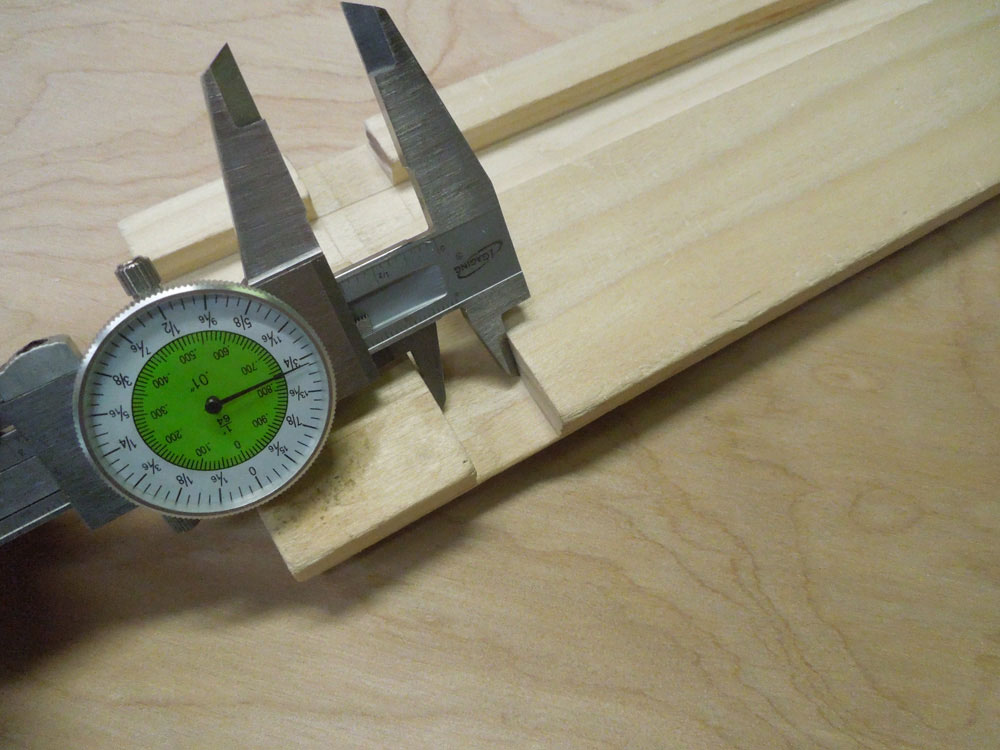
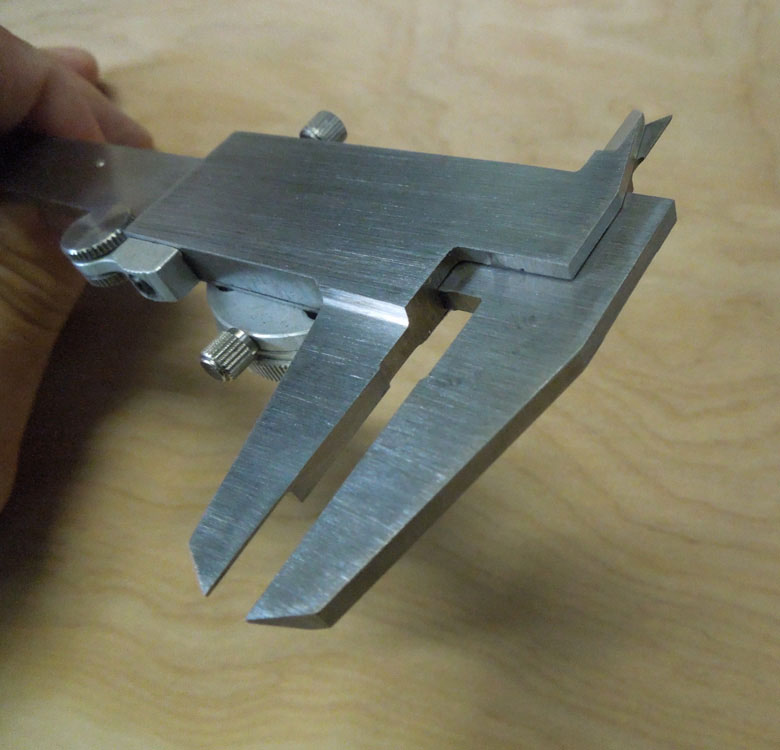
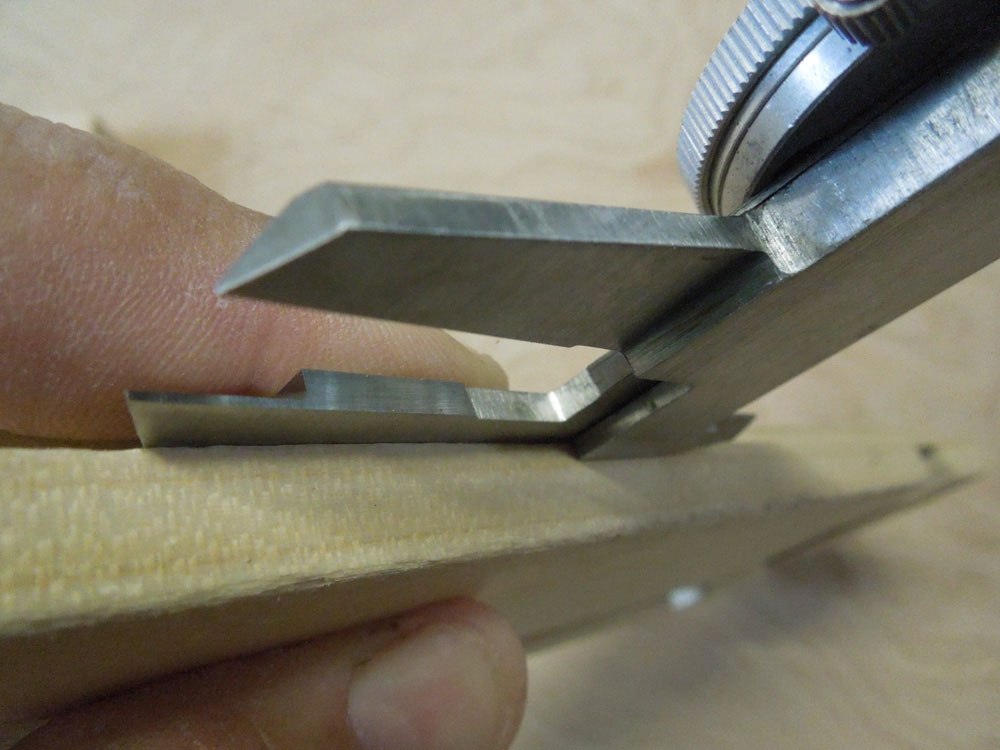
If you have stayed with me so far, I've kept the best measurement for last. This is the one that practically no one knows about! It is called the step measurement. It is used to measure the width of a step, like a rabbit, cut into the edge of a board although it may have other uses as well. As you see in the following picture, the movable jaw has a back that is proud of the upper jaw.
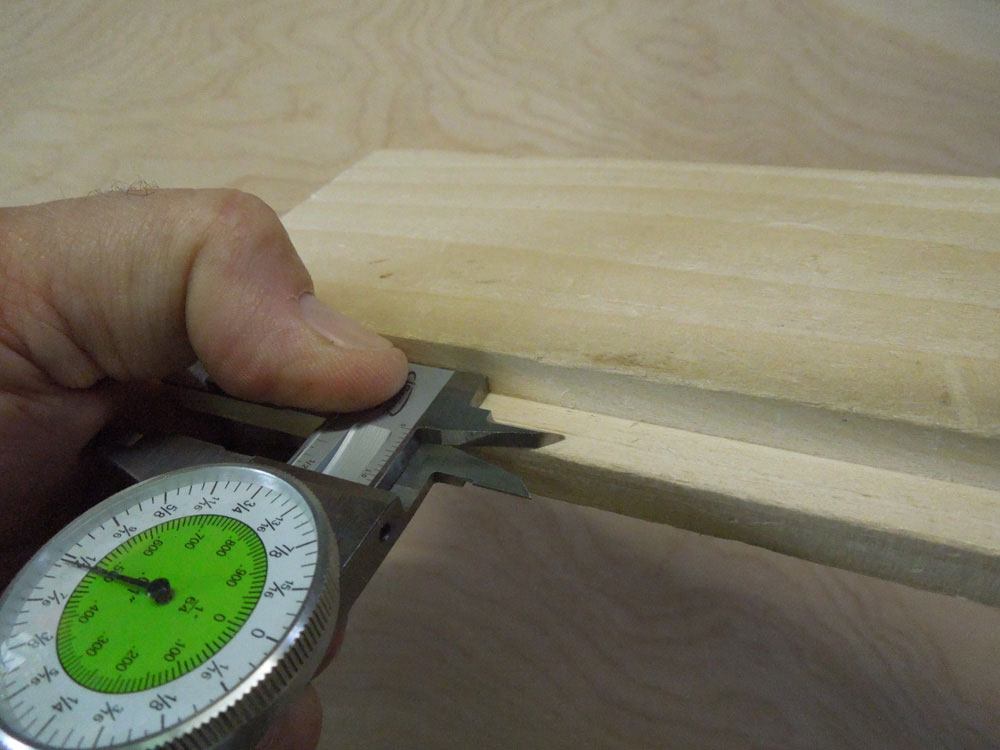
You can set the flat top of the caliper against the vertical wall of a rabbit and the lower, movable jaw, against the front edge, as shown in the following pictures:
The size of the 'step' is read on the dial as normal.
The Woodworker's Dial Caliper is an extremely useful tool to have in your shop. Not only does it provide extremely accurate measurements...down to 128th of an inch, but is very useful in a variety of other uses as I've described in this review. It is very well-made and should last for a long time in your shop. I keep mine in my apron so I have it handy and I recommend you keep one in your shop as well.
Find out more and purchase a
Woodworker's Dial Caliper
Jeffrey Fleisher has been a woodworker for approximately 20 years and a professional woodworker for the past 6 years. He is the president of his local woodturning club, the Woodturners of the Virginias and past president of the Northern Virginia Carvers. You can see some of the furniture he has made at
www.jeffswooddesigns.com. He can be reached by email at furnmkr@gmail.com
Return to the
Wood News Online
front page
|