|
Roubo Bench With a Twist - Fin
To start at Part 1 of this series, Click Here
In the
previous installment of this Roubo Bench Odyssey
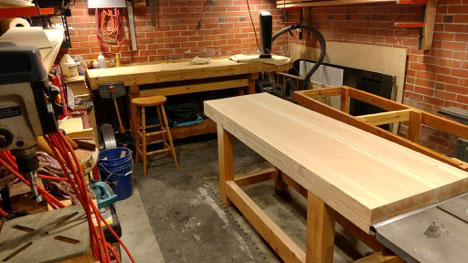
, I had cut and fit the joinery and mated the top to the base. This is a special time in the building of a workbench. On the one hand, it is when the thing begins to start "breathing" on its own and actually beginning its life.
On the other hand, it is a time when you can see the end of the adventure approaching, a time for a little bittersweet contemplation. Not a lot, just enough to stand back and appreciate all the planning and effort that has gone into the build. This is my favorite time because I still have some finishing touches to attend to, but the thing is almost ready to be turned loose into my shop.
Once I flattened the "Up" side of the bench once more, a final flattening as it were, It was time to set my sights on the leg vise. Initially, I had planned for a
Moxon style vise
, like what would be used on a Holtzapffel. As the build went on though, I elected to contact Highland Woodworking and get my hands on
Benchcrafted's Crisscross
and build a proper leg vise, Roubo style.
The Moxon style vise of the Holtzapffel bench was attractive to me because I am getting back into cutting dovetails by hand, and that vise configuration would lend itself well to my needs. However, after having read about some of the shortcomings of shop built holtzapffel vises, I figured that the leg vise was just as good, and maybe a little bit more versatile for my shop.
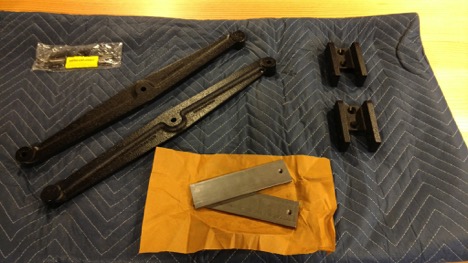
The Benchcrafted CrissCross was my one splurge financially for this bench. WORTH IT.
There are
two versions of the Crisscross
. One is for new construction benches and one is for retro fitting the apparatus to an existing bench.
I chose the Retro version despite this being a "new" bench. The regular version or "Solo" is designed for new construction that allows for the use of a drill press to accurately bore the holes for the pins that hold the thing together. The Retro on the other hand uses additional pinned plates that are mortised into the leg and chop to get around using a drill press. Either way, construction is pretty straight forward. I just chose the Retro since it was something of a last-minute change in plans. READ THE DIRECTIONS BEFORE INSTALLING…...read that again…..it will save you lots of time, and lots of brain damage. I know I am glad I heeded this advice when I went to install mine.
As I was waiting for the Crisscross to be delivered, I went ahead and bored the holes for the holdfasts. I used the layout dimensions that Chris Schwarz provides in the drawings for his Roubo bench. My benchtop dimensions were close enough to St. Schwarz's that they would be just about right.
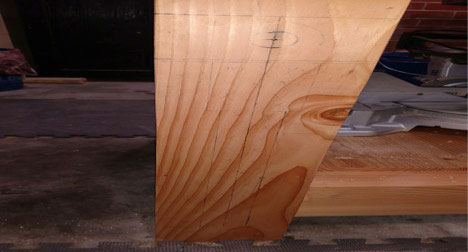
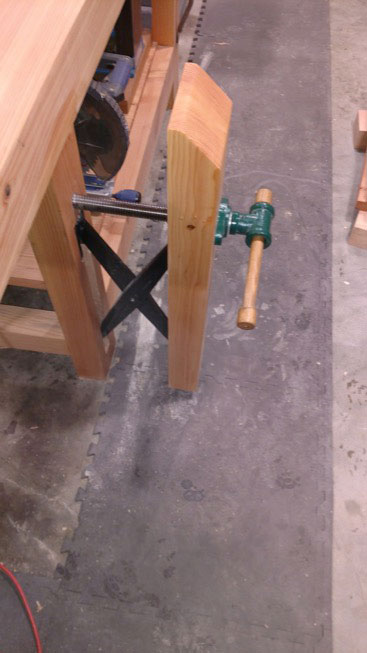
To install the Crisscross, I routed the channels that accept the device in both the chop and the leg of the bench. This went off without too much drama. The screw I used for the vise was a Veritas shoulder vise screw that I had already purchased prior to starting the build. In the picture below, you can just barely make out my layout lines for the cavity that houses the Crisscross. Tipping the bench over onto its side, while taking my life into my own hands, was key to routing this cavity. Routing and a little chisel action to clean things up, and "Bob's your uncle."
A little word here about this deceptively simple device. Benchcrafted's fit and finish are as clean and as pleasing as we have come to expect of their products. The instructions were voluminous and extremely helpful. I must say that they are some of the best instructions available for those of us who actually read them.
In practice, the Crisscross works exactly as advertised. I can pinch a board 7' long and still be able to lift the corner of my bench up by it. The clamping pressure is very satisfying, though I would caution that these results are most likely directly proportional to the attention paid to the directions provided and the adherence to them during installation. If you are a "skip ahead to the good stuff" kind of direction reader, don't plan on these types of results…..you have been warned.
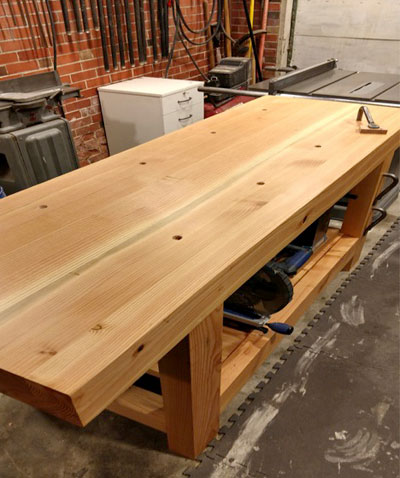
Holdfast holes, holdfasts, and vise are now all tidy and functional, I turned my attention to finishing this beast.
There are two camps to fall into when it comes to finishing a workbench: Those that say that a naked wood bench is best, because it provides a little more grip to work pieces being manipulated on the bench, and those who advocate applying some sort of non-film finish as a means of adding protection against fluids and glue.
I am agnostic about finish on workbenches. While I understand the thought behind no finish at all, I tend to like the color and the limited protection I get from adding a wiping varnish or oil to my work benches.
For the Roubo I chose to mix up the beloved homebrew danish oil finish (1 part Boiled Linseed Oil, 1 part Spar Varnish, and 1 part Turpentine or mineral spirits). It is dead simple to make, apply and take care of. It has been a mainstay in my shop since I first started making sawdust. The traditional rule of thumb for application is:
Apply once a day for a week.
Once a week for a month.
Once a month for a year.
And once a year thereafter.
This is overkill. I made two, flooded applications one day apart rubbing the finish in with a clean rag once it had stopped pooling and the top was done soaking it in like a sponge. For the next week I was rubbing any bleed back off with whatever rag was lying about, and if there is any bleed back now, or rising sap from the Fir, I just sand it off real quick with some 400 grit or whatever is close at hand.
*Caution…...Oily rags need to be disposed of safely. If you are not familiar with how best to do this, Google is your friend.
Boiled Linseed Oil (or BLO), mineral spirits, turpentine, and varnish, each by themselves constitutes a fire hazard. Mixing them and then soaking rags in them simply screams to the user to be cautious and to KNOW THEIR PRODUCT. Spontaneous combustion is a VERY REAL HAZARD in this circumstance. Be sure you know how to safely dispose of soaked rags prior to using this finish.
The one concession I did make is that I only used the finish on the bench. No wax. On my furniture I will often times apply a
Carnauba Wax
after the oil finish has dried to add protection and luster.
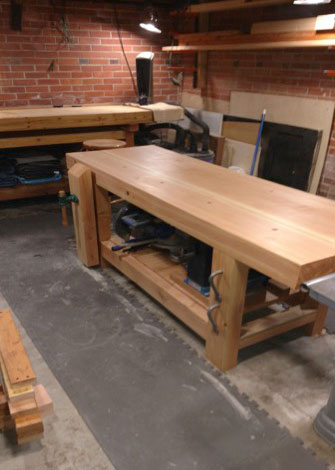
Some thoughts on the Roubo. I really do love this bench. It is plenty heavy for handwork, and also just the right size for the needs and size limitations of my shop. It is cheap to build, and is a lovely aesthetic addition to the shop.
Yes, making the top out of hard maple would definitely help limit the dings and dents that are sure to happen to this Douglas fir behemoth. It would also cost roughly $950 more to build.
On balance, I am very pleased with how this beast turned out. It is a hybridization of economy and craftsmanship, and with any luck will be providing even my grandchildren (when I actually have some) with as much pleasure as I am getting from it right now.
Next time:
I will jot down some thoughts on life with this bench. I built it all the way through before beginning this series, so I have had some time with the bench in actual use. While it is holding up very well, I do have some things to say about some of the choices I made, things I am glad I did, and things I would change moving forward.
Comments, ideas, and discussion are always welcome. I can be reached at:
madcapwoodwright@gmail.com
Always remember to work wood with joyful abandon!!!!
John McBride is a professional woodwright, blogger, and writer, living and working joyfully and with abandon in Denver, Colorado. He welcomes feedback on any of his writing, and can be reached
at
madcapwoodwright@gmail.com
. Feel free to drop him a note.
Return to the
Wood News Online
front page
|