Making a Wooden Globe
by Marco Aurelio R. Guimarães
Belo Horizonte, MG, Brazil
marcoarg@terra.com.br
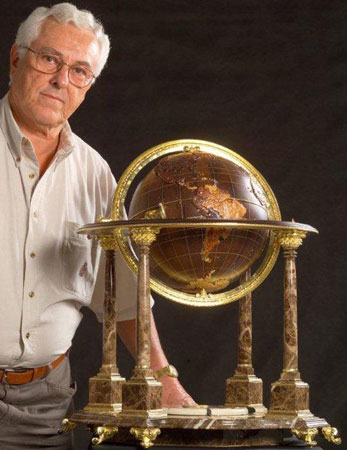 Some time ago I decided to give to my wife a birthday present, but I wanted something that I was
sure she would appreciate and that was crafted exclusively by myself.
Some time ago I decided to give to my wife a birthday present, but I wanted something that I was
sure she would appreciate and that was crafted exclusively by myself.
Since she has a predilection for Geography in general, and in a special way for atlases, maps and
alike, I came up with the idea of making a wooden globe. However considering my amateur skills, this
seemed like too great of a challenge. Then I remembered an adage I read at Disney World that
encouraged me: "If you can dream it, you can do it!" Therefore, I promised myself that I would
realize my dream.
I began by analyzing the shape, size and details I would have to represent. I chose a scale of
1:40,000,000 which could show details representing geographical features of about 12 miles in real
scale.
My first attention was driven to the several research sources that I should have in hand such as
books, atlases, physical and political maps, and a good prototype globe, as well. Since the
illustrations in these sources were printed in several sizes, I had to copy everything I thought I
would need, so that the scale of them all was in accordance with the size chosen for the wooden
globe project.
After browsing the Internet and searching several bookstores, I decided to acquire a better quality
globe printed with contrasting colors and well-defined details that were accurate and complete.
Unfortunately, however, the prototype I found was made in a larger scale, which made things even
more challenging for me.
My next concern was collecting all the possible reference material I would need for the project. I
did not want a lack of information to interrupt the construction process.
The basic concept was to make a globe on whose surface the country landmasses could be positioned on
the exact convexity of the sphere. That way I could glue the pieces to the sphere without the risk
of creating internal pressures. For this reason, among others, I preferred to avoid using the wood
bending process.
According to my project specification, the landmasses should be made using only solid wood of 24
different species (sourced from all continents of the globe!) in several natural and contrasting
colors. I intended to interlock these independent pieces, carving and shaping them in order to
represent the countries and the landmasses around the world.
At first glance, using so many different species may seem unnecessary. However I did not want two
countries sharing the same boundary between them to be made out of wood species with similar colors.
As an example, in the case of a large country such as Brazil, there are borders shared with 10 other
countries, all of which have their own neighbors! Besides that, due to so many color nuances and
patterns found in each wood, it is quite difficult to select 24 different species with contrasting
colors. That's why I had to plan in advance what wood species I would cut for each country landmass,
so that all international boundaries would be clearly defined by two contrasting colors.
Another problem to solve was how to correct the distortion of two-dimensional projections obtained
from a spherical source such as a globe, and vice-versa.
I intended to use primarily the conventional tools and machines that I already owned. Unfortunately
most ordinary woodworking equipment is built to cut plane sections of timbers rather than concave
and convex sections such as the country landmasses to be represented on the surface of the globe.
My goal was to establish a method for cutting the shape of the countries out of small blocks of
solid wood on whose surface I had previously glued photocopies of the respective countries. While
shooting the photos, I shot the prototype globe from several different positions, turning it so that
the focused theme was always in the center of my camera lens. In this way I could focus on the exact
parts I needed. However, the resulting photos still showed distorted images since the photocopies
were printed on a flat surface of paper while the prototype globe was spherical. The subjects that
were farthest from the center appeared more distorted than those nearest to the center, due to the
spherical effect. Besides that, my photos were shot from different distances from the focused
subjects, resulting in different size images of the countries that were not in accordance with the
1:40,000,000 scale.
The solution, however, was quite simple. By using an ordinary scanner and applying the distance
between two well-known points, I could convert the images to the appropriate scale. The only
remaining problem before beginning construction was to correct the spherical distortion. Again there
was a very simple solution.
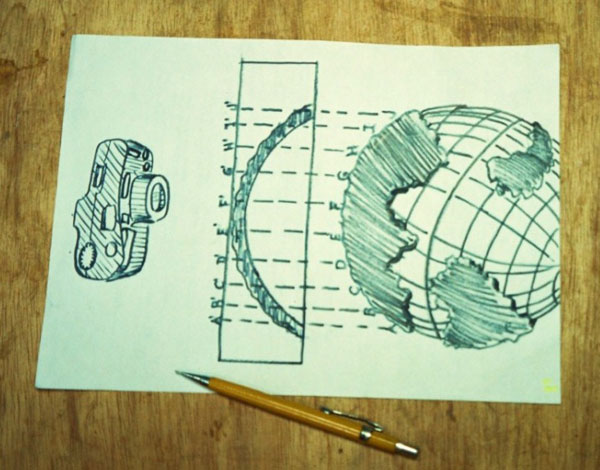
The drawing above shows the camera shooting a part of a country on the prototype globe in which the
points A, B, C, D, E, F, etc. define the equal-length segments AB, BC, CD, DE, EF, etc. The central
figure in the drawing is the side view of a block of solid wood on whose plane surface I have glued
a copy of the photo in a corrected scale. Notice that the points A', B', C', D', E', F', etc. on the
block of wood are no longer equidistant from one another as on the original A, B, C, D, E, F, etc.
of the prototype.
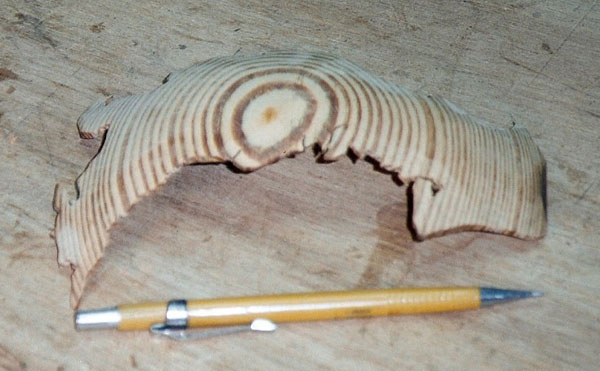
Using a precision scroll saw (the Hegner Multicut) with a 2/0 blade, I then cut the boundaries of
each country. By shaping the landmasses cut in the wood block into a thinner convex piece, it was
possible to correct the distorted plane image into a curved one in which the relevant points were
repositioned exactly as they were in the prototype globe surface.
Since the bigger the country, the bigger the depth of the block to be shaped, I made a proportion
rule in order to find the minimal depth needed so that each piece could be shaped into a convex
piece. On the convex side it was possible to use a belt sander or some other conventional method for
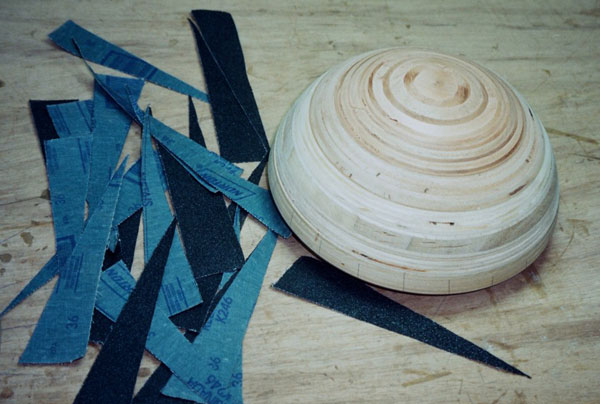
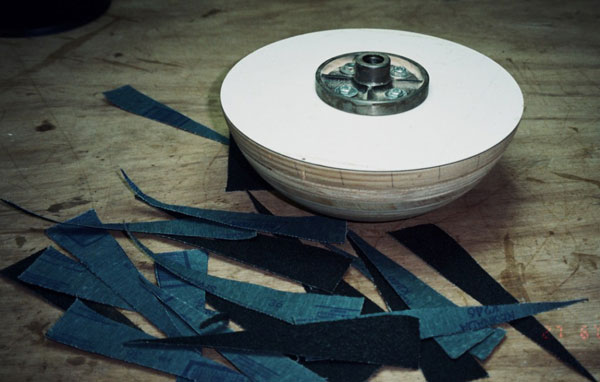
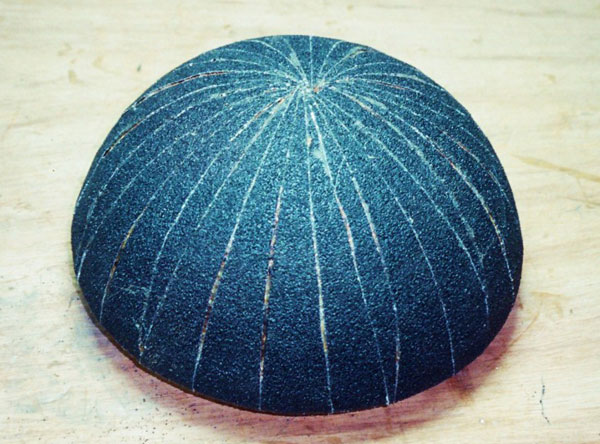
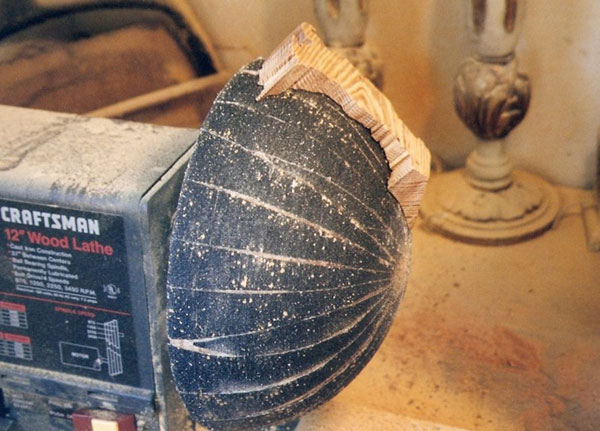
shaping this outside face of the landmasses. In order to carve the concave inside part however, it
was necessary to build a simple jig for my lathe in which I glued sections of sandpaper to cover a
half sphere. The following photos illustrate the process.
I chose this complex process for several reasons. First, because it is almost impossible to bend
flat pieces in more than one direction. Besides, the landmasses would be severely distorted. Another
very important reason is due to a phenomenon known as "wood memory." If a flat piece were forcefully
glued onto a spherical surface, sooner or later the glue or the wood itself would fail due to wood's
tendency to return to its original shape.
Go to next
page
Go to Wood News front
page
Go back to Marco's Letter
page
