Making a Wooden Globe, page 3 of 4
by Marco Aurelio R. Guimaraes
marcoarg@terra.com.br
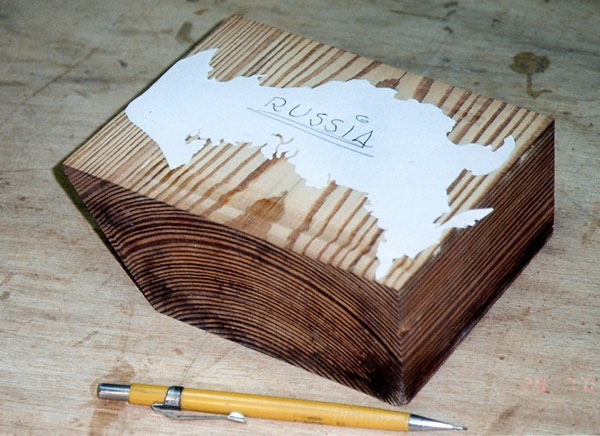
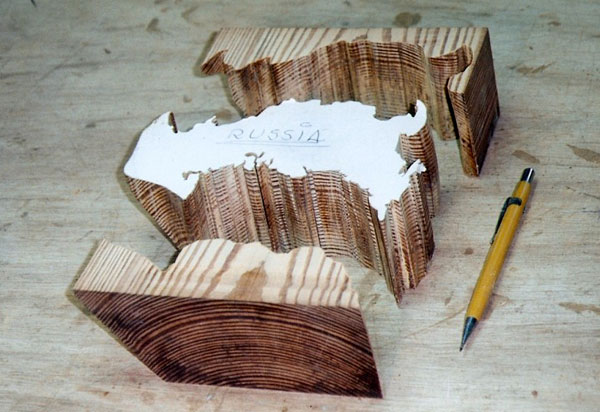
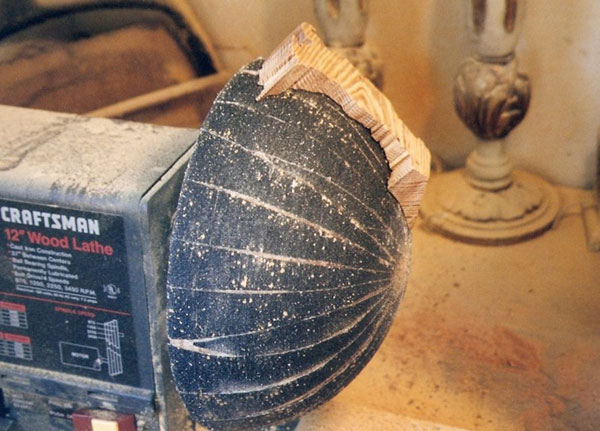
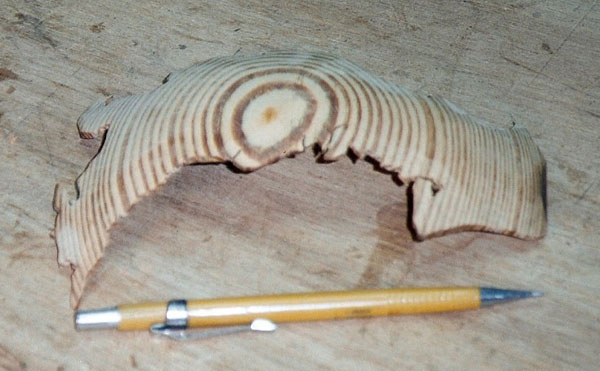
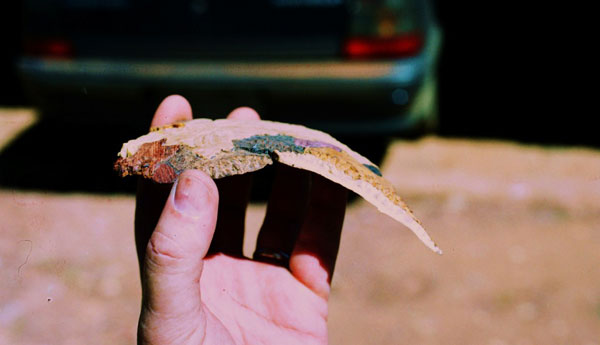
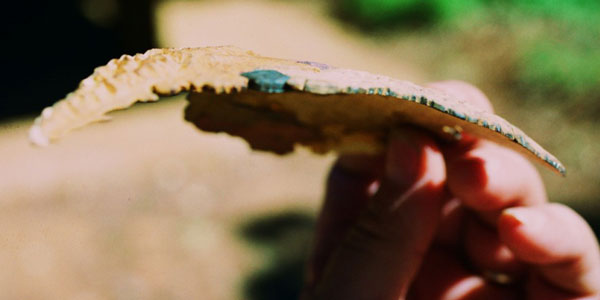
The convex pieces that form the landmasses were made from small, thick blocks, as illustrated in the
series of photos which follow.
The shaped landmasses, after being glued together in their proper boundaries, were then carved in
order to suggest the topography and the most important geographic
features.
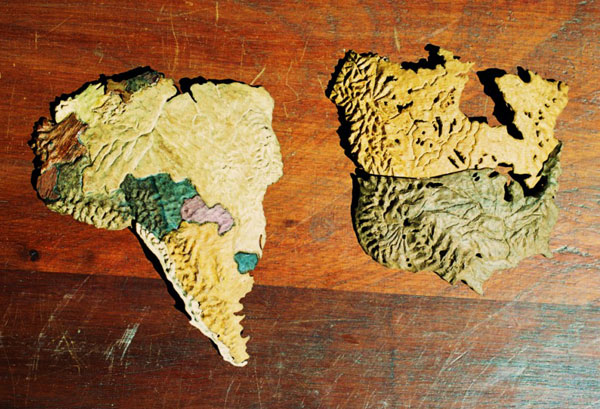
At a scale of 1:40,000,000, Mount Everest, for instance, would only be about .009" high. That is why
the vertical scale is only suggestive rather than represented literally. In this way I tried to
represent the most important mountain chains, larger lakes, main rivers, islands, and general
geographic features that I could best detail.
The carving and whittling work was based on the atlas and map sources previously cited, and are an
attempt to best represent (or at least suggest) the topography of the countries around the world.
This work was done using very small chisels, dental power and hand tools, chip carving knives,
mini-rotary tools, and many types of whittling and sanding tools.
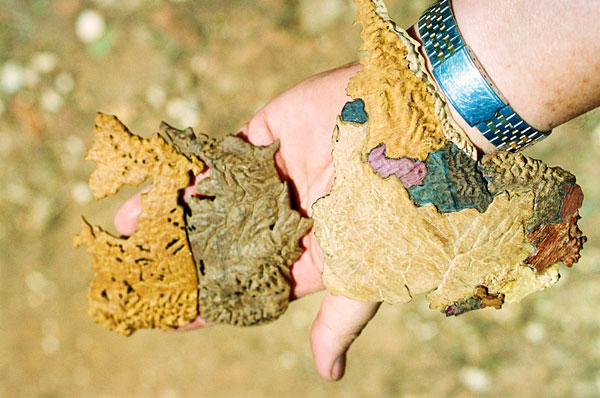
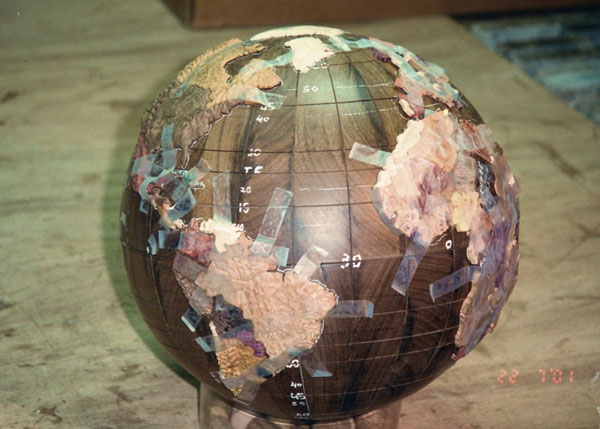
Although the vertical scale is not precise, the horizontal scale must be precise. Otherwise the many
country boundaries would not match perfectly and the relative position of the countries would be
affected, severely diminishing the accuracy of the whole work. Thus in order to avoid mistakes in
positioning the continents, islands, polar regions, etc., these pieces were first dry assembled
using clear tape. After provisionally dry-fixing all pieces onto the surface of the earth globe, I
marked the outline of the pieces with a sharp pencil to make the final gluing job easier.
Even assuming that all care was taken in each step in an effort to maintain the smallest possible
tolerances, some new problems surfaced after the pre-assembly of the landmasses on the globe.
Through the north and south pole, I inserted a long 3/8" brass axle with two ball bearings to allow
smooth rotation of the globe. This axle protrudes from the poles about half an inch. Both ends are
solidly fixed by a decorative cast silver piece in a large metal ring that permits the orthogonal
rotation of the assembly. Due to several causes, but mainly because the earth globe has on its
northern hemisphere much more continental mass than in the southern half, the wood globe was
completely unbalanced and tended to stay upside down.
In order to balance the weights of both hemispheres, I embedded some lead weights inside the two
semi-spheres of the wood globe, similar to how a car wheel is balanced. Using the method of trial
and error, I had to position another small weight at a specific point so that the final inclination
of the N-S pole line was 23.5 degrees, which is the proper ecliptic angle. This is the inclination
of the N-S earth axis in relation to the plane of its orbit around the sun.
With these arrangements, the globe could then twist simultaneously in the two orthogonal directions,
one movement not interfering with the other and always stopping in an upright position, at the
ecliptic angle relative to the plane of the biggest horizontal wood ring.
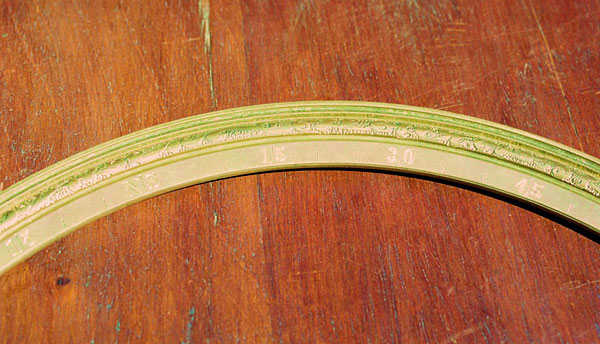
The metal and wood rings were graduated every 5 degrees so that it would be possible to find a
particular point on the globe just by knowing its correspondent coordinates, which is to say, its
latitude and longitude.
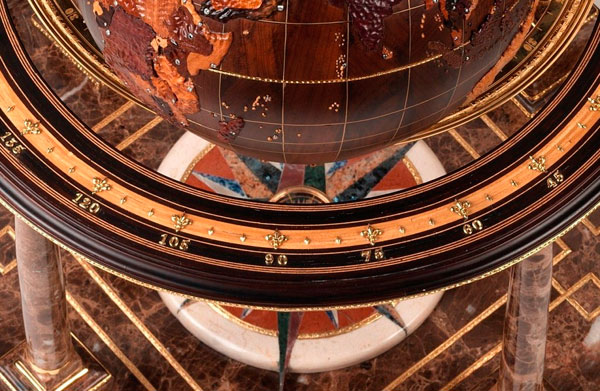
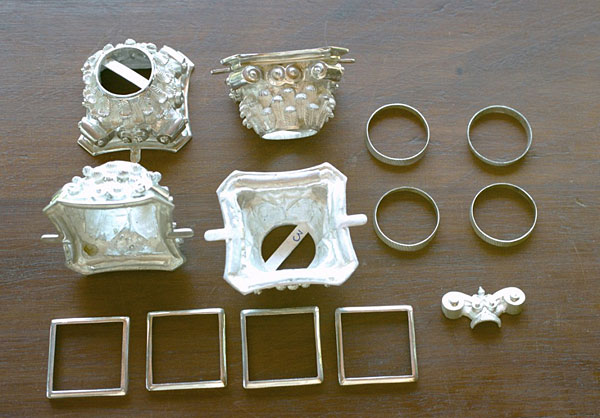
Regarding these rings, the metal one was turned in brass, on which the ornamental designs were
carved by hand using a burin. Finally, the brass ring was plated with a 10-micron layer of 18-carat
gold. This finishing was used in every metal piece of the assembly except the internal part of the
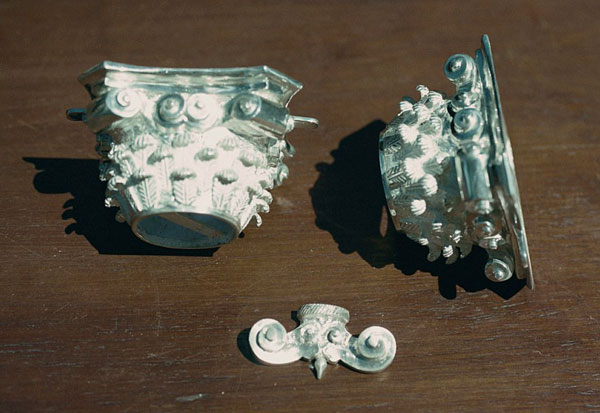
N-S brass axle. All other metal parts were carved in wax and cast in silver before receiving the
gold covering layer.
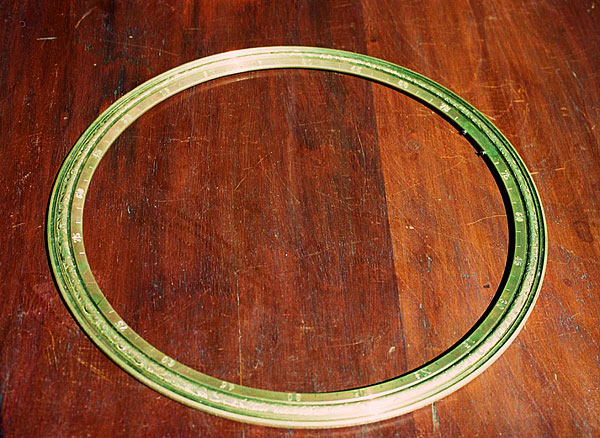
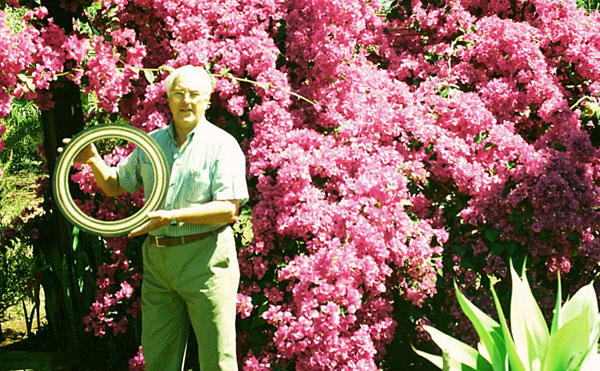
The horizontal wood ring actually is a bent lamination of 37 strips of about .04" of Jacaranda (
Dalbergia nigra — or Brazilian rosewood) and Pau Marfim (Balfourodendron riedelianum -- or ivory
wood).
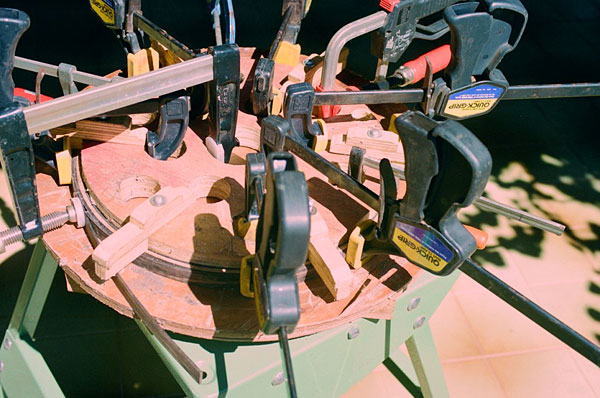
This ring must be very strong because it supports the entire weight of the globe as well as the
heavy brass ring. I did not want a ring made of a solid piece of wood that would naturally have had
a grain direction and thus could not distribute the forces evenly along its perimeter. Another
important issue to consider was the fact that only four thin columns would support the entire weight
of the assembly. In adopting the use of solid wood for this project, I would certainly have warping
problems, among others, such as cracking and splitting. The bent lamination was naturally the best
solution for this problem and the process of assembling and gluing the ring is self-explained in the
following sequence of photos.
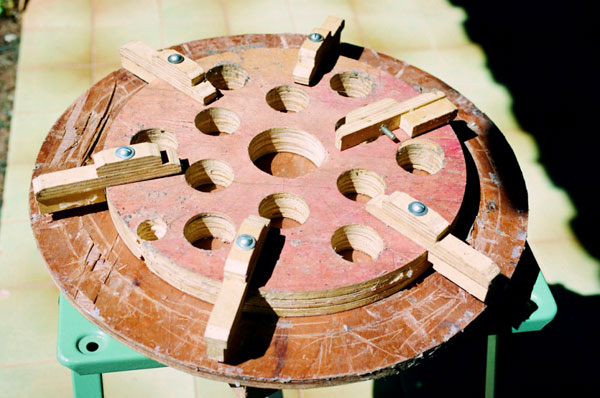
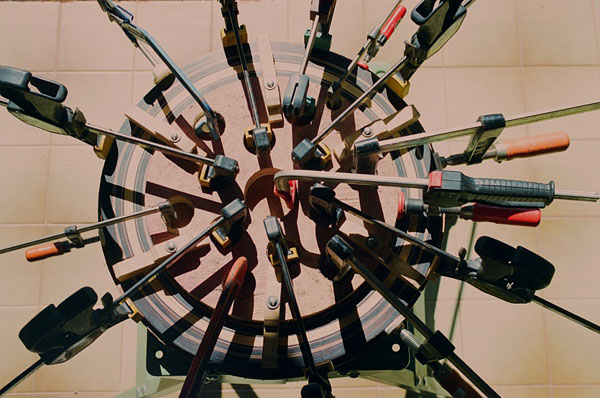
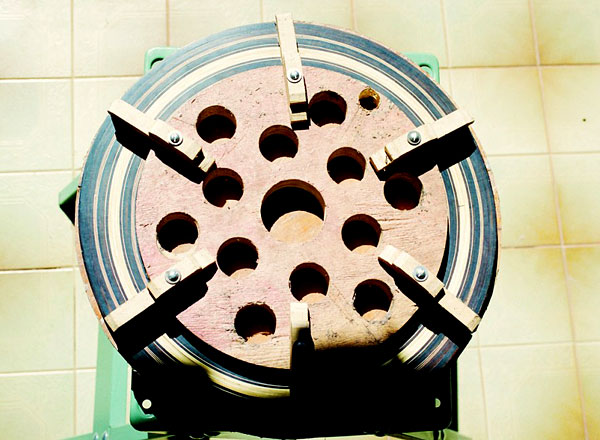
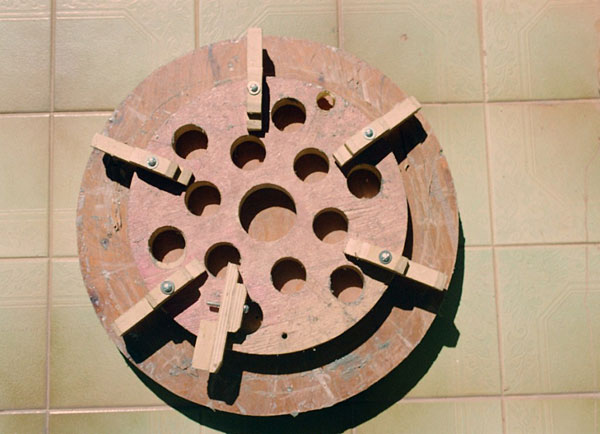
The circular plywood jig with unaligned holes made it easy to fix and maintain the strips in the
right place during the gluing process. Even using this small trick however, the lubricating effect
of the glue made the strips tend to slip upward, which forced me to upgrade the jig by assembling
radial cleats that could then maintain the strips in place.
Since Brazilian Rosewood is a very dense and extremely hard wood species (similar to Gabon ebony),
it is also brittle. Thus, in order to diminish the struggle with such a stubborn wood, I had
previously immersed the 3/4" x 3/64" strips in water for about three days. Then with the use of a
hot air blower, it was possible to tame them, allowing me to roughly obtain a circular shape and
easily accommodate them in the jig.
In the wood ring at 0 degrees and 180 degrees of longitude there are two bearings also cast in
silver that support the weight of the entire piece.
Go to final page
Go to Wood News front
page
Go to previous page
