Turning a Christmas Tree
by Rick Morris
Duluth, GA
Note: click on any picture to see a larger version.
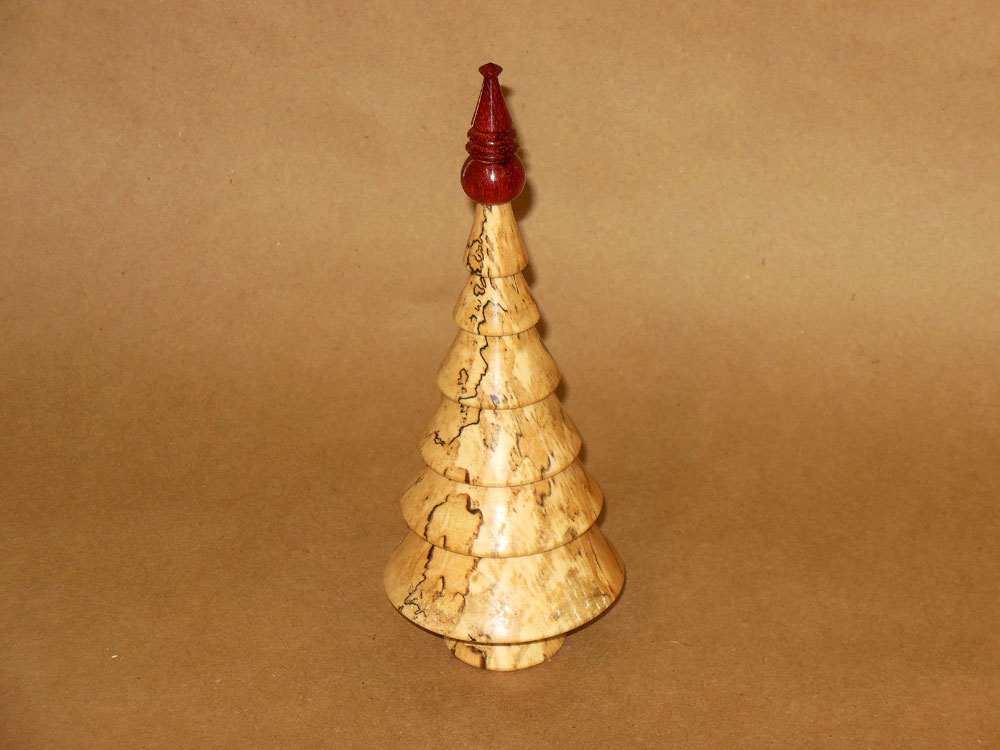
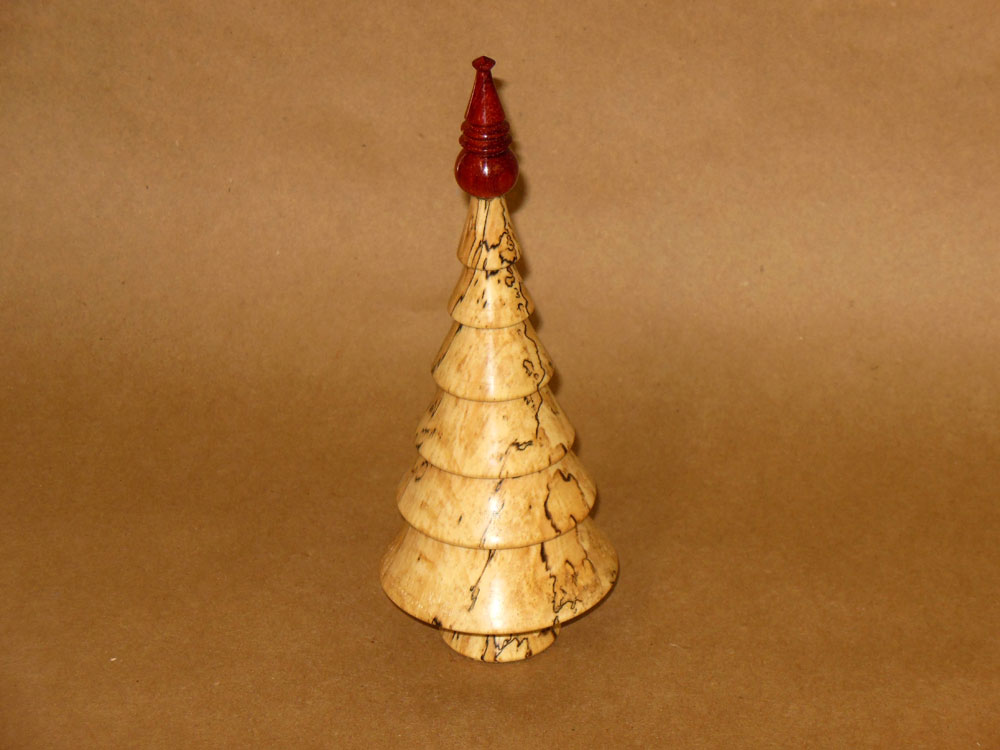
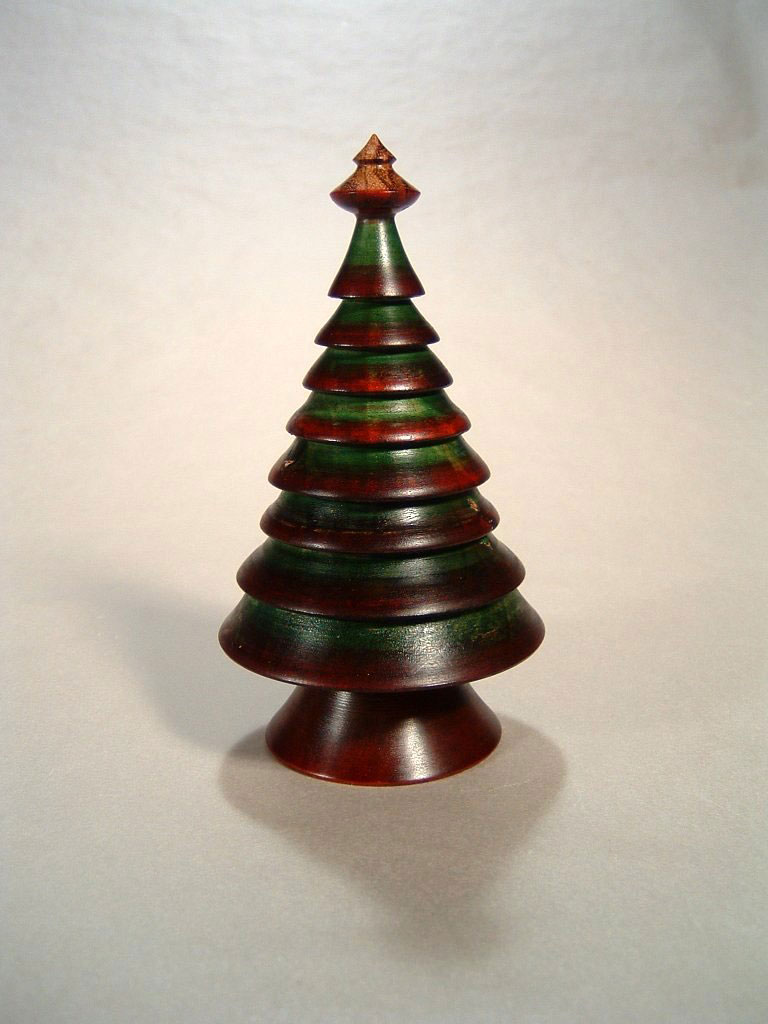
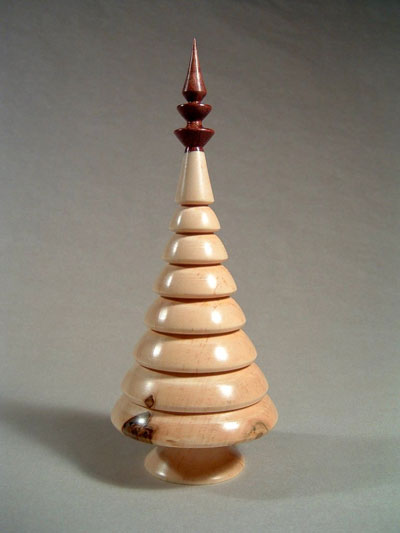
It's not too early to start your Christmas season woodturning (or shopping, but that's another story). I'm
going to show you how I turn Christmas trees for holiday gifts. The tree shown in Figure 1 is around eight
inches high and around three inches in diameter at its widest point.
|
|
Figure 1
|
Tools Needed
This is a fairly simple woodturning. For the woodturning activity, I use the following tools:
-
Narrow Parting Tool
-
1-1/2" and a 1" Skew
-
3/8" Spindle Detail Gouge
-
Steb-type Drive Center
-
Woodturning Chuck
-
Morse Taper Drill Chuck
Materials Needed
This turning has only three parts: the body, the top ornament, and a small pin to hold the ornament to the body. For this tree, I started with a seven to eight inch length of four inch square spalted maple for the body, and a three inch length of one inch square bloodwood (also known as satine) for the tree-top ornament. I always use a contrasting wood for the top ornament; it shows up better and looks more like a separate tree-top ornament on a Christmas tree.
I got the maple for the body from a local tree taken down by a local municipality, and the bloodwood from one of the online suppliers of turning blanks. You can buy blanks intended for pen turning, but I've found those are usually 3/4 or 5/8 of an inch thick, making them just a little too small; I generally purchase one inch square pieces about 12 inches long of exotic hardwoods.
Other items needed are
CA glue medium viscosity, and some
woodturning friction polish.
Prep the blanks
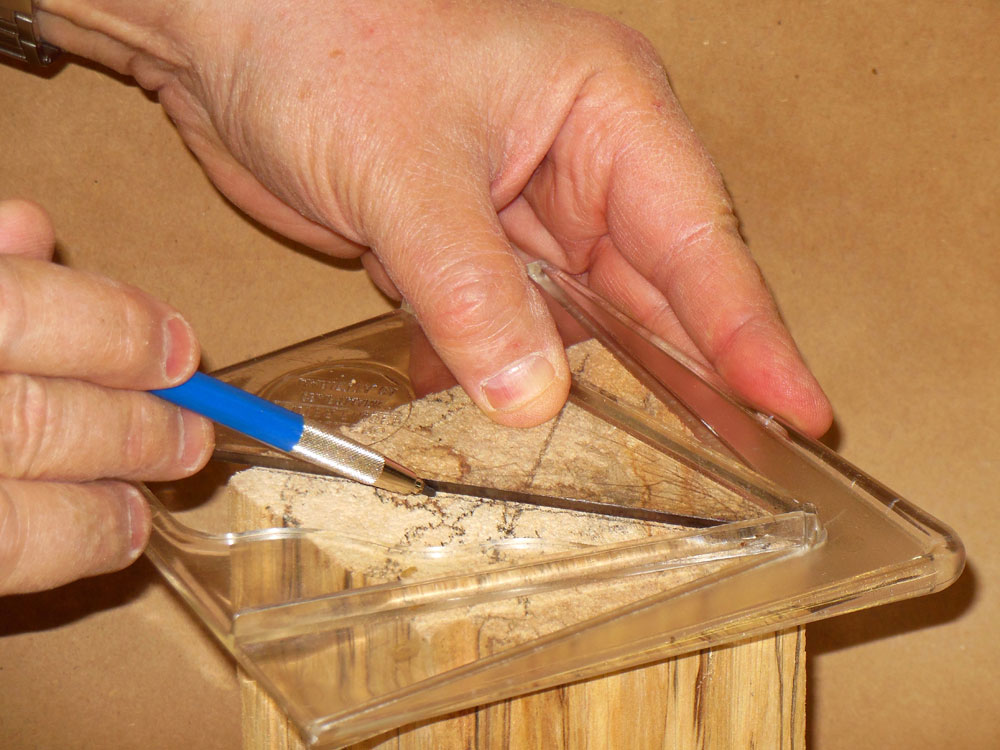
I start by cutting both pieces of the wood to length on a bandsaw. Then I mark the center on each end of the blanks, for mounting between centers (Figures 2 and 3).

|
|
Figure 2
|
|
|
Figure 3
|
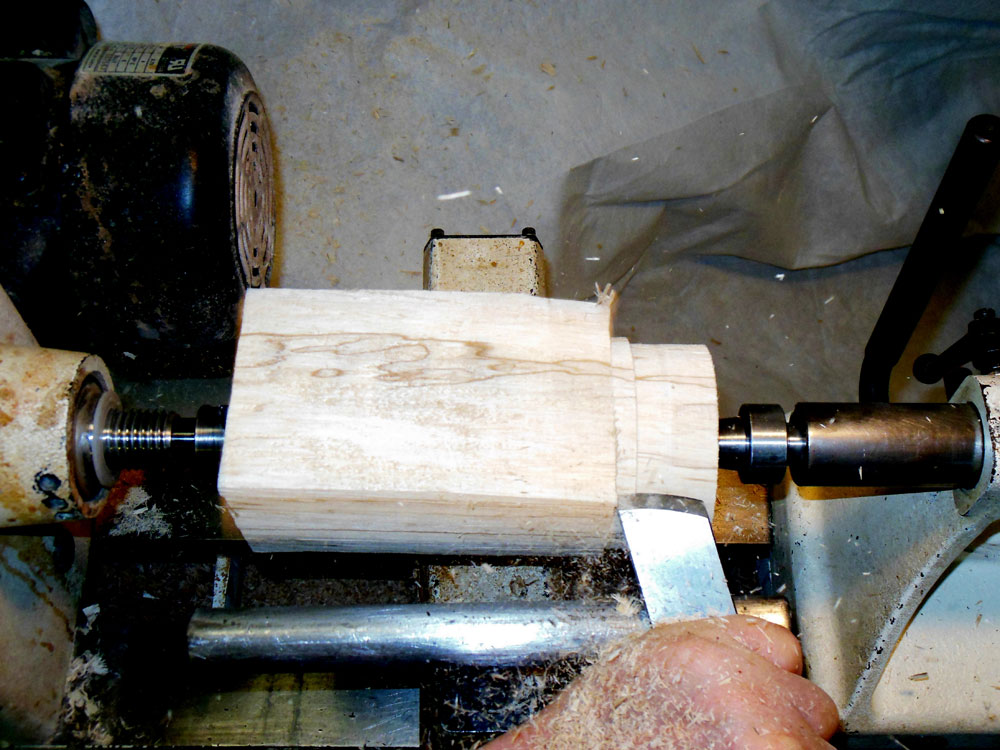
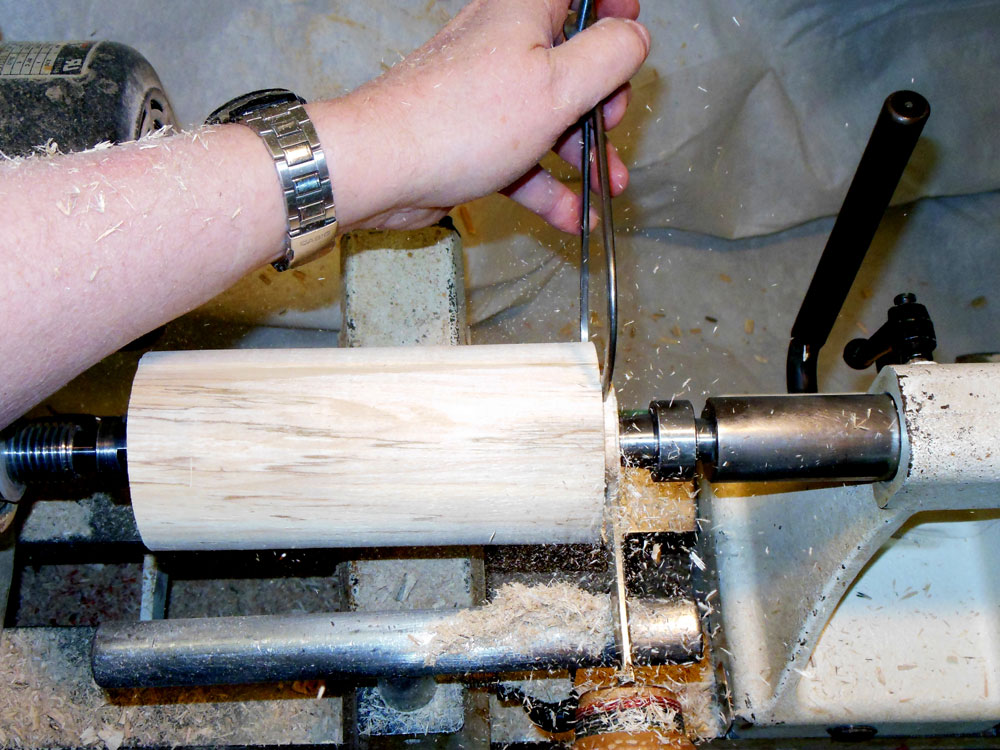
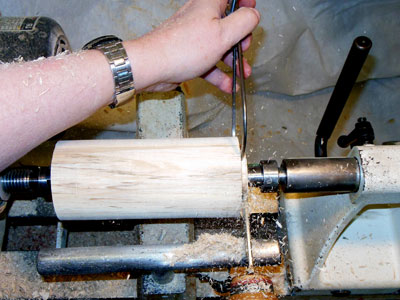
Next I mount the blank for the tree body and using a 1-1/2" skew, rough it down to round (Figure 4).

|
|
Figure 4
|
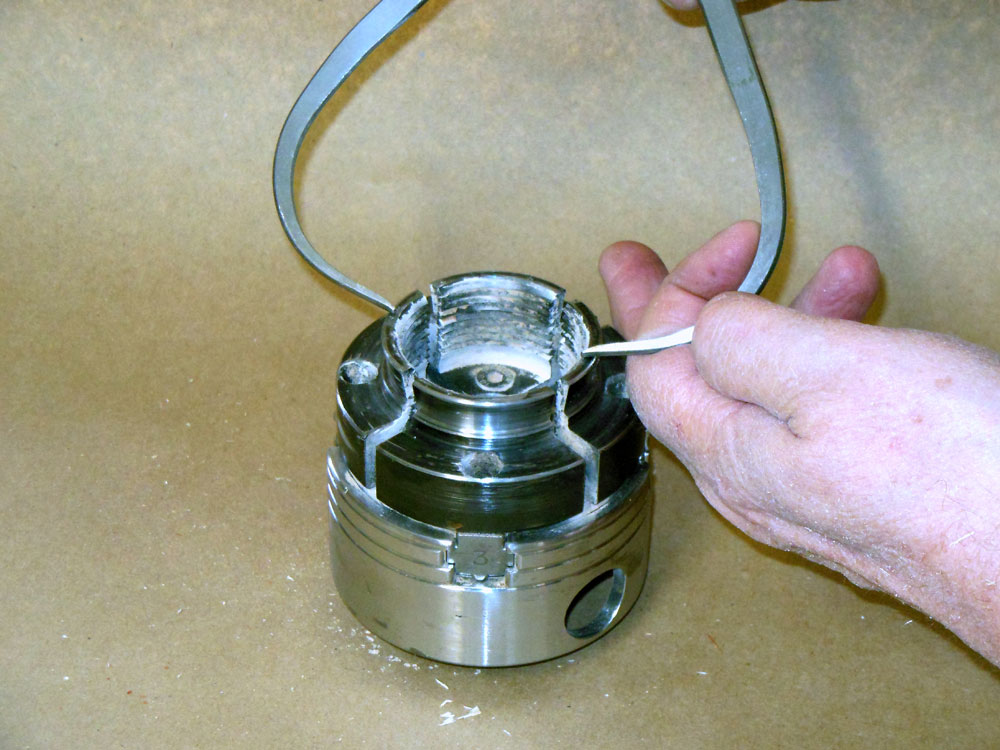
The rest of the turning on the body will be with the blank held in a chuck, so I set a pair of calipers to the chuck opening (Figure 5).

|
|
Figure 5
|
With the body blank still between centers, turn a tenon about a half inch long on one end (Figure 6).
|
|
Figure 6
|
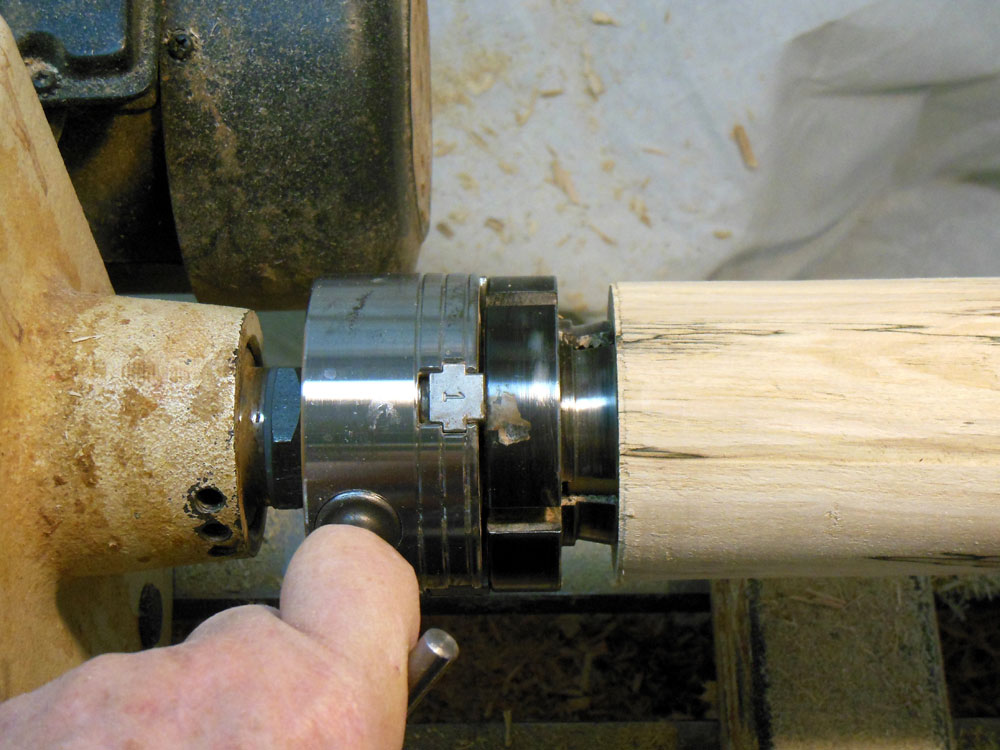
I then put a chuck on the lathe and mount the blank in the chuck (Figure 7).

|
|
Figure 7
|
The top end of the body blank (where the ornament will be mounted) is on the right side, farthest from the chuck. That surface must be flat and square to the length. I use a skew to make a paring cut across the end (Figure 8), and check to be sure it's flat (Figure 9).
|
|
Figure 8
|

|
|
Figure 9
|
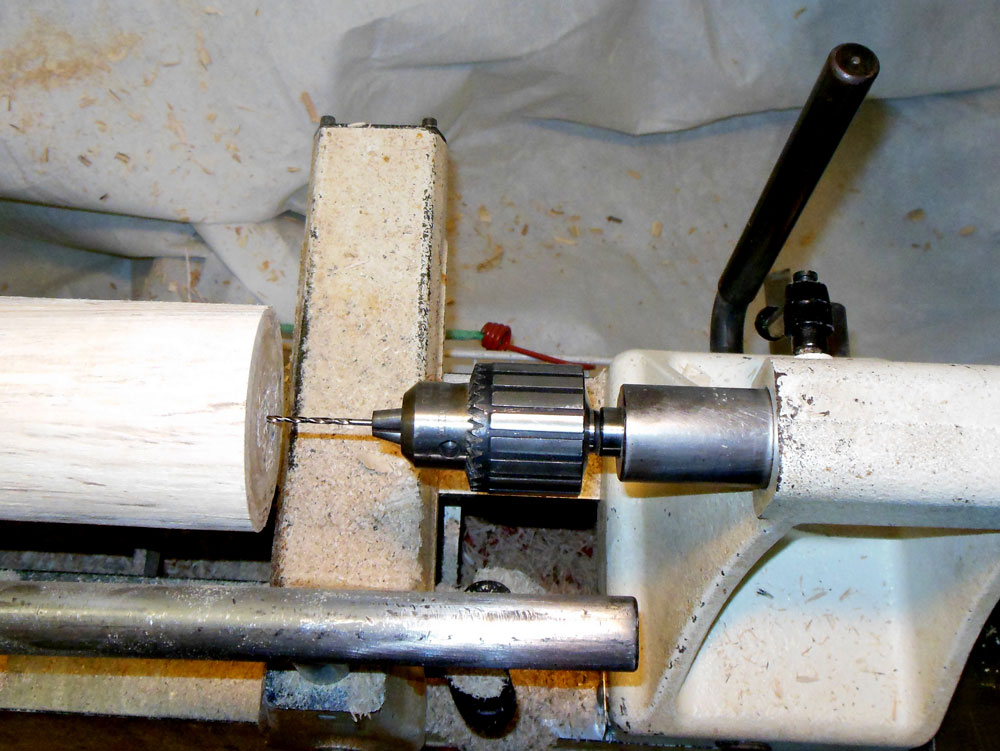
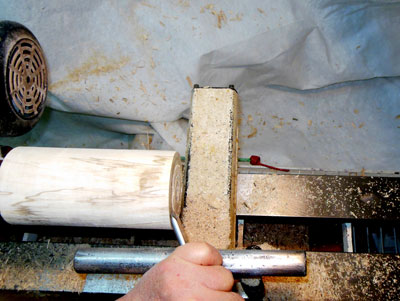
With a Jacobs chuck (drill chuck) in the tailstock of the lathe (Figure 10), I drill a 1/8 inch hole 1/2 inch deep in the center of the top of the body blank. This is for attaching the ornament blank.

|
|
Figure 10
|
The body is done for the moment. I replace the woodturning chuck with a Steb-type drive center; the small blank for the ornament can split easily if a regular drive center is used. I find it easier and faster to use the Steb center rather than pre-drilling a center hold for a regular drive center.
On one end of the ornament blank, I turn a tenon, again for chuck mounting (Figure 11).

|
|
Figure 11
|
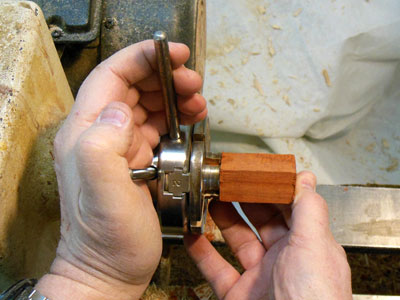
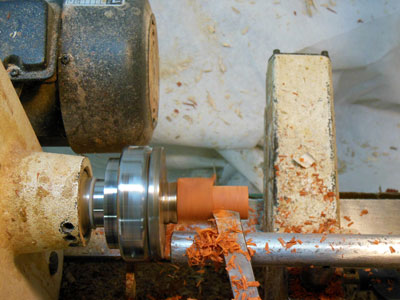
The small blank is then mounted in a woodturning chuck with small jaws (Figure 12), and the blank is roughed down to round (Figure 13).
|
|
Figure 12
|
|
|
Figure 13
|
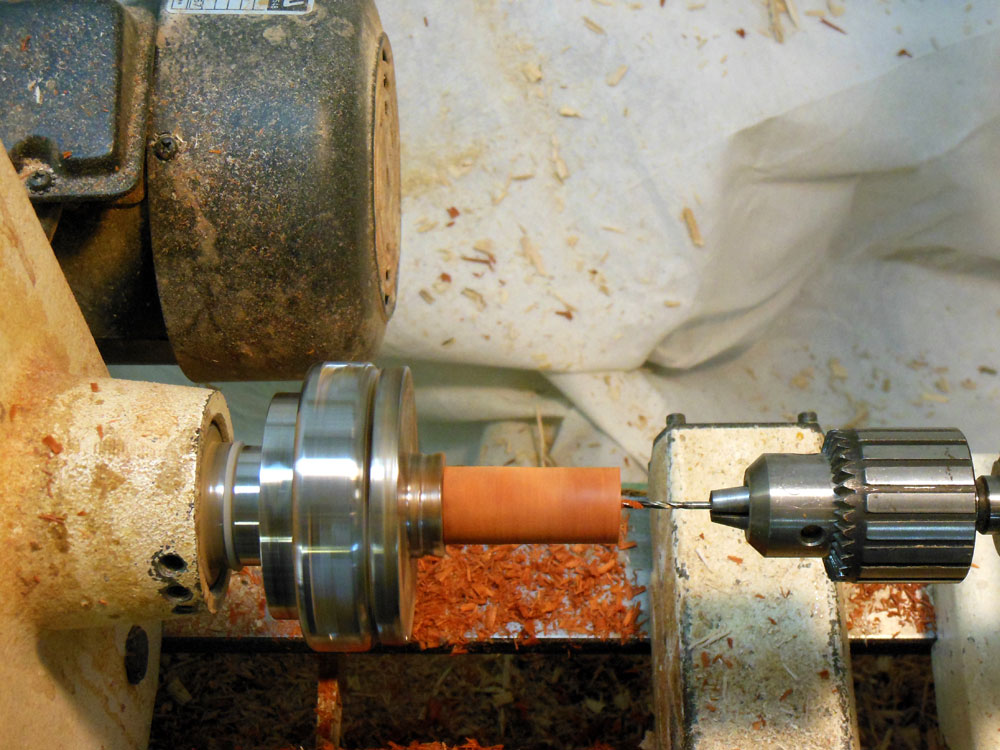
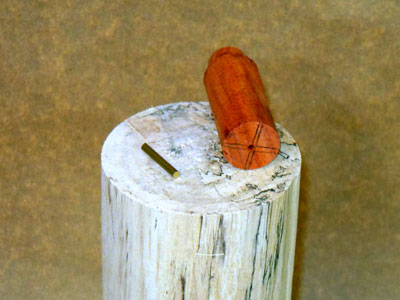
As with the body blank, I drill a 1/8 inch hole ½ inch deep in the end of the ornament blank (Figure 14).

|
|
Figure 14
|
Connect the ornament blank to the body blank
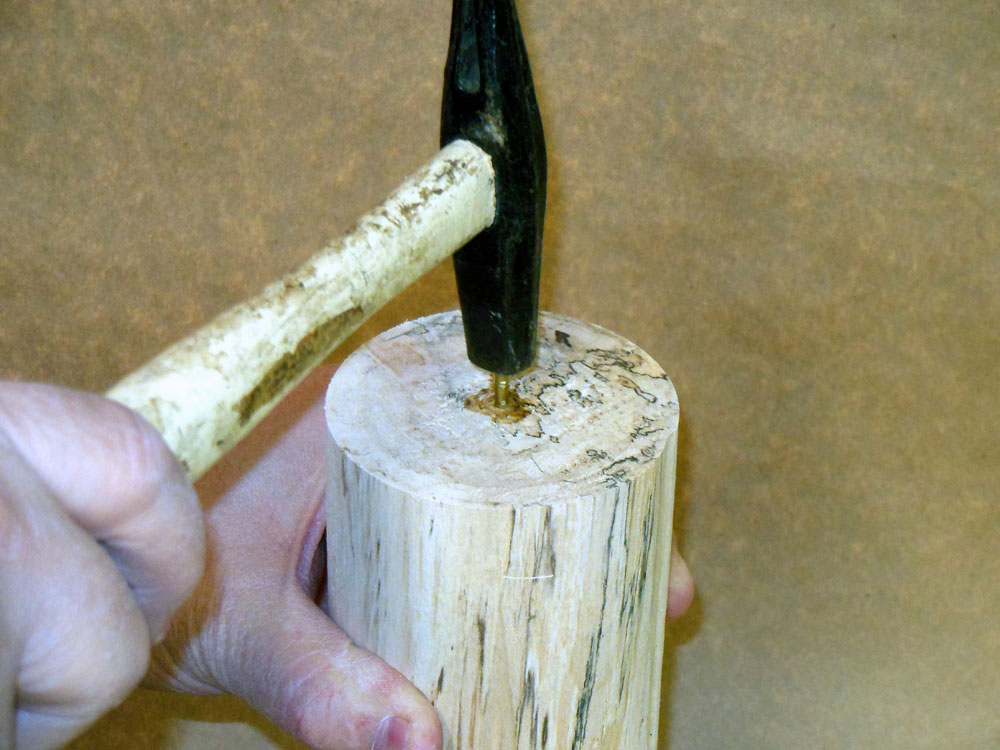
I glue the ornament blank on top of the body blank. For this tree, I use a 1/8 inch pin (a small length of brass rod that I had purchased for this and other uses) to reinforce the glue joint (Figure 15); that joint is end-grain to end-grain, and glue isn't strong enough by itself. A brass pin isn't really necessary; a nail with the head cut off will do fine.
|
|
Figure 15
|
For other Christmas trees, I have used a slightly more complicated procedure, drilling a 1/4 inch hole in the body blank and turning a 1/4 inch tenon on the ornament blank. This makes a stronger joint than using a pin, but it is more trouble. However, the pinned joint is somewhat more flexible when turning the ornament to shape.
I use CA glue for the joint (Figure 16).
|
|
Figure 16
|
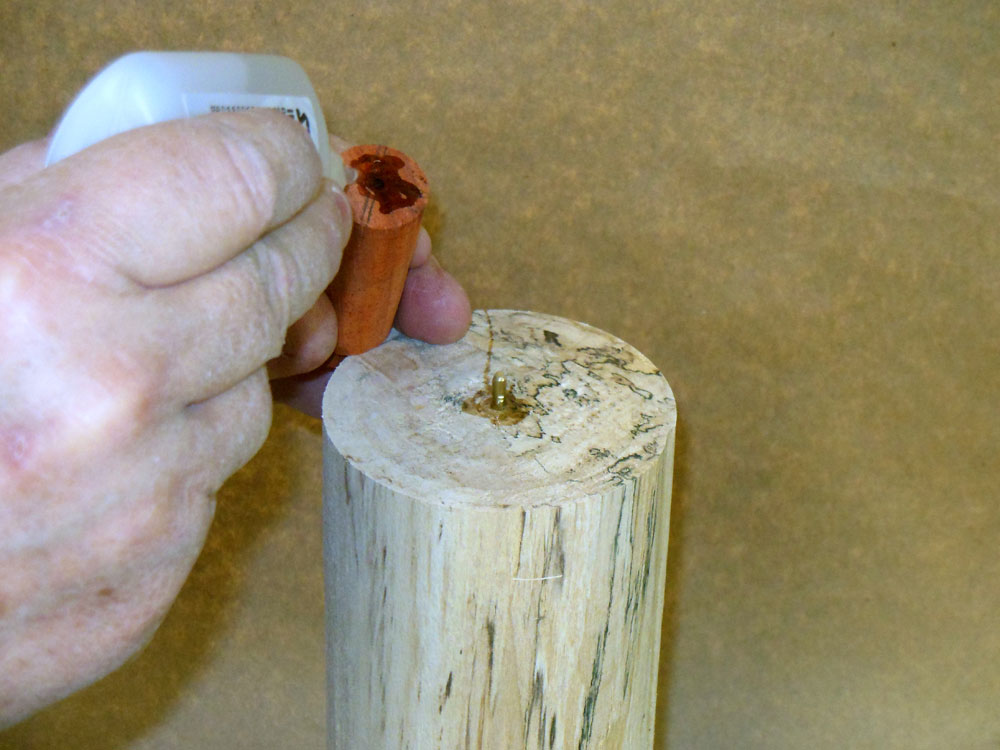
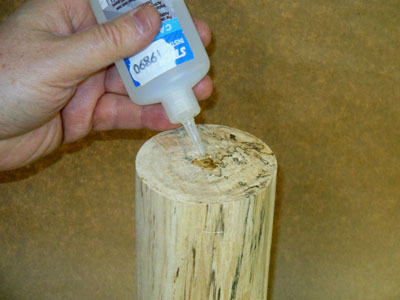
I put some glue on the hole in the body blank, and a little on the pin itself, and tap the pin into the body blank (Figure 17).

|
|
Figure 17
|
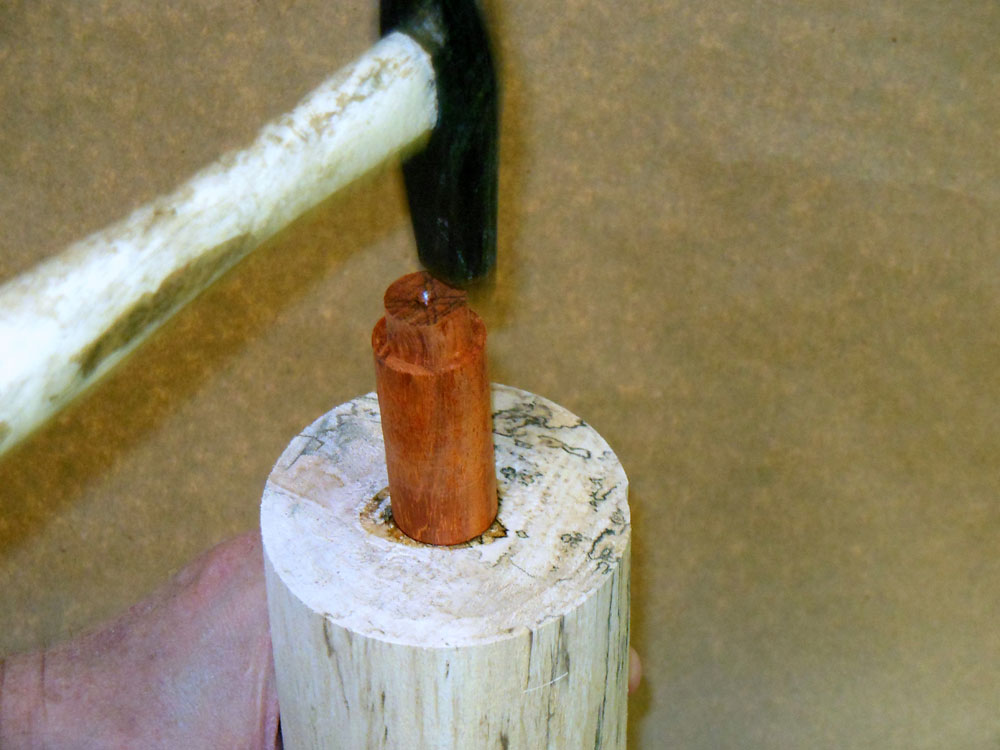
After putting glue on the end of the ornament blank (Figure 18), I push it onto the body blank pin (Figure 19), tapping it down for a tight fit (Figure 20). Clamping the two pieces together really isn't necessary, especially with CA glue; I give the glue joint a minute or so to set.

|
|
Figure 18
|
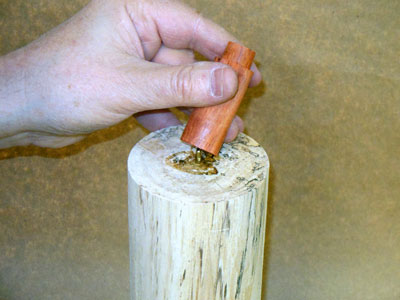
|
|
Figure 19
|

|
|
Figure 20
|
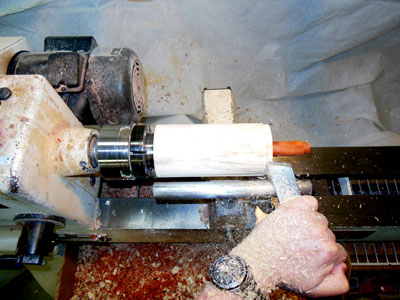
Rough out the shape
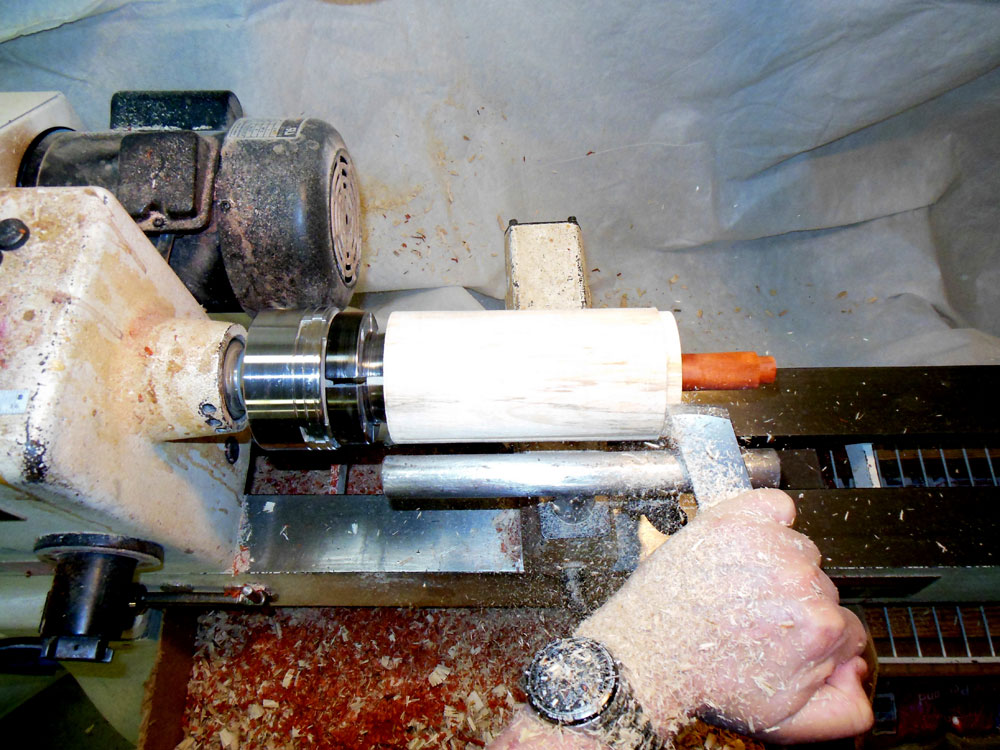
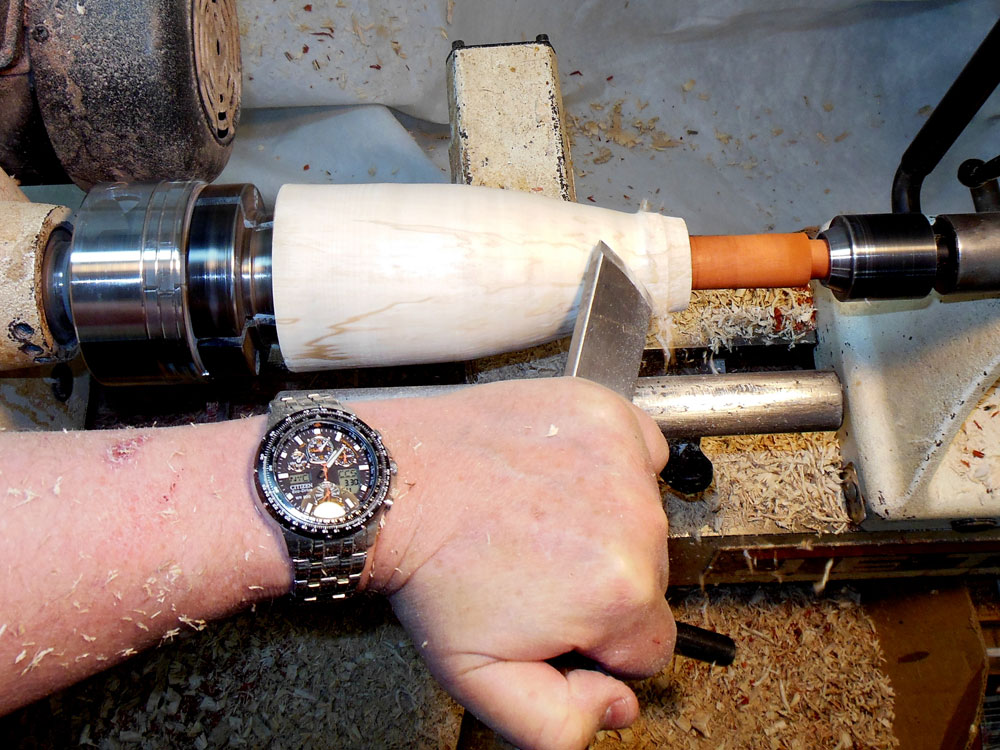
The blank is now remounted in a woodturning chuck with #2 jaws, and roughing out the conical Christmas tree shape begins (Figure 21).
|
|
Figure 21
|
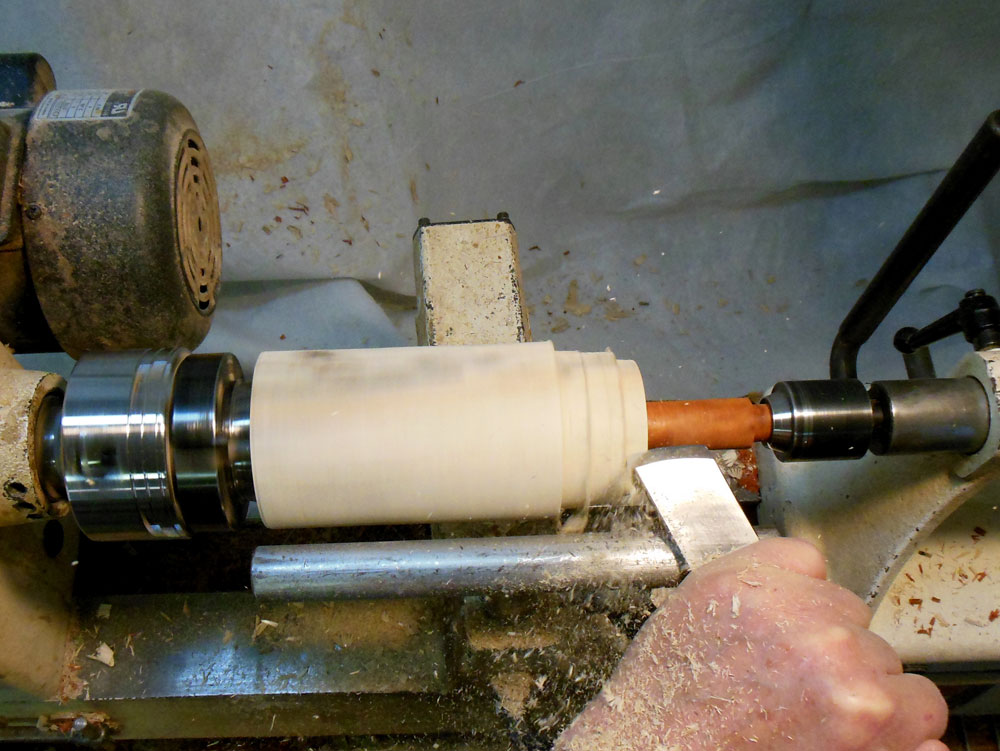
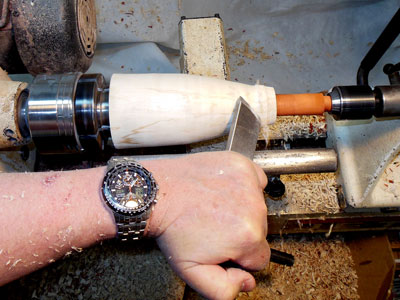
I start with a skew, making peeling cuts to remove a lot of the waste (Figure 22).

|
|
Figure 22
|
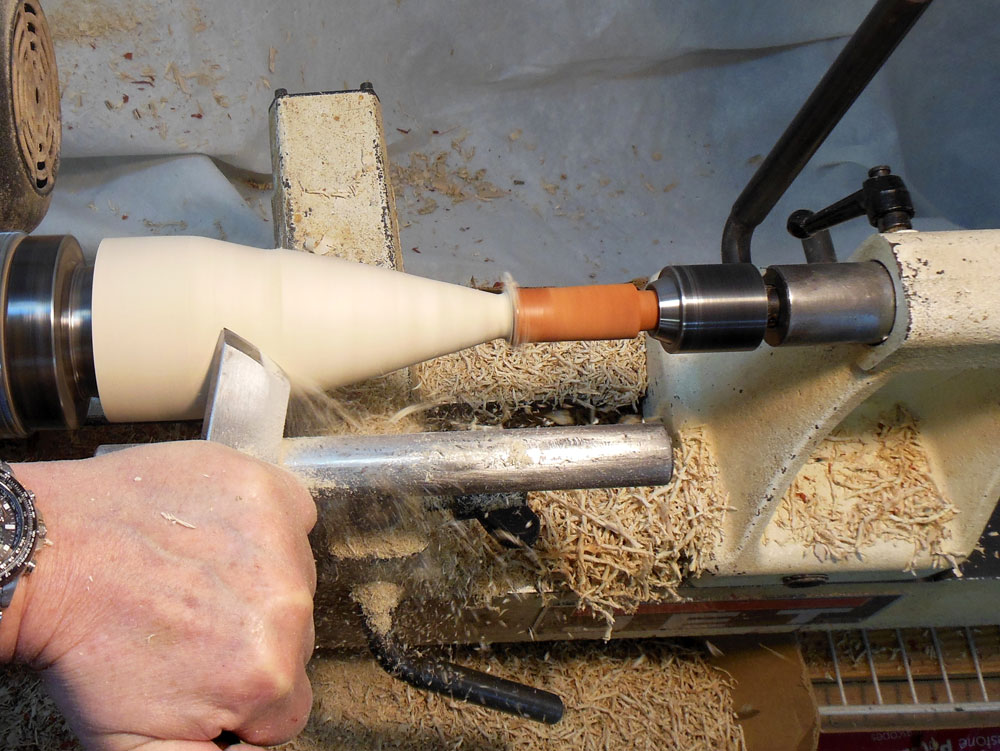
I then use the skew to shape the cone down the body blank (Figures 23 and 24).
|
|
Figure 23
|

|
|
Figure 24
|
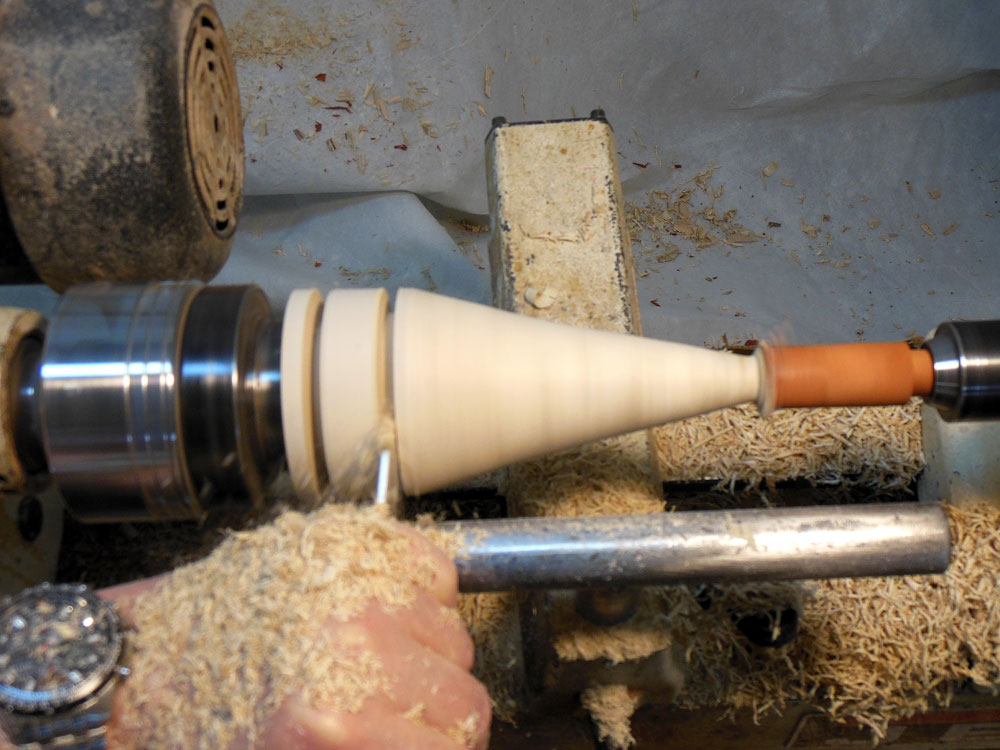
Note that the base of the cone is around 1-1/2" in from the left-hand edge of the blank; this leftmost length will be the tree trunk base. Although not strictly necessary at this point in time, I mark out the location of the tree base now (Figure 25); it makes it easier to visualize the entire tree shape. At the top of the body, right below the ornament joint, I leave the wood a little on the thick side, for strength while turning the ornament.

|
|
Figure 25
|
Refine the shape
With the basic tree trunk shaped, I move on to the tree-top ornament, smoothing it down to a cone shape (Figure 26) first, and shortening it as necessary (Figure 27).
|
|
Figure 26
|

|
|
Figure 27
|
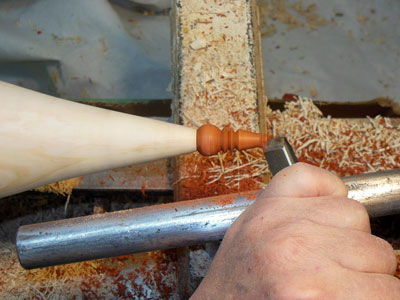
I then start on the base of the ornament, turning a ball shape (Figure 28 and 29), using a 1" skew.
|
|
Figure 28
|
|
|
Figure 29
|
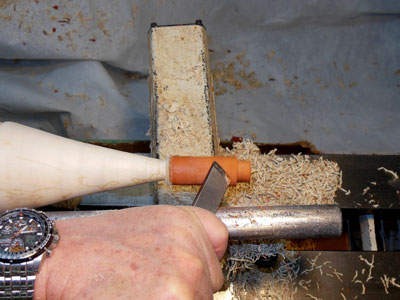
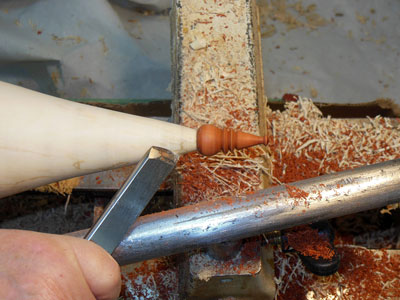
Above the ball, I turn one or two sharp-edged beads (Figure 30).

|
|
Figure 30
|
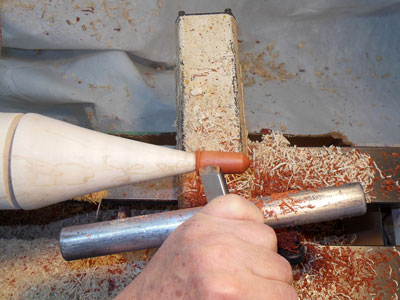
At the very top of the ornament, I usually put a small decoration of some sort (Figure 31), so that the very tip isn't too sharp (safety feature, mandated by my wife).
|
|
Figure 31
|
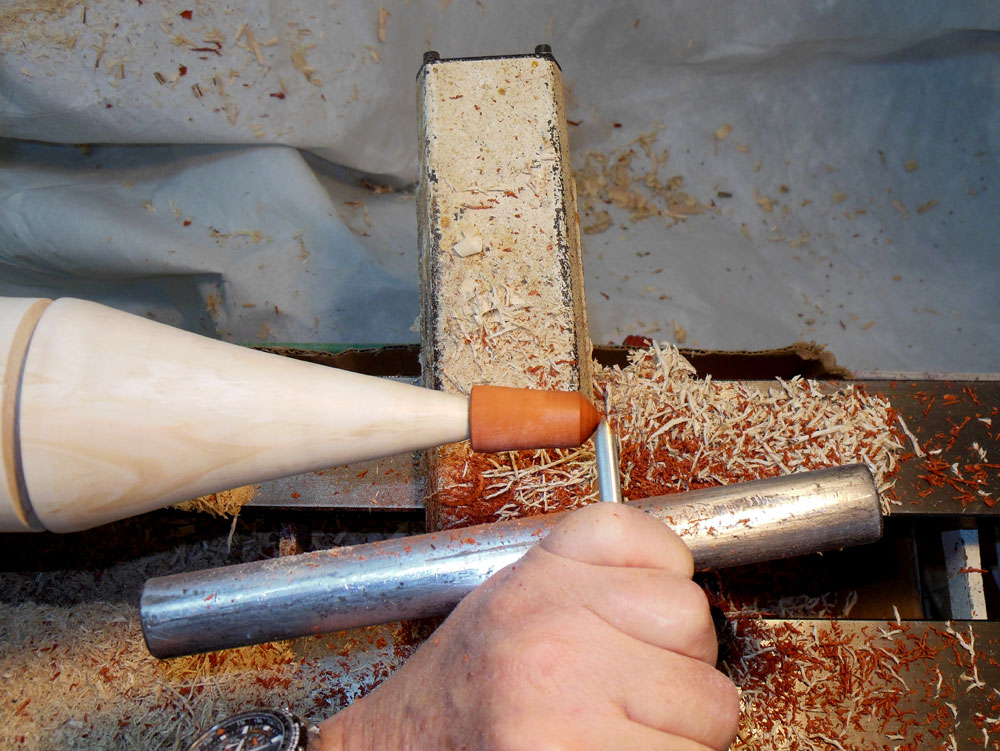
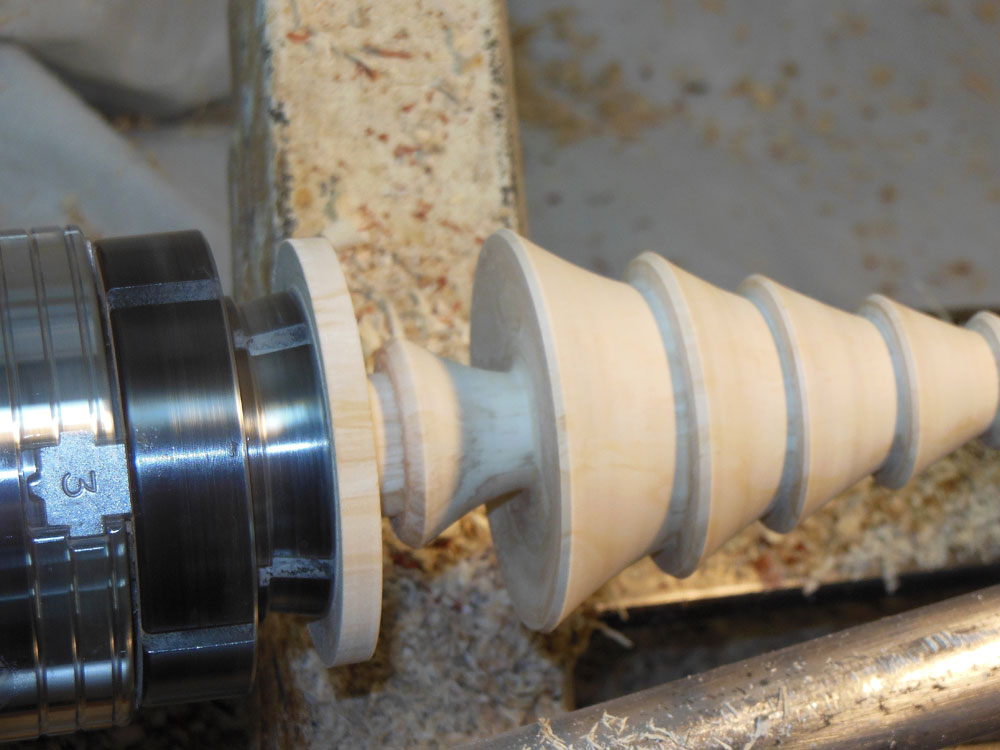
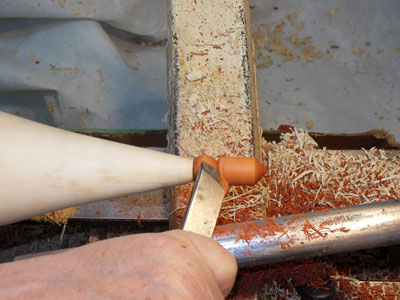
With the ornament shaped, I switch back to the body, first cutting the area joining to the ornament to final size (Figure 32).
|
|
Figure 32
|
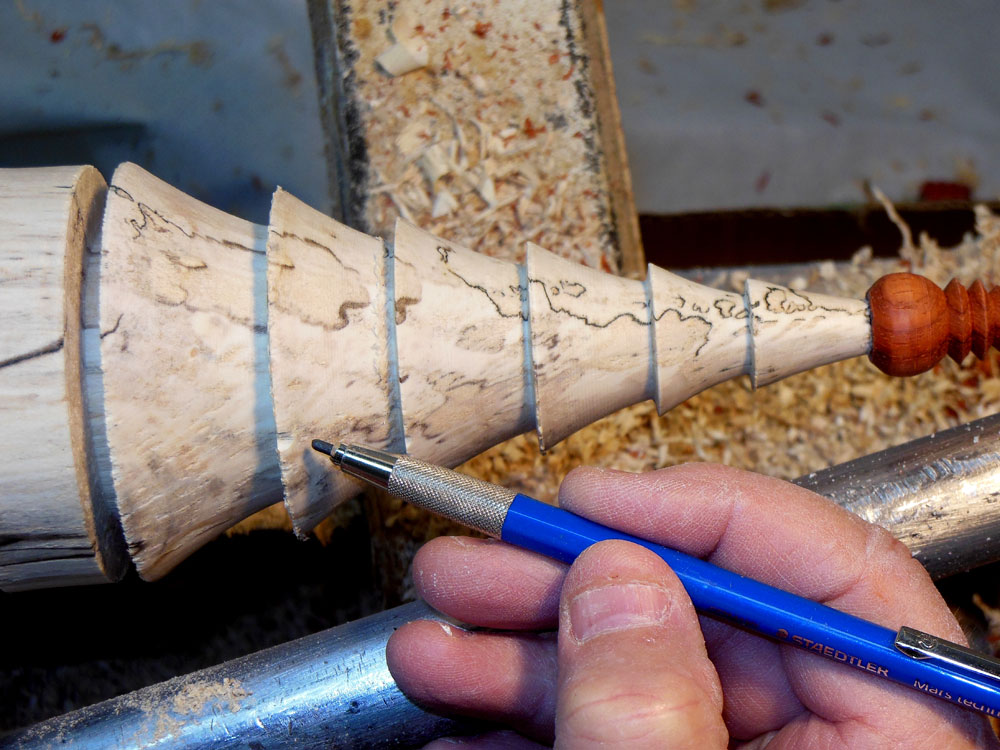
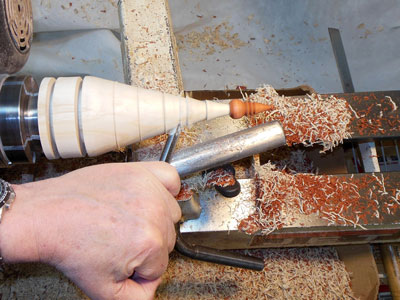
I then go down the body, marking a line at about 3/4 to 1 inch intervals (Figure 33); these lines mark the layered boughs of the tree.

|
|
Figure 33
|
At each bough layer, I turn a concave slope from the bottommost edge to the topmost edge (Figure 34 and 35).

|
|
Figure 34
|
|
|
Figure 35
|
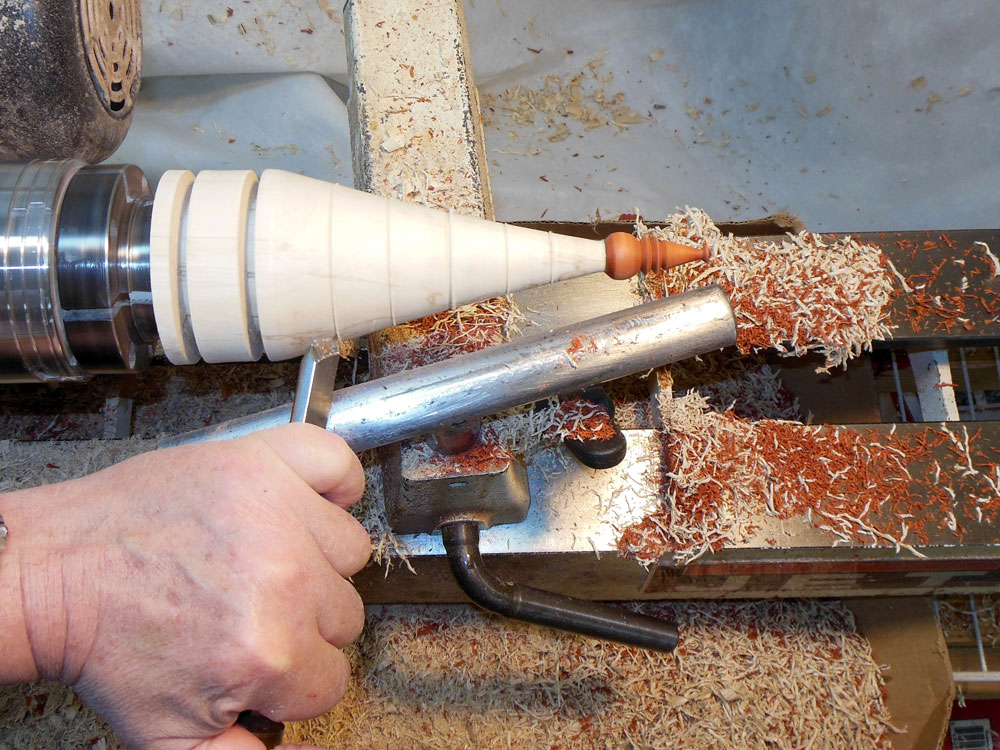
I think the concave curve yields a nicer appearance than just a straight cut. I use both a skew and a detail gouge for these cuts; the skew is a bit more difficult, but leaves a cleaner surface. The gouge is less prone to catches, however (Figure 36), which have destroyed (or "smallified") numerous of my trees.

|
|
Figure 36
|
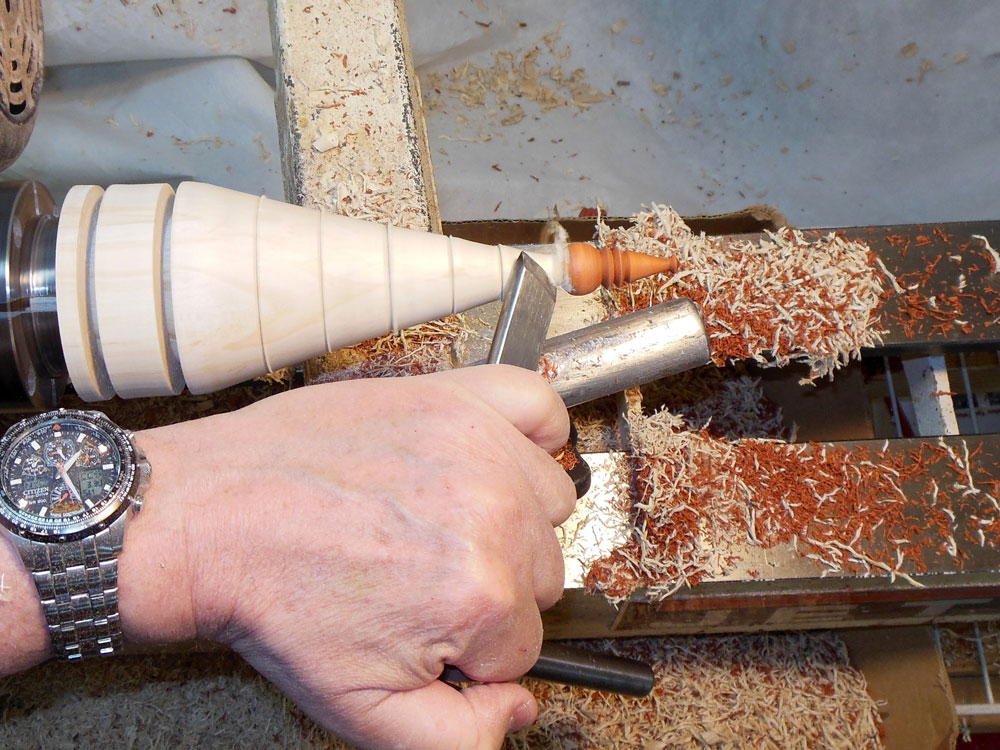
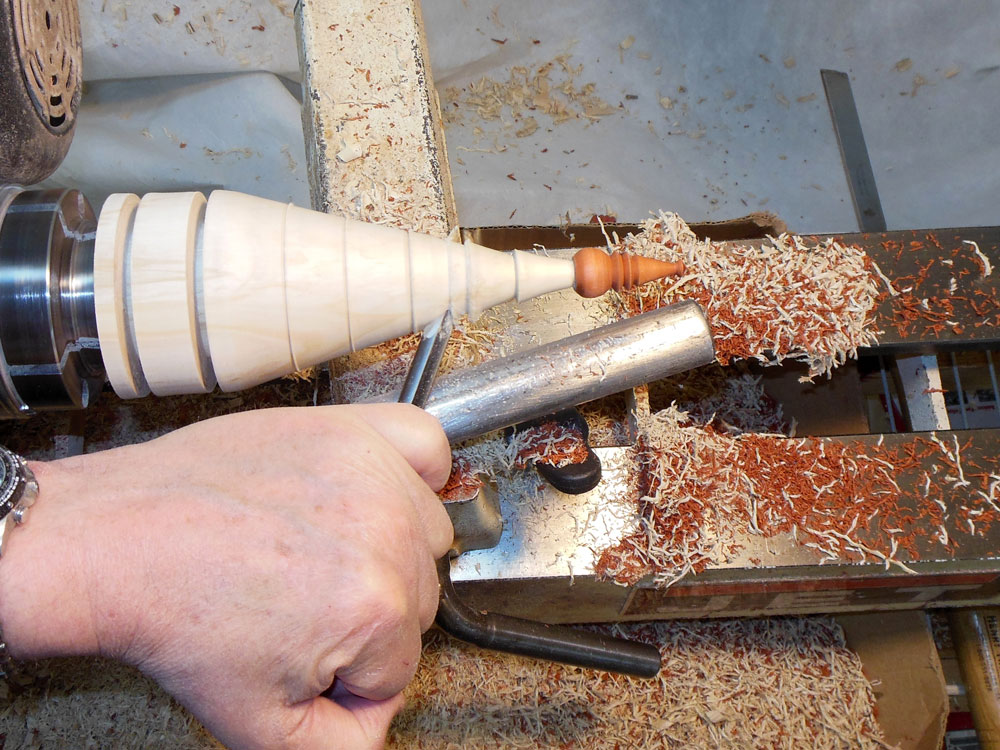
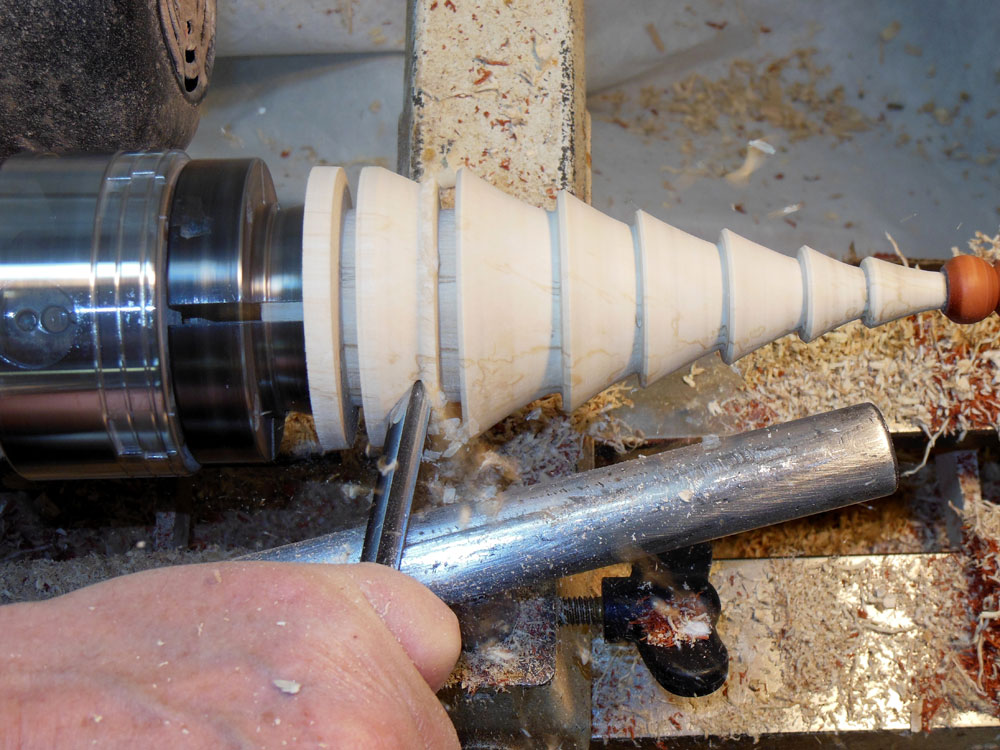
The spalted maple I'm using for this tree is fairly soft; it has an irritating tendency to chip on sharp edges (Figure 37). I've encountered the same problem on a few other woods, such as walnut. I use a skew to cut the broken edge away (Figure 38), giving a slight bevel to the bough edge, which actually looks pretty good.

|
|
Figure 37
|

|
|
Figure 38
|
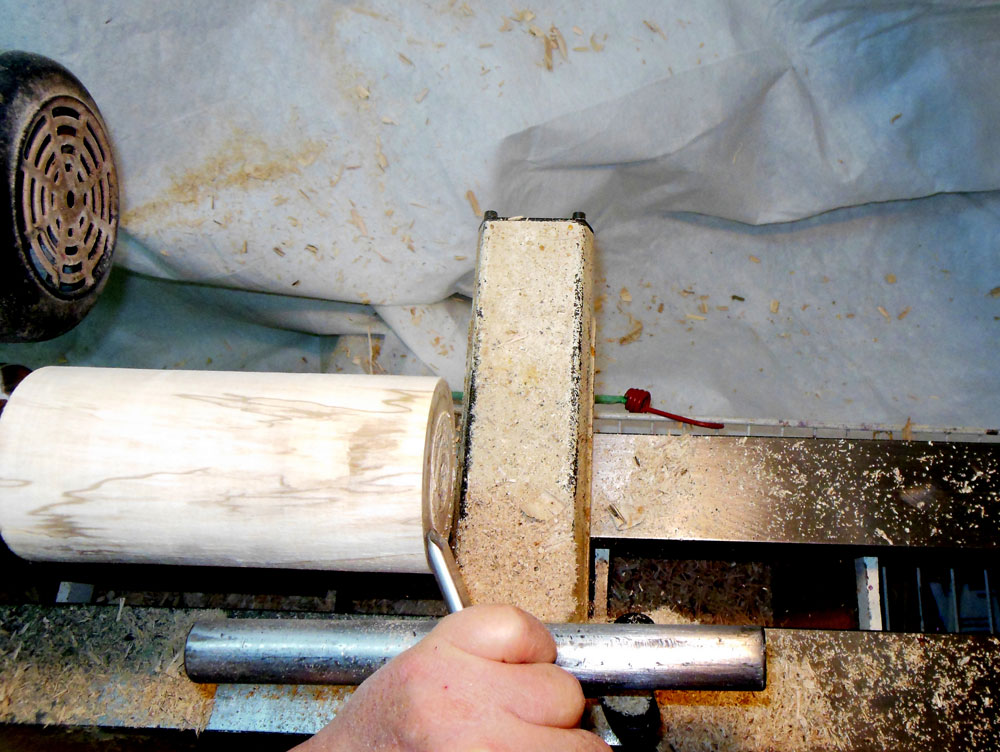
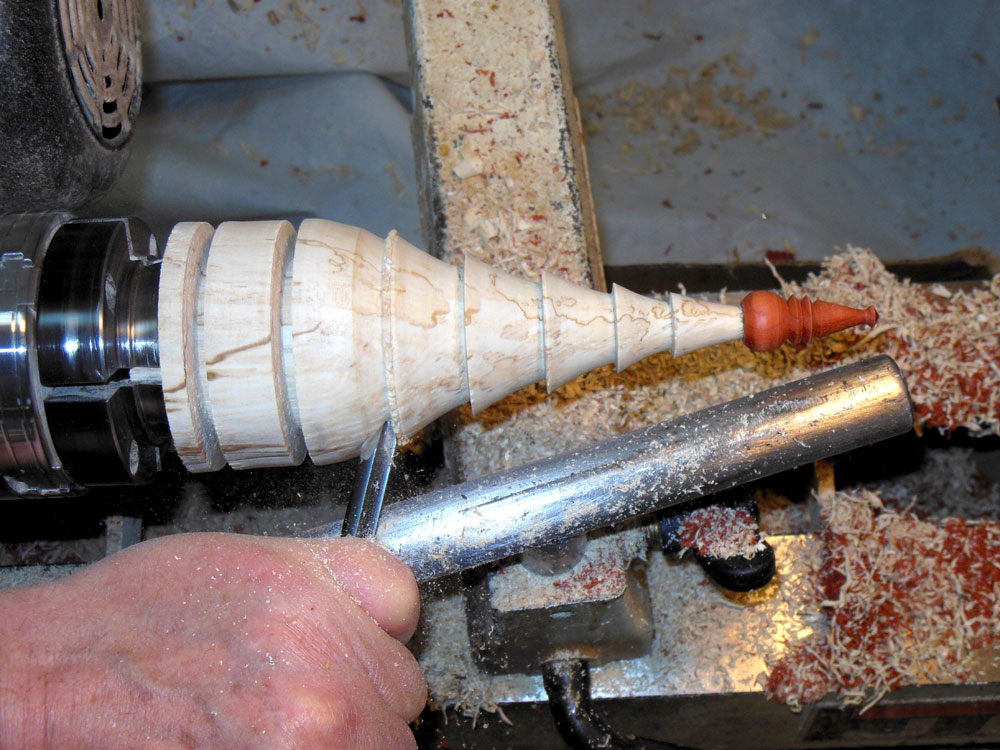
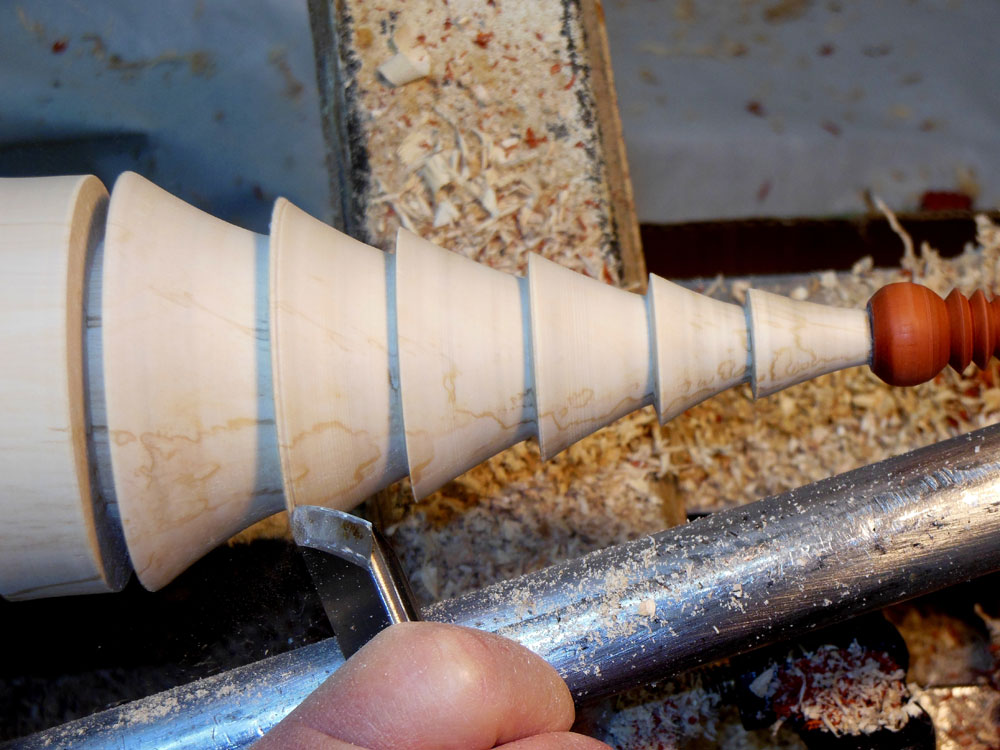
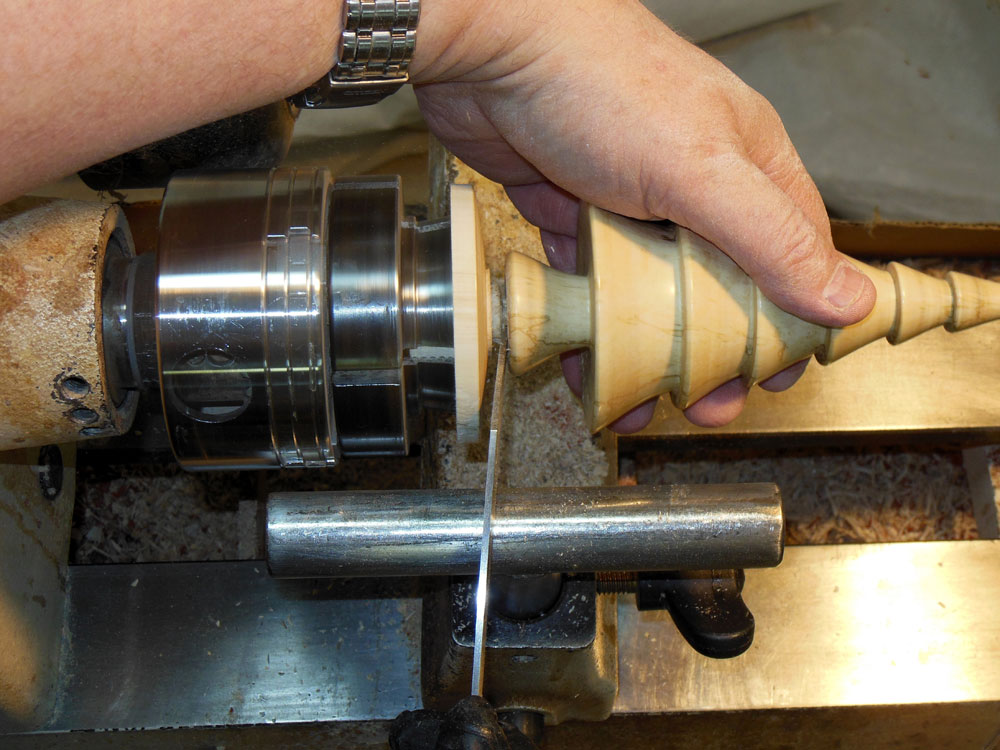
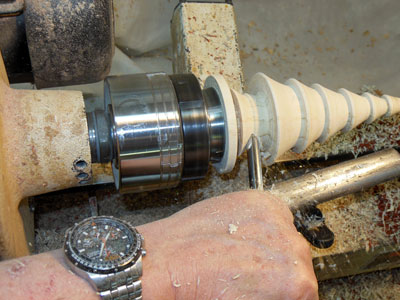
The tree trunk base is the last part of the tree to be shaped (Figure 39).

|
|
Figure 39
|
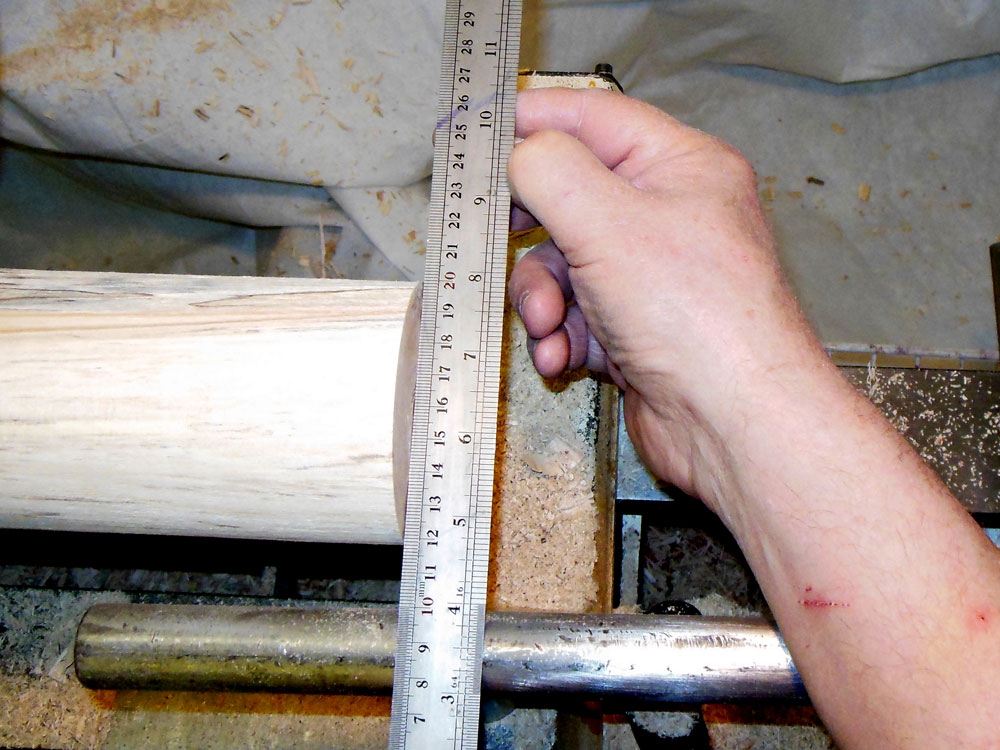
The base is also cut with a concave curve (Figure 40), and at its maximum diameter is maybe half that of the lowest bough layer (Figure 41). Note that it also gets a slight bevel on its lowest edge, again to remove chip-out.
|
|
Figure 40
|

|
|
Figure 41
|
Finishing
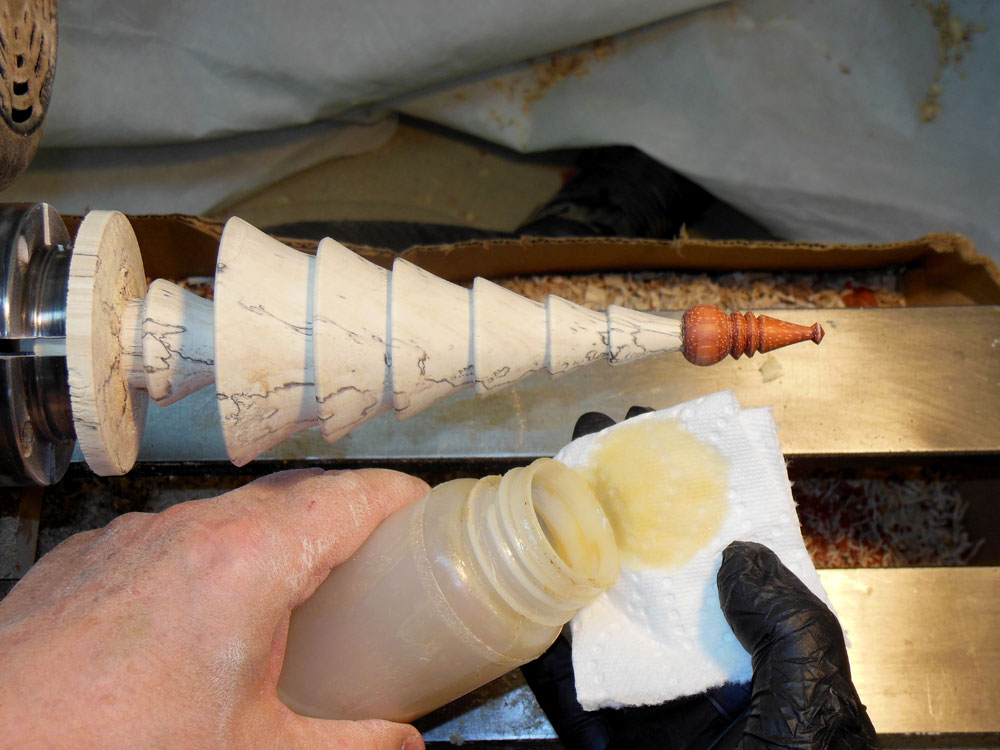
It's time to sand the tree…and sand….and sand…and sand. I start sanding at 150 grit and go down to 1000 grit (no pictures here, it's too boring). I use a friction polish (shellac) to finish the tree (Figure 42); the shellac has a few small chunks of carnuba wax added to it, but the wax doesn't dissolve, so the wax is pretty much to engage my imagination more than anything else.

|
|
Figure 42
|
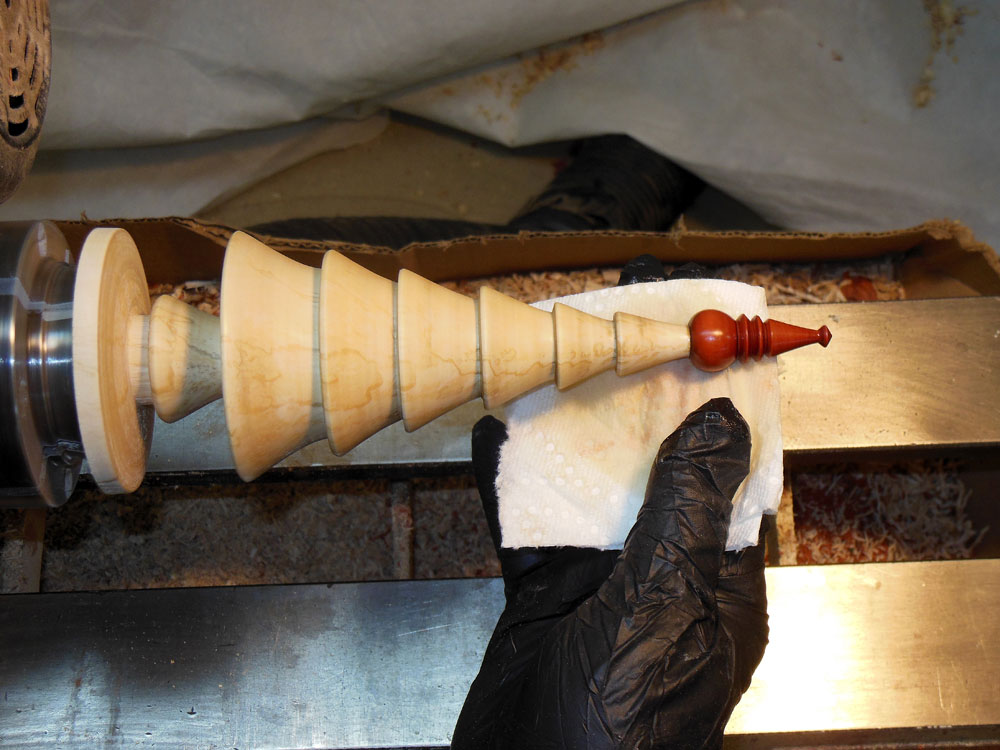
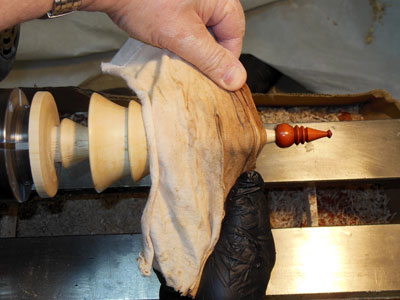
I wipe on the shellac with a paper towel with the lathe off, turning the piece by hand (Figure 43), and taking care to get the finish up into the edge right below each bough layer.
|
|
Figure 43
|
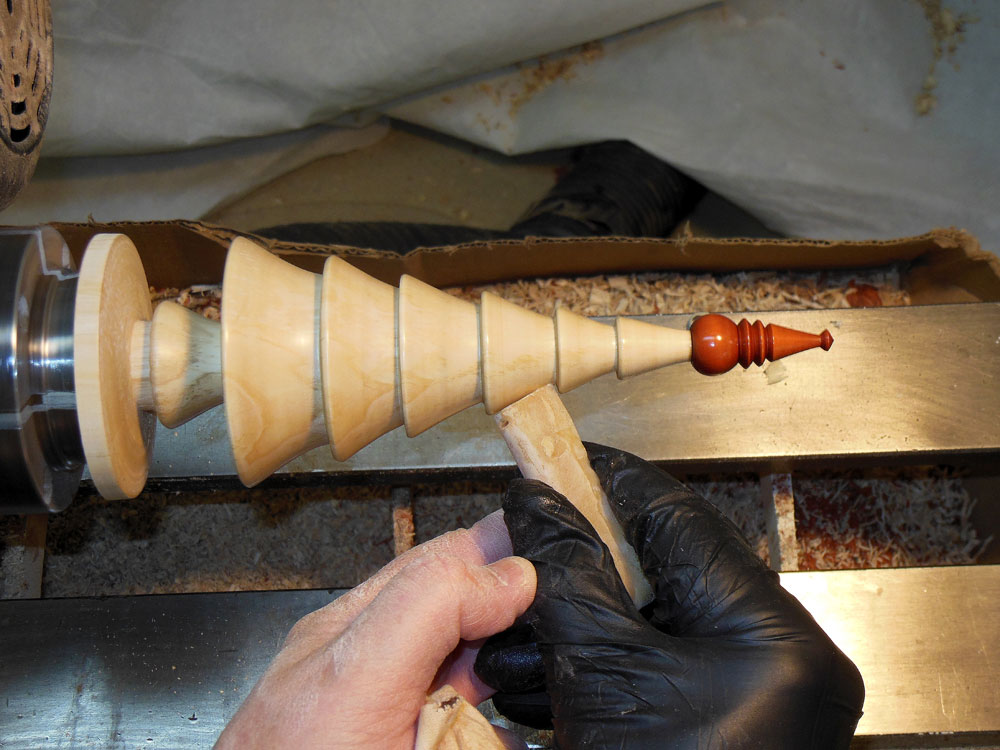
Then with the lathe running at a high speed (1500 rpm or so), I polish the finish (Figure 44) with the same paper towel that I used to apply the finish.

|
|
Figure 44
|
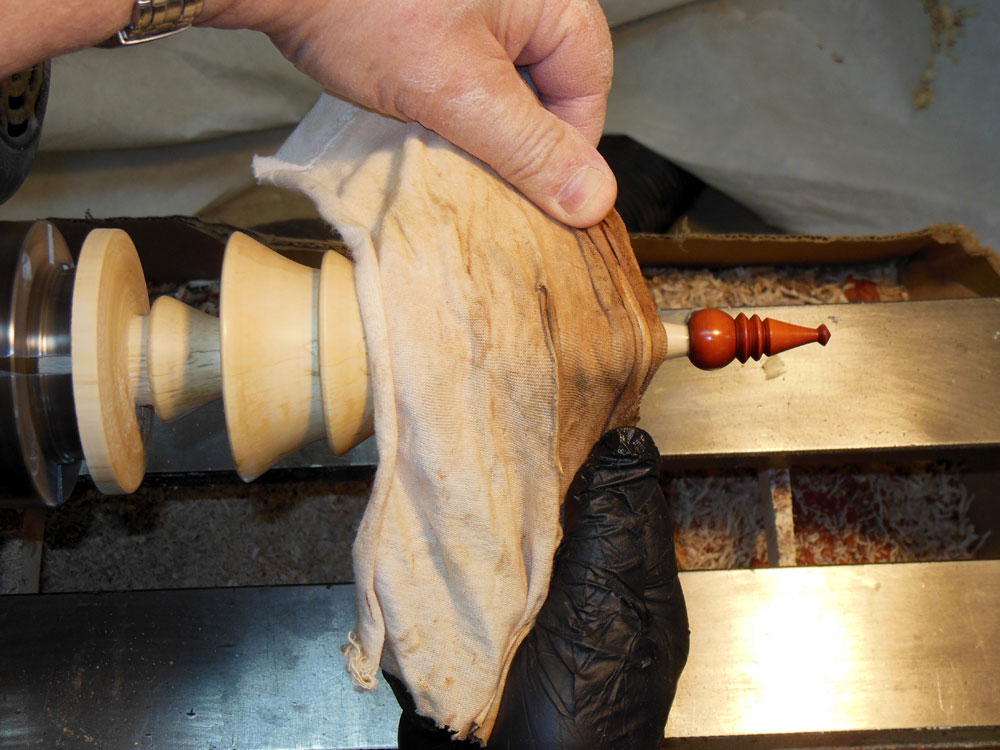
Finally, I apply some
Carnuba Wax
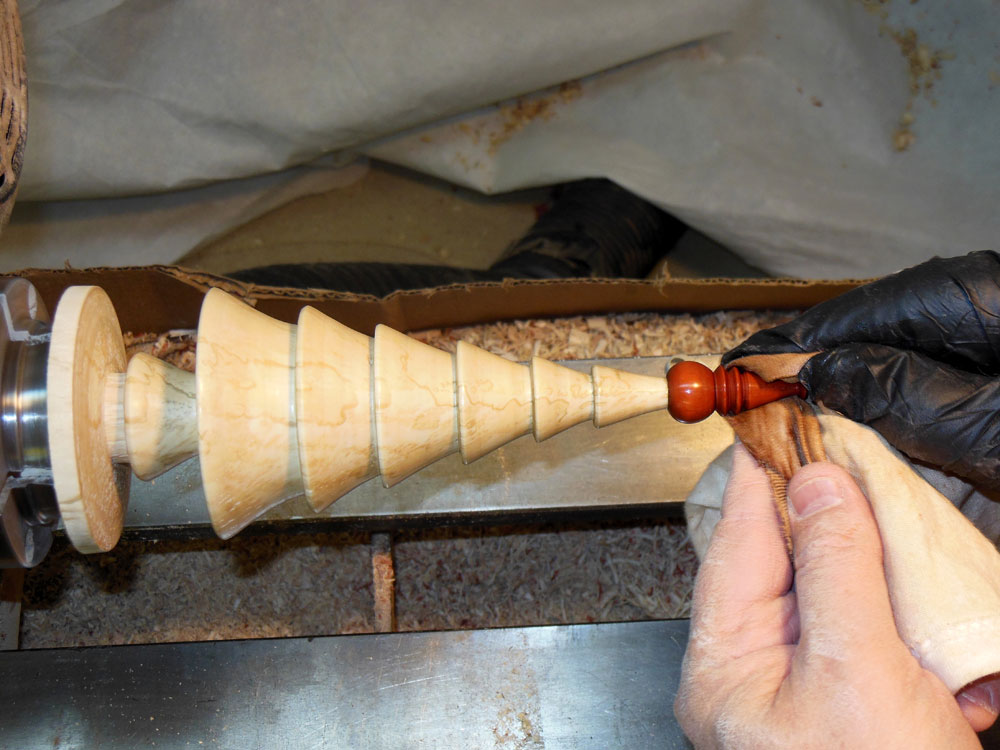
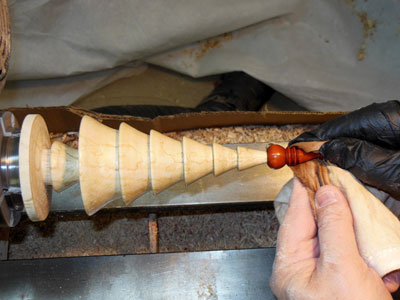
over the whole tree (Figure 45), and polish it with a rag that has obviously seen a lot of polishing (Figures 46 and 47). Carefully applying pressure above and below an area with the cloth generates heat, which melts the wax, and it shines up nicely. With the fine-grit sanding I have done and the shellac and wax polish, I usually get a medium-to-high gloss finish.

|
|
Figure 45
|
|
|
Figure 46
|
|
|
Figure 47
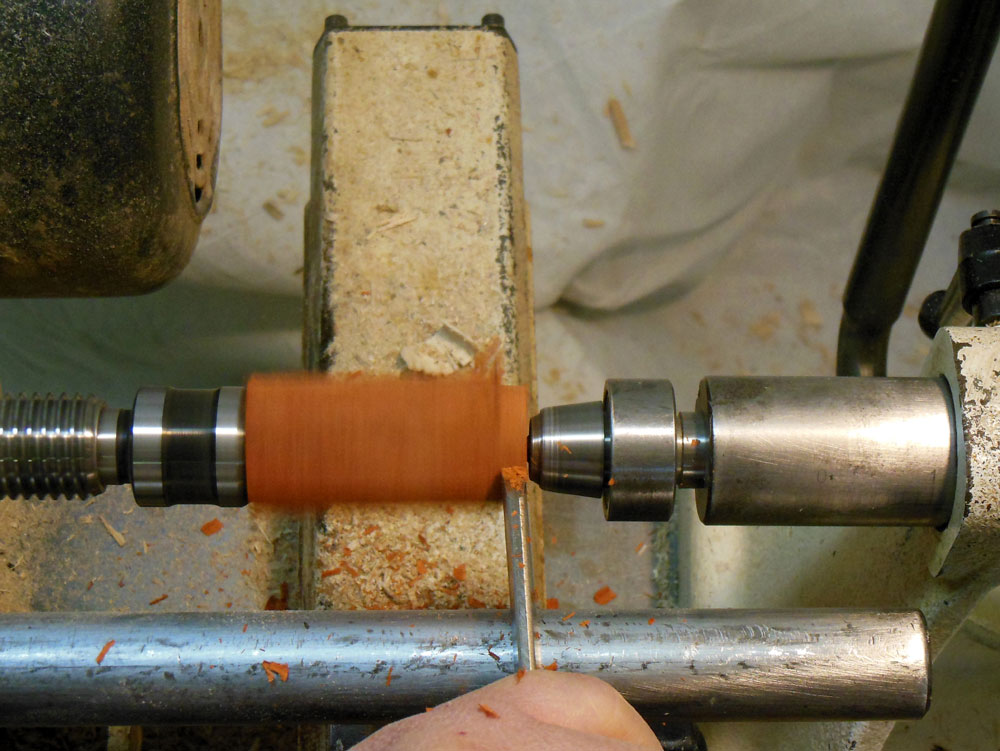
|
The last step is to part off the tree (Figure 48); I'm using a 1/16" parting tool here.

|
|
Figure 48
|
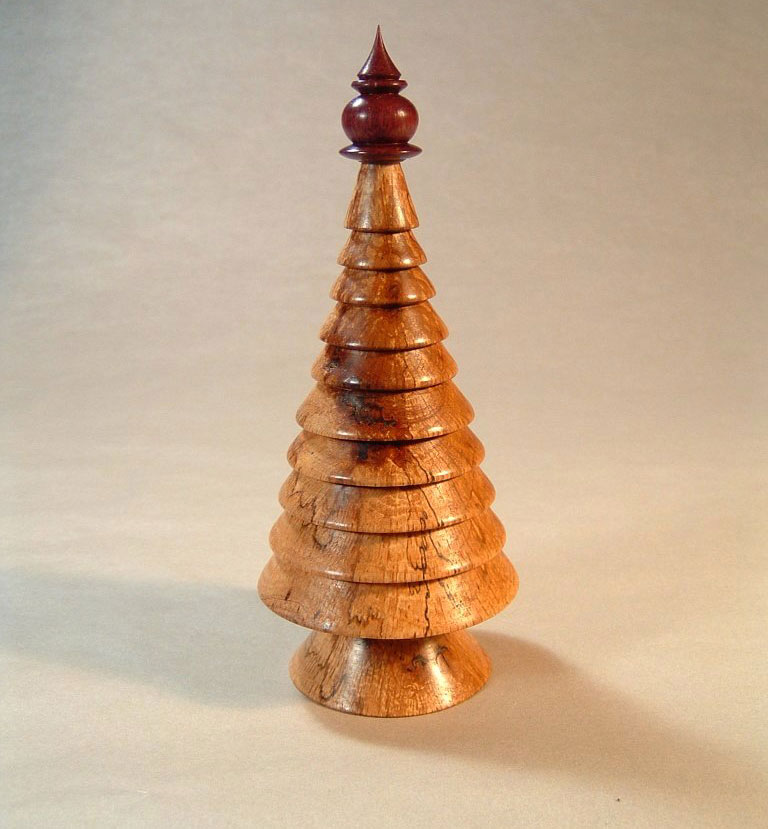
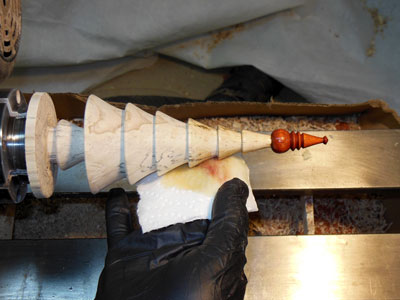
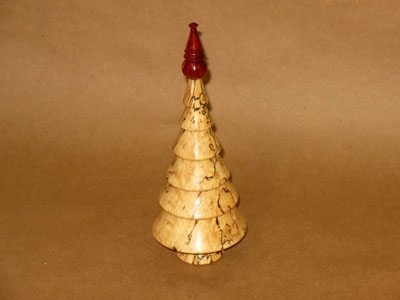
Done!
The Christmas tree is finished (Figure 49).
|
|
Figure 49
|
I've made a lot of Christmas trees over the last 12 years or so (Figures 50, 51, 52).
|
|
Figure 50
|
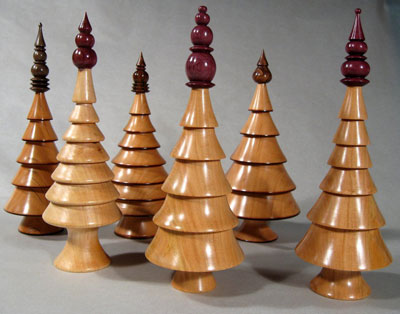
|
|
Figure 51
|

|
|
Figure 52
|
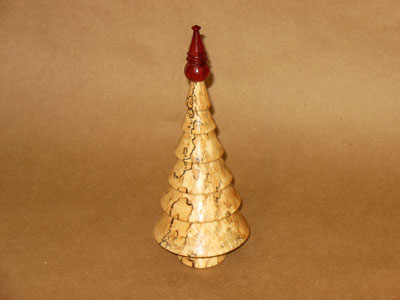
I've occasionally dyed the tree for some variety (Figure 53); having done it only once or twice, I'm not sure if I'd recommend it, but it does serve to enhance less interesting pieces of wood.

|
|
Figure 53
|
If you make some Christmas trees based on this article, I hope you'll enjoy it as much as I have.
You can email Rick at
carlrmorris@att.net