Turning a Steampunk Dirigible Christmas Ornament
by Rick Morris
Duluth, GA
Note: Click on any picture to see a larger version.
Christmas is coming up again, and to woodturners, that can mean only two things:
-
Step away from the lathe
if you're full of Christmas spirits
-
It's not too early to turn Christmas ornaments
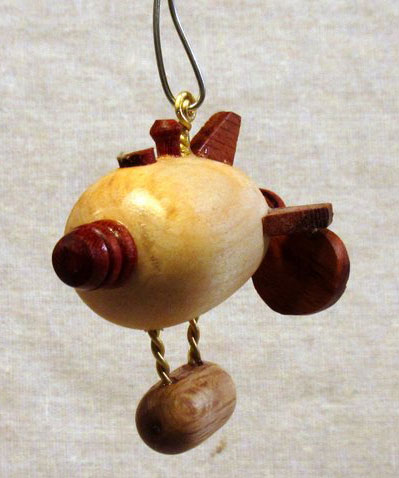
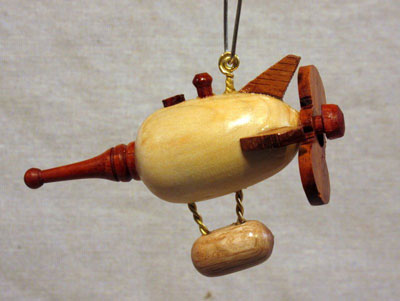
This year, when looking for something that was both unique and reeking of Christmas spirit, I decided to turn a steampunk dirigible Christmas ornament…because nothing says "Christmas" like a fantasy vehicle propelled by impossible power sources flying through the sky.

|
|
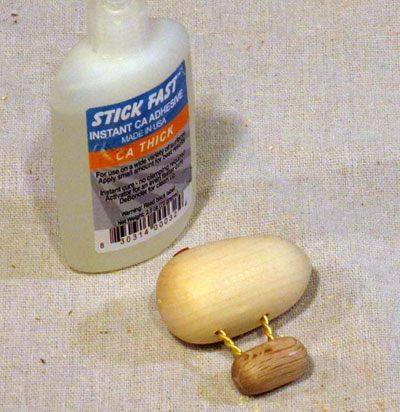
Figure 1 - Nothing says "Christmas" like a dirigible
|
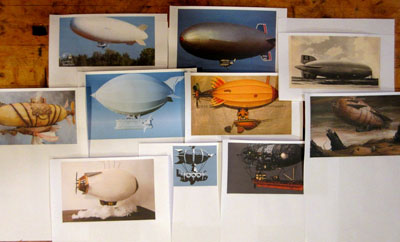
What's "steampunk", you say? I thought you'd never ask. Steampunk is an area of science fiction and fantasy based on the premise that civilization in the late 19th century is based on steam power. Steampunk is characterized by steam engines, brasswork, leather, gears, gauges, ironwork, etc. Search on Google Images for "steampunk","steampunk vehicles", or "steampunk dirigibles" for some awesome-looking stuff.
Which is exactly what I did when I was looking for some authenticity to work into my steampunk dirigible Christmas ornament.
|
Figure 2 - Some authentic steampunk (and real)
dirigibles
|
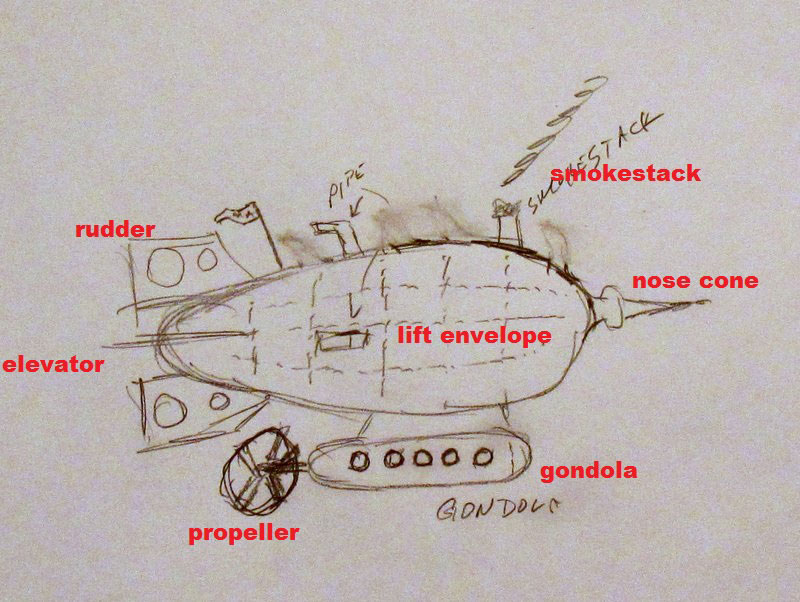
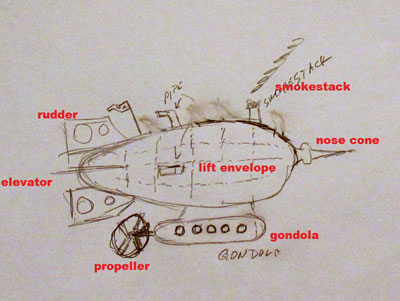
After extensive study of steampunk aerodynamics and historical engineering drawings, I decided on this:
|
Figure 3 - My technical specifications
for a steampunk dirigible
|
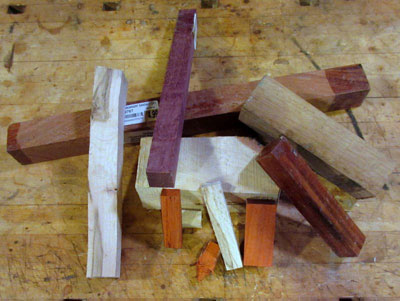
There are 5 components to be turned on the lathe and 2 to be cut from thin, flat stock. After full assembly, the overall length is 3 inches and the overall height is 2-1/4 inches. The largest piece, the lift envelope, is 2 inches long and 1-1/8 inches in diameter. So right away, you can guess this project isn't going to take a lot of turning stock. I started with a lot of scraps left over from this year's various projects.
|
Figure 4 - This project was made with small scraps
of various woods
|
I wanted the biggest pieces to be light-colored wood, and the other fittings to be darker. The lift envelope is made from maple, the control gondola from water oak, while the nose cone, smokestack, rudder, elevators, propeller, and prop axle are all made from padauk.
Turning the Lift Envelope
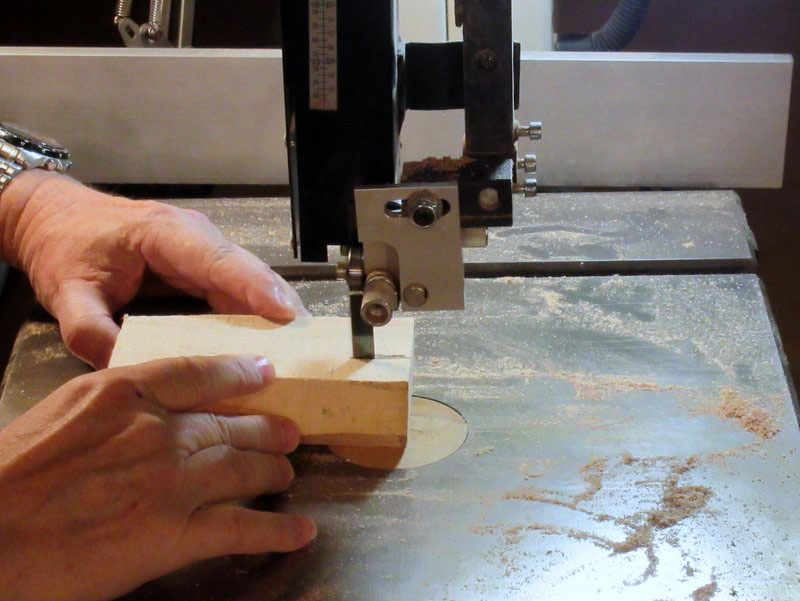
The blank I started with for the lift envelope is about 6 inches long and 1-1/2 inches wide. (The extra length is for making two ornaments, not just one.)

|
Figure 5 - Cutting a blank for the lift envelope
on the bandsaw
|
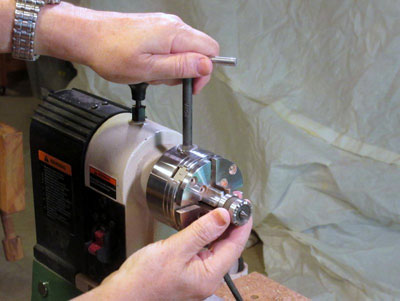
I started off with the blank between centers. Since I would be using my chuck frequently (this is a
Nova G3 Lathe Chuck
with long 25 mm jaws), I put a dead center insert into the chuck. That little insert is a time saver, as it keeps me from having to mount and unmount the chuck and dead centers to switch back and forth.
|
|
Figure 6 - A dead center insert for my woodturning chuck
|
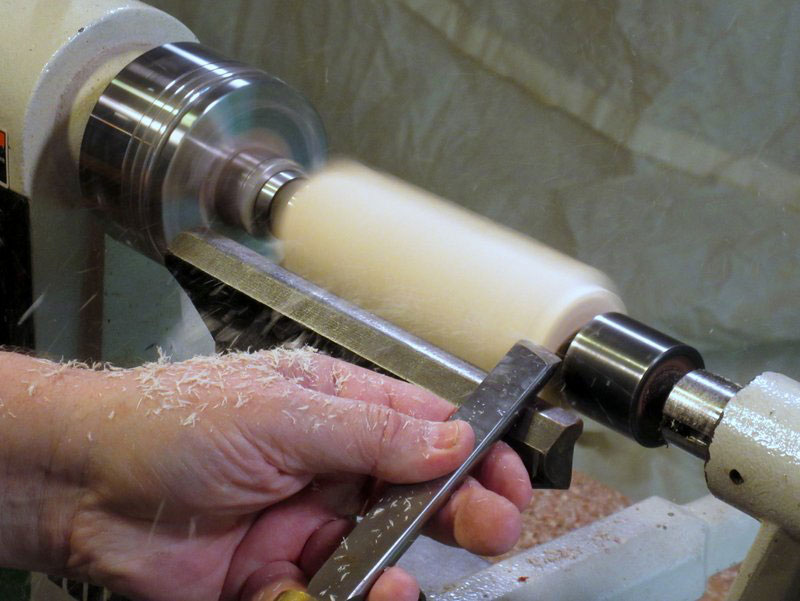
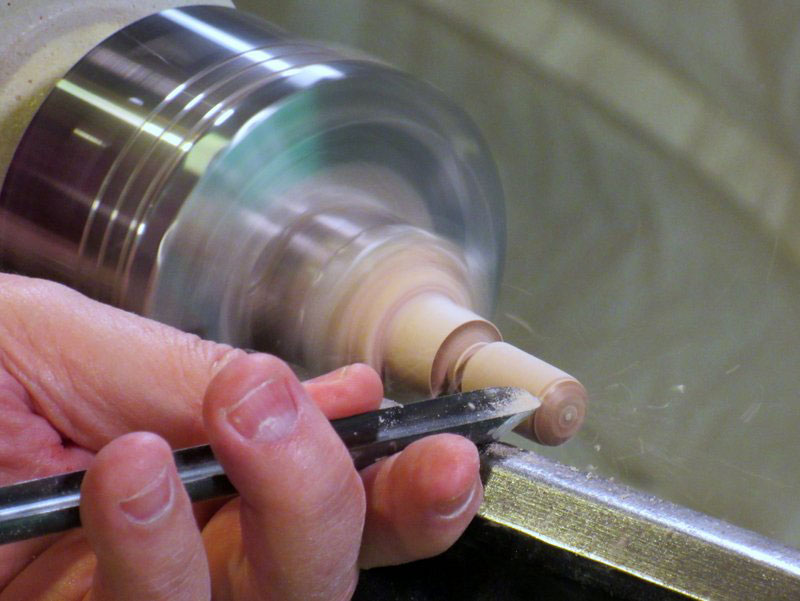
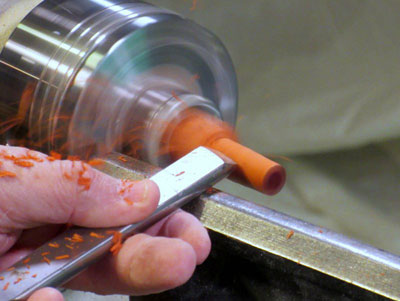
With the blank between centers, I roughed it down rapidly with a
1 inch Skew Chisel, making peeling cuts down the length of the stock.

|
|
Figure 7 - Roughing down to round with a skew
|
After roughing, I had a piece just under 1-1/2 inches in diameter. This is a good time to put a chuck tenon on both ends, which I cleverly forgot to do.
|
|
Figure 8 - The roughed down cylinder
|
I then used my
Diamond Parting Tool
to cut the blank in half.

|
|
Figure 9 - Cutting the 6 inch blank into two pieces
|
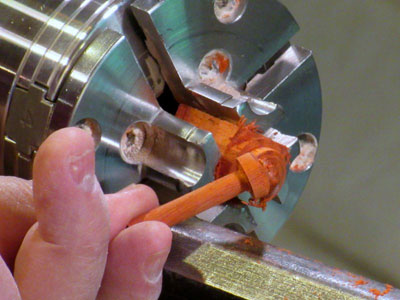
Next I mounted the short blank directly in the chuck.

|
Figure 10 - Remounting directly into the chuck after
removing the dead center
|
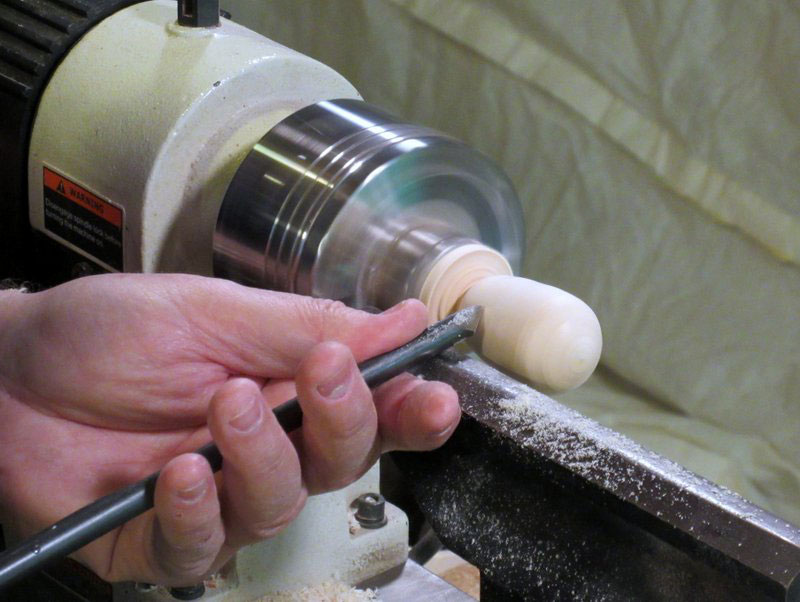
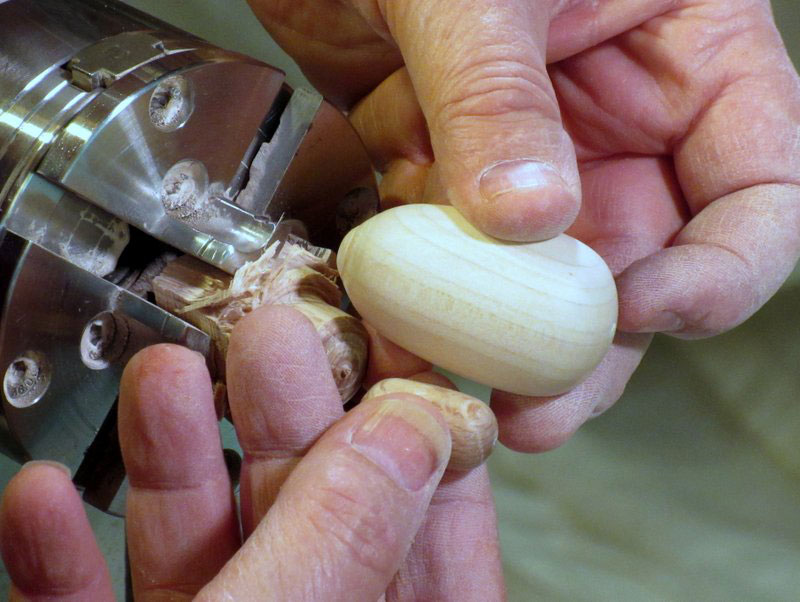
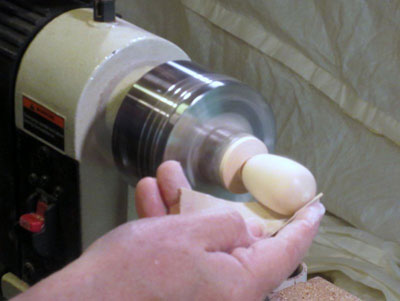
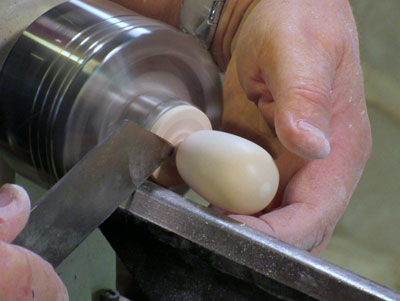
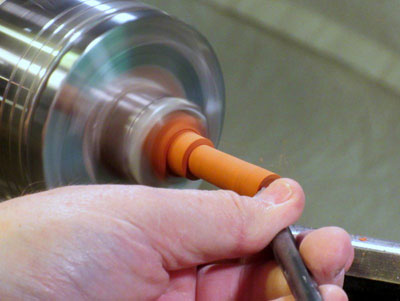
Now for some woodturning! The lift envelope can be fully symmetrical (like a football) or more bulbous on one end than the other (like an egg). I decided to go with short and bulbous, sort of like me during the holidays.
|
|
Figure 11 - Starting to turn the lift envelope of the dirigible
|
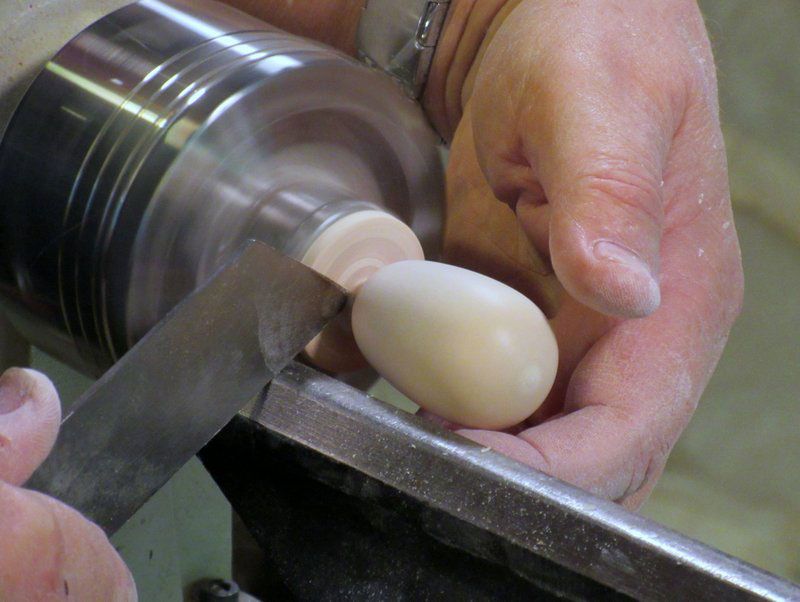
The back end is toward the headstock, the front is free. I cut a slight taper from front to back, and rounded each end.

|
|
Figure 12 - Tapering and rounding from front to back
|
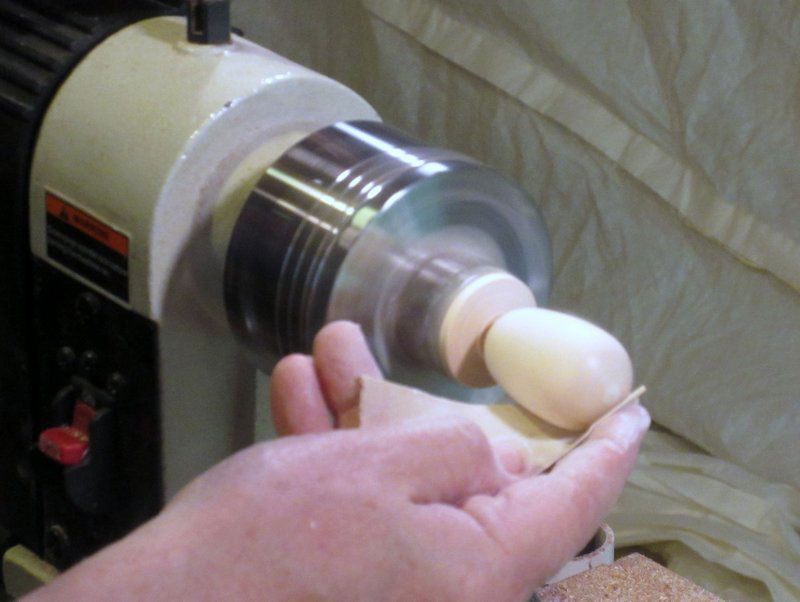
It needed to be sanded, of course. Normally, I sand the heck out of a small piece like this, going from 150 grit all the way down to 1000 grit. However, for this and other pieces in the ornament, I only sanded down to 400, because I decided not to do any finishing until after the whole ornament was assembled (I regretted that decision, as I will mention below).
|
|
Figure 13 - Sanding the lift envelope
|
I parted it off with a 1/16 inch narrow parting tool.
|
|
Figure 14 - Parting off the lift envelope
|
Turning the Control Gondola
The control gondola is where the pilot (in the best of all possible worlds, that would be me) sits, flying the dirigible. My gondola is about 1 inch long and about a 1/2 inch in diameter. I started with a blank that was around 1 inch square and 3 inches long, mounted directly in the chuck (without a tenon in this case).

|
Figure 15 - Mounting the blank for the gondola
directly in the chuck jaws
|
Then I roughed it down to round with a skew.
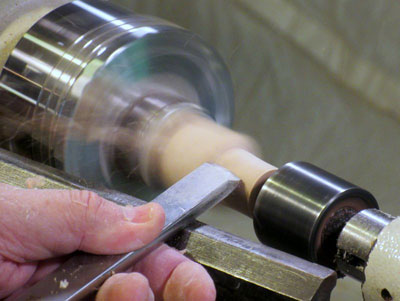
|
|
Figure 16 - Roughing down the gondola piece
|
Using the lift envelope piece as a guide, I marked off a small section of the blank.
|
|
Figure 17 - Determining the length of the gondola
|
I then used a
3/8 inch Spindle Gouge
to shape the gondola. Basically, I made a large pill shape of wood…evenly rounded on both ends, same diameter over the whole length.
|
|
Figure 18 - Shaping the gondola
|
I sanded the gondola and parted it off.

|
|
Figure 19 - Sanding the gondola
|

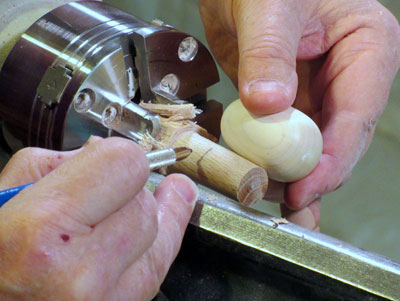
|
|
Figure 21 - The lift envelope and the gondola
|
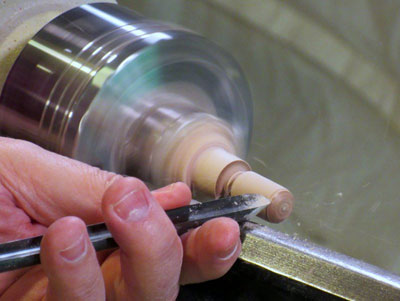
Turning the Propeller Axle
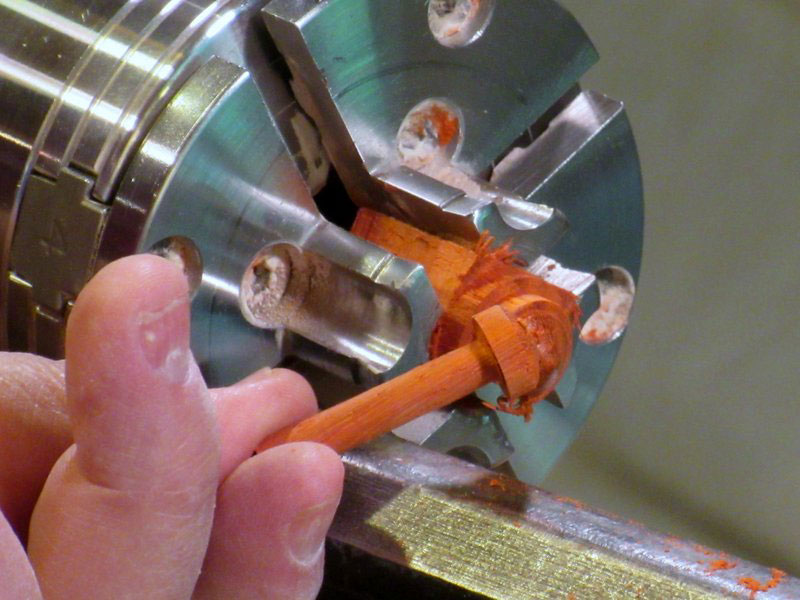
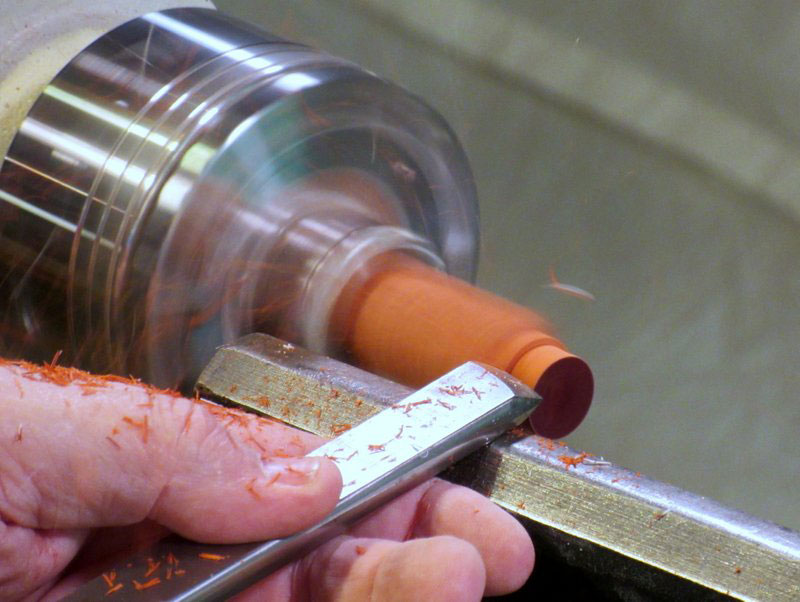
This steampunk dirigible has a propeller at the back of the lift envelope (other models have the propulsion motors mounted on pylons on the side of the envelope), so it needs an axle to let it rotate freely, but mainly to hold it in place. I used padauk for this because it has a beautiful orange color, making it uniquely suited for steampunk construction (I believe Count von Zeppelin's steampunk dirigibles were made entirely of padauk, but he was an insufferable show-off.)
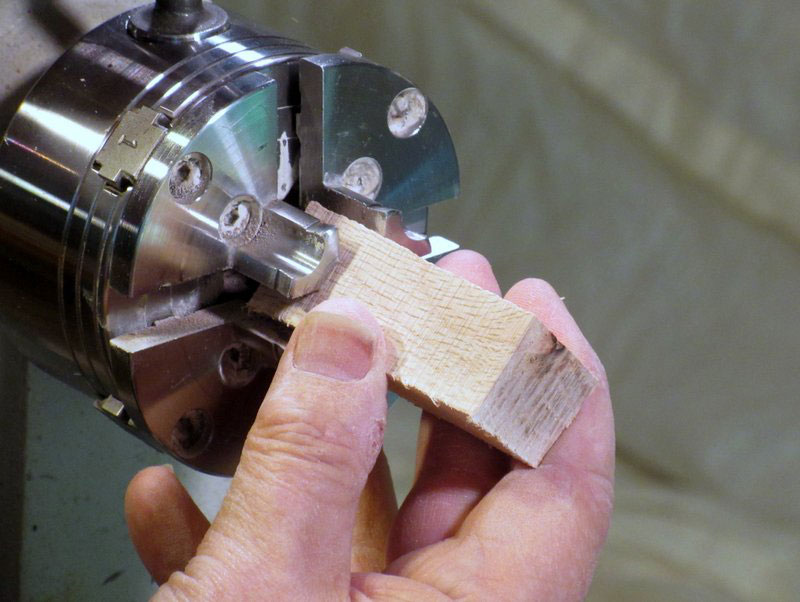
I started with a small scrap, about 2 inches by 3/4 inch, mounted directly in the chuck (i.e. no tenon again – it's fast, but sloppy).
|
|
Figure 22 - Roughing down the prop axle
|
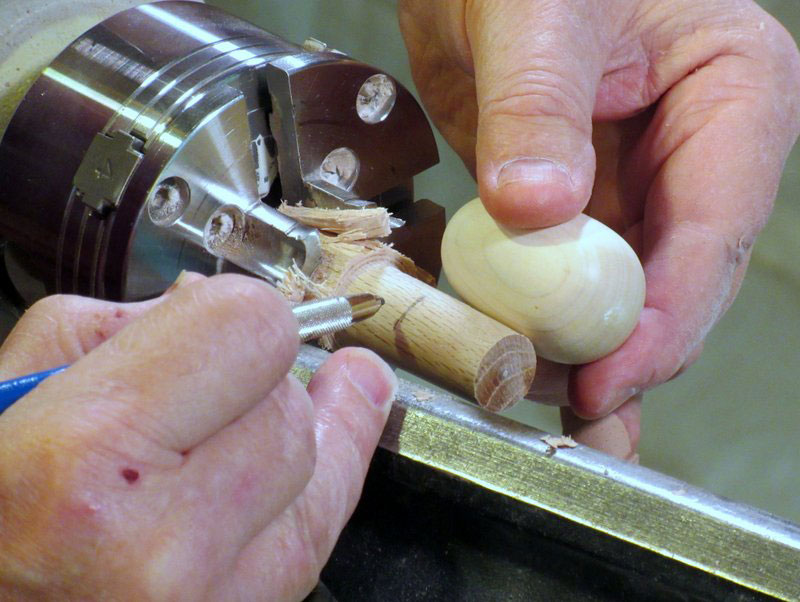
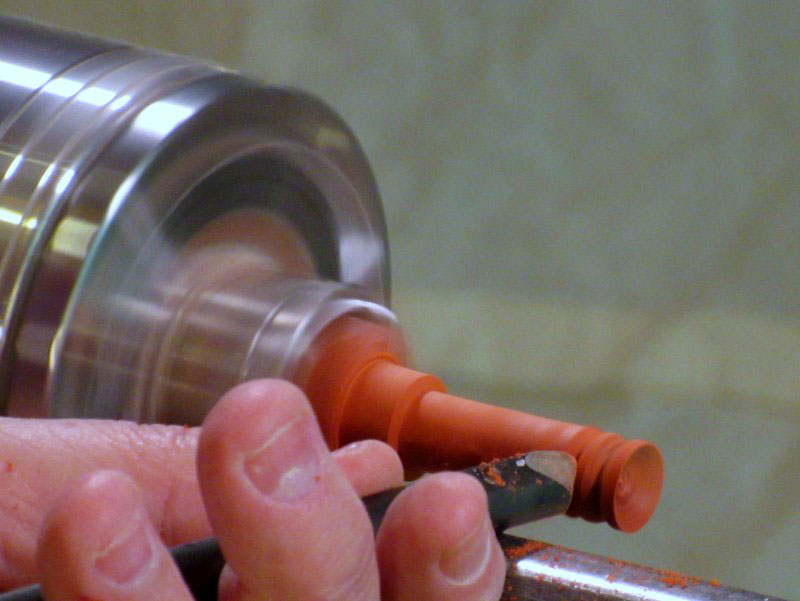
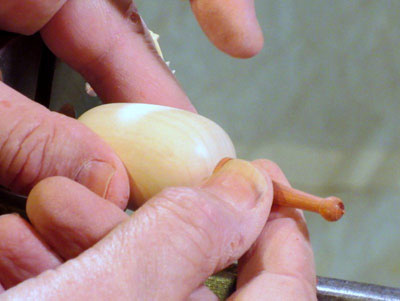
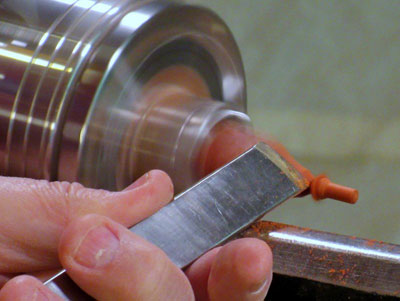
After bringing it down to about 1/4 inch in diameter over a length of about 1 inch, I cut a larger diameter "head" on one end. That "head" will keep the propeller from flying off when operating at full power.

|
|
Figure 23 - Forming the axle "head"
|
|
|
Figure 24 - The completed propeller axle
|
Turning the Nose Cone
Of course, the steampunk dirigible has to have a nose cone. Where else would the forward-scanning, anti-dirigible steam detector be located? For this, I started with padauk again, a piece about 2 inches long and 3/4 inch thick.

|
|
Figure 25 - Roughing down the nose cone
|
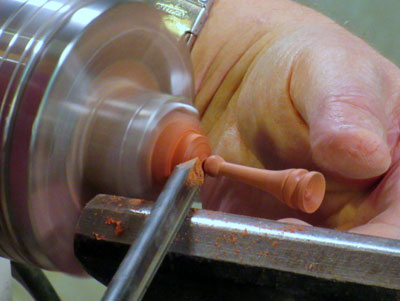
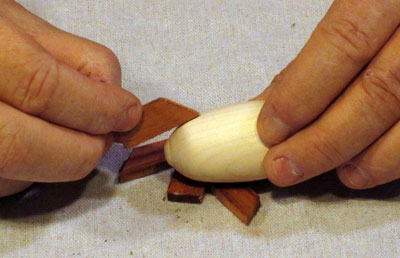
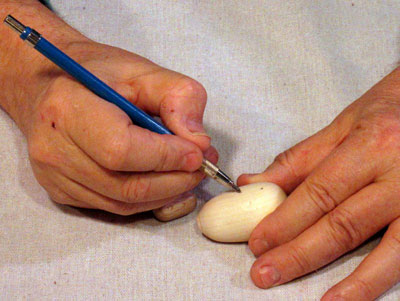
The nose cone must fit on the nose of the dirigible. While that may seem self-evident to you, you'd be surprised at how many dirigibles those steampunk guys made with the nose cone pointing off into space somewhere.
I cut a small cove into the end of the cone. (I could have mounted it with a tenon into a hole on the dirigible…this actually would have been a better method, as I found out later when I tried to glue the nose cone in place.)
|
Figure 26 - Turning a small cove into the end
of the nose cone
|
As I cut this cove, I checked the fit on the lift envelope…I wanted a snug fit around the edge of the nose cone.

|
|
Figure 27 - Testing the fit of the nose cone
|
I then used a small
Spindle Gouge
to add some detail to the nose cone and narrow it to the forward end.

|
|
Figure 28 - Turning a bead on the nose cone
|
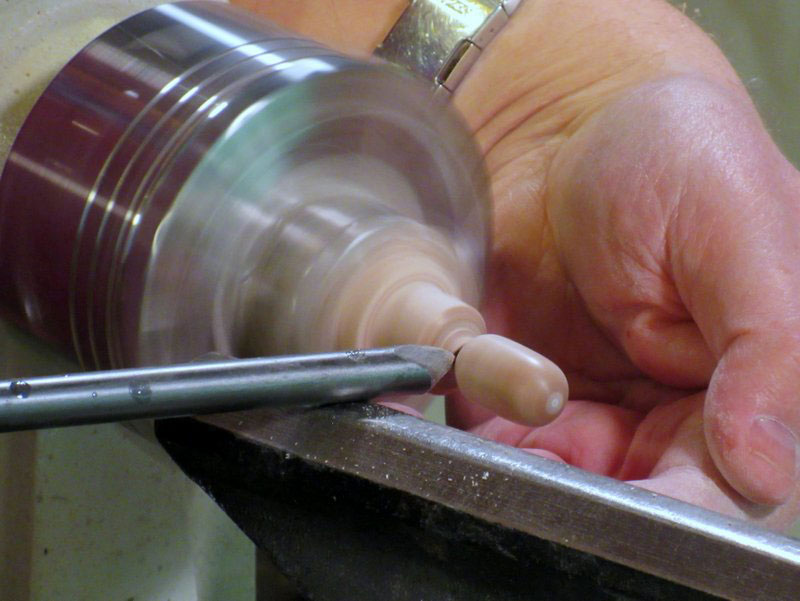
After some sanding, I formed a small ball at the forward end, and parted it off with my spindle gouge.
|
|
Figure 29 - Final detail on the nose cone
|
|
|
Figure 30 - The completed nose cone
|
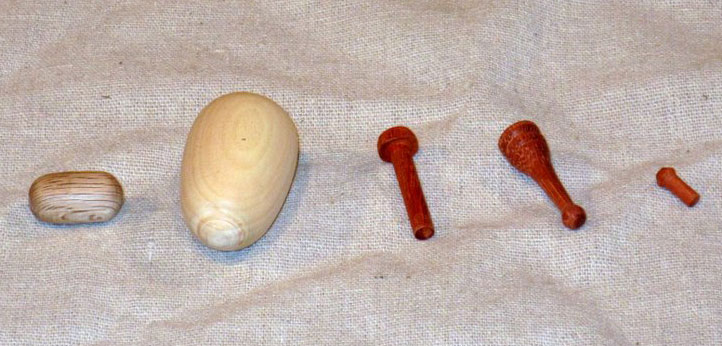
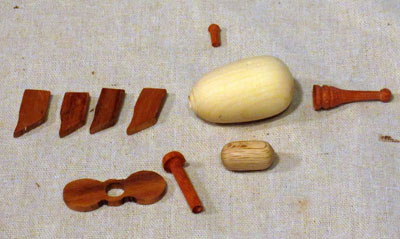
Turning the Smokestack
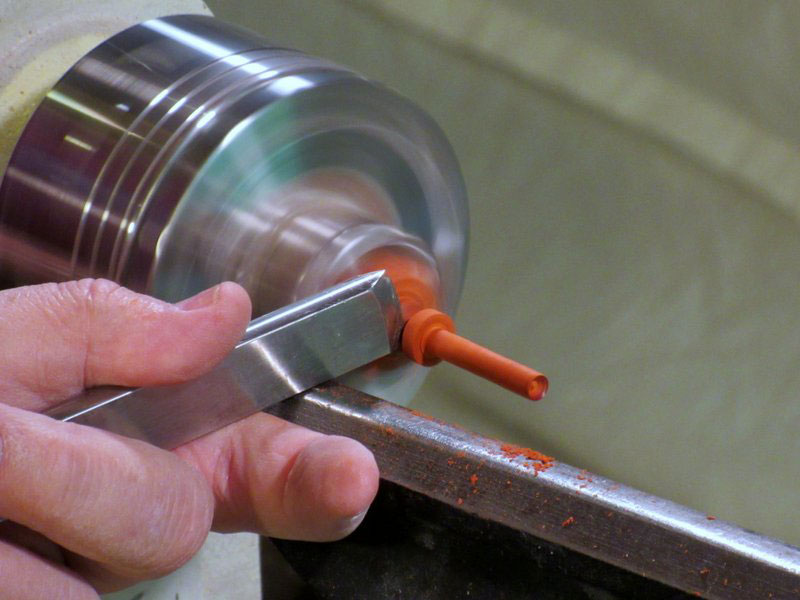
Steampunk vehicles that are powered by steam engines must have a smokestack. Using a small piece of padauk, I turned a very small peg, about 3/16 of an inch in diameter, with a larger piece at the top. The smokestack will be glued into a small hole on the top surface of the lift envelope.
|
|
Figure 31 - Making a smokestack
|
The smokestack is the last turned piece.
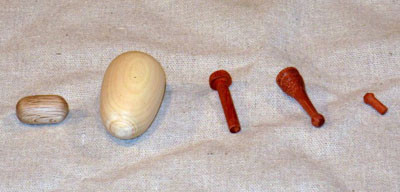
|
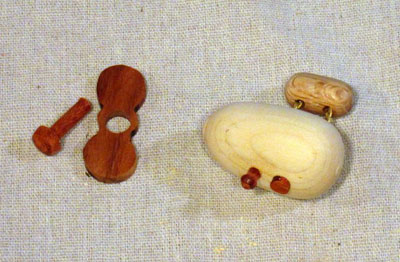
Figure 32 - The five turned pieces of the
steampunk dirigible
|
Making the Rudder and Elevators (The "Fins")
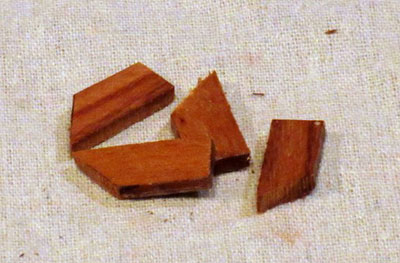
For directional control, the dirigible must have a rudder (a vertical "fin", one or two) and two elevators (horizontal "fins"). These are simple flat pieces, about 1/8 of an inch thick and a 1/2 inch or so wide. (I made two rudders (top and bottom), but one got shot off in an engagement with steampunk pirates, so my dirigible ended up with only a single rudder on top of the lift envelope.)
|
|
Figure 33 - The rudder and elevators
|
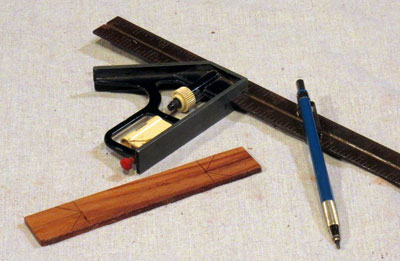
I started with a 5 inch piece of 1/8 inch thick padauk, cut on the tablesaw. On each end, I marked off two pieces with a 45 degree angle.
|
|
Figure 34 - Marking "fins" on a thin piece
|
|
|
Figure 35 - After cutting on the band saw
|
Since the lift envelope is curved, a straight cut on the fin pieces doesn't fit very well.

|
Figure 36 - Straight side of fin doesn't mate well
to the lift envelope
|
To get a better fit for gluing, I went to my belt sander and sanded a slight curve in the top (pointed section) of the fin.

|
|
Figure 37 - A curve is sanded on the fin
|
That curve still isn't a perfect match, but it will do.

|
Figure 38 - The curved area of the fin against
the lift envelope
|
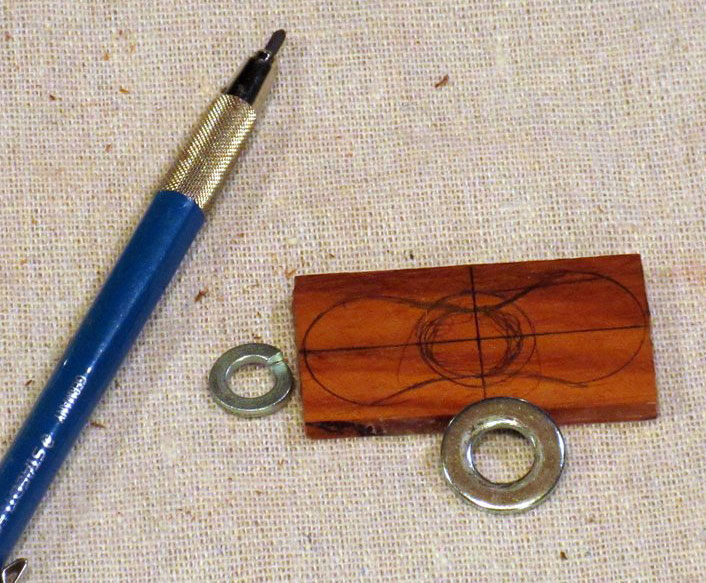
Making the Propeller
I made the propeller out of the same stock as the fins. I started with a 2 inch long piece, 1 inch wide, and 1/8 inch thick. I used a couple of small washers to draw the propeller shape.

|
|
Figure 39 - Laying out the propeller
|
I cut out the propeller on a bandsaw with a 1/16" blade.

|
|
Figure 40 - The bandsaw is used to cut the propeller
|
Then I used a disk sander to refine the shape.

|
|
Figure 41 - Shaping the propeller on a disk sander
|
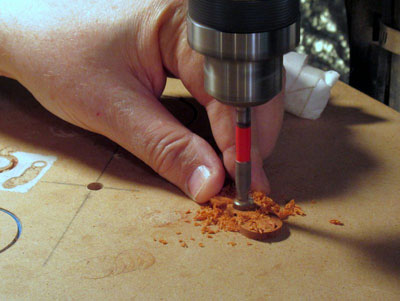
The drill press is used to bore the center hole, using a 3/8 inch bit.
|
|
Figure 42 - Completing the propeller
|
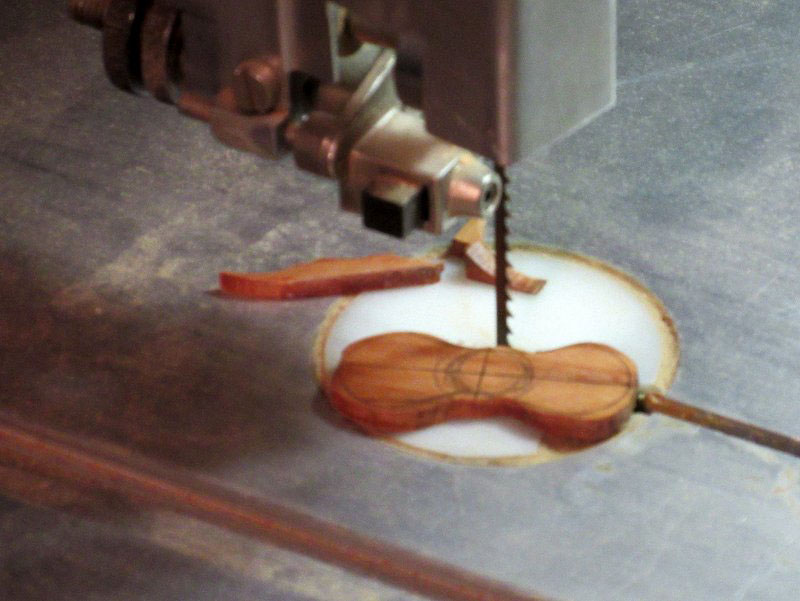
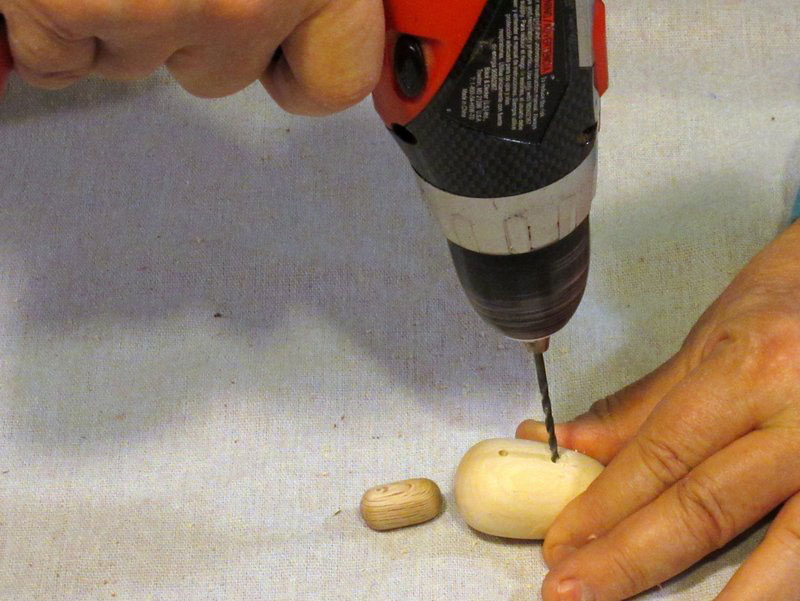
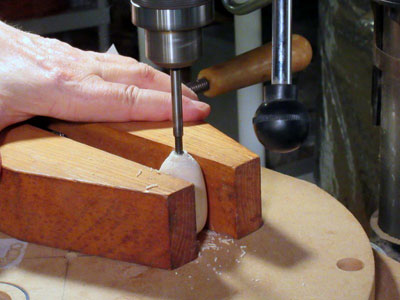
To attach the propeller to the lift envelope (using the previously turned propeller axle), I drilled a hole at the back of the lift envelope.
|
Figure 43 - Drilling a hole in the lift envelope
for the propeller axle
|
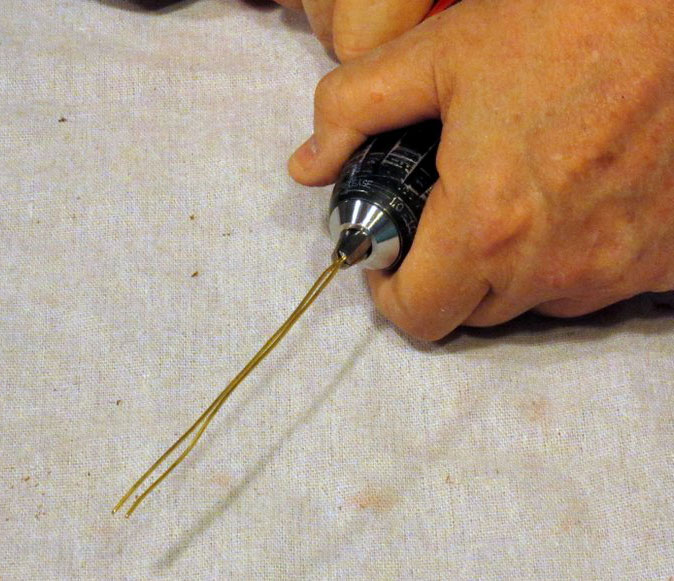
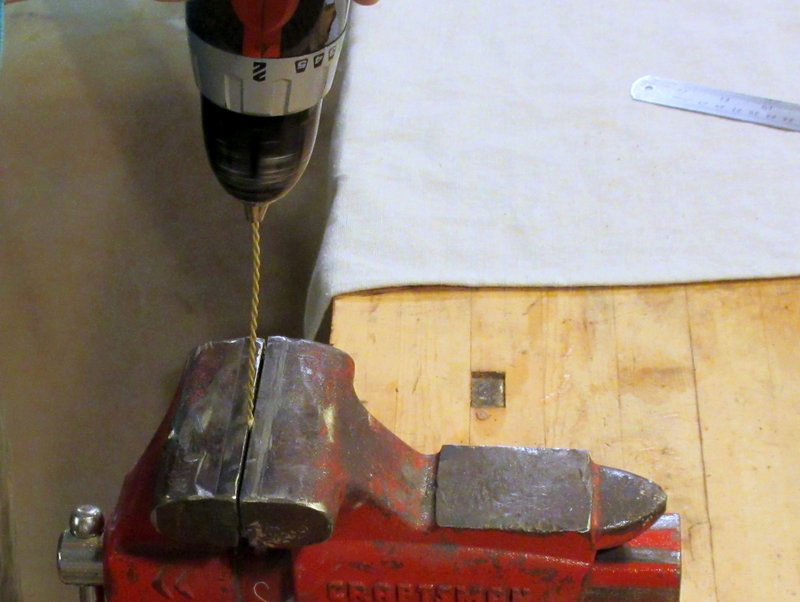
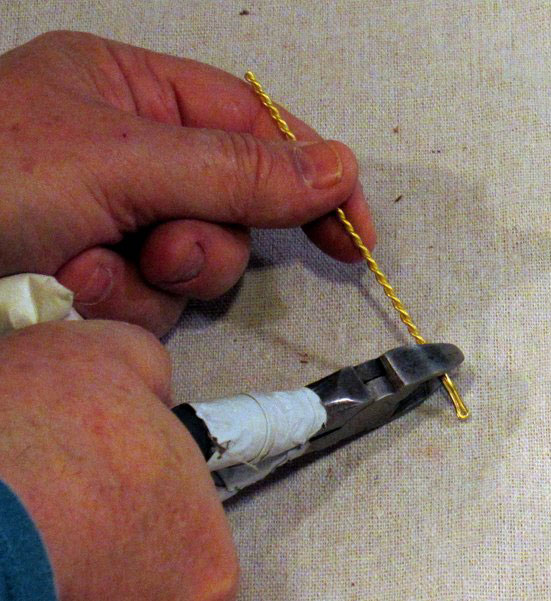
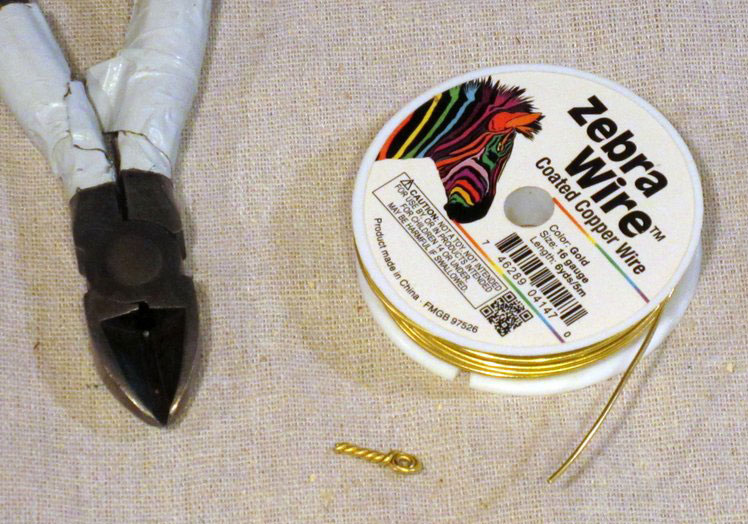
Making the Brass Struts for the Gondola Attachment
The control gondola hangs below the lift envelope with, in my case, some massive brass struts. I used two 4-inch pieces of 16 gauge brass-colored craft wire to make the struts. I cut the 2 pieces to length, affixed both in the chuck of an electric drill, clamped the other end of the wires in a vise, and ran the drill to twist the two pieces tightly together. It worked great!
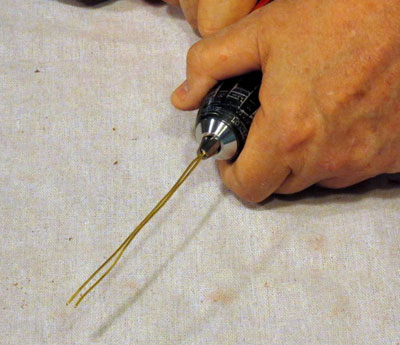
|
|
Figure 44 - Preparing to twist the wire
|

|
|
Figure 45 - Twisting the wire with the drill
|

|
|
Figure 46 - Cutting the gondola struts to length
|
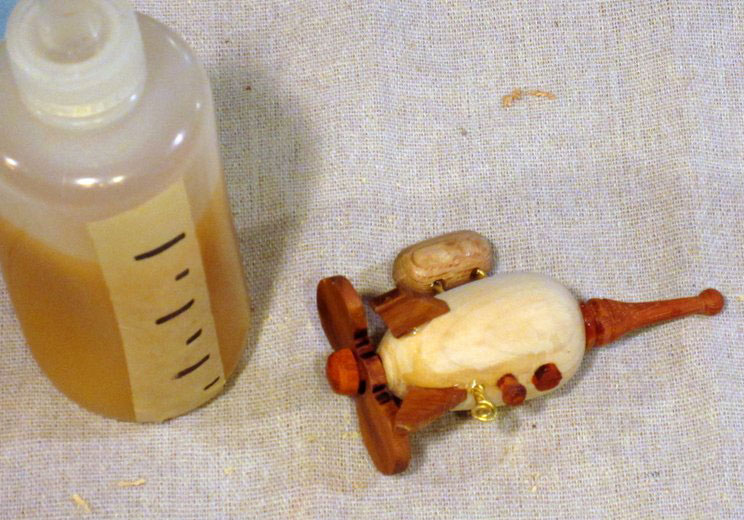
Assembly!
The wooden pieces are all turned or cut. The wire pieces are formed. It's time to put everything together.
|
|
Figure 47 - The wooden parts of the steampunk dirigible
|
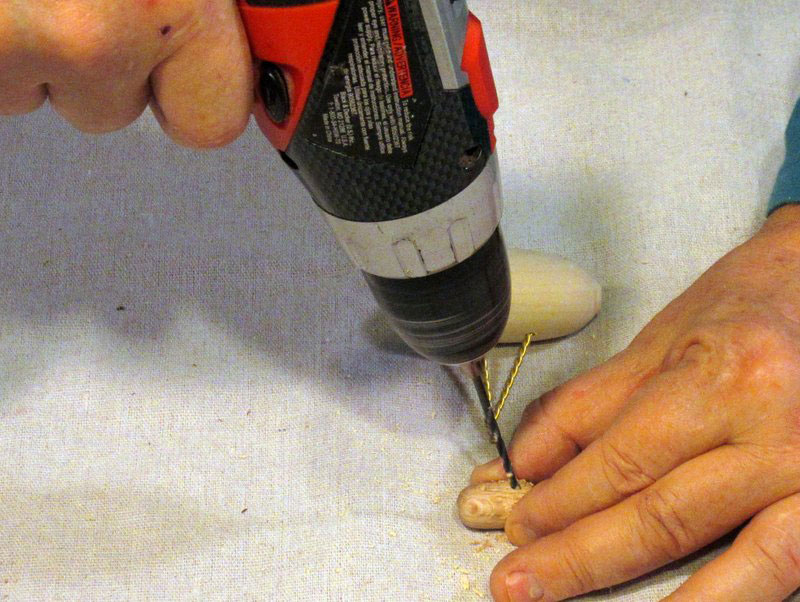
Both the lift envelope and the gondola need two holes, one for each of the attaching struts. I marked those freehand, and drilled the holes freehand, angling the holes slightly toward each other.
|
Figure 48 - Marking the location of the strut attachment
to the lift envelope
|

|
Figure 49 - Drilling the holes in the lift envelope
for the struts
|

|
|
Figure 50 - Drilling the holes on the gondola
|
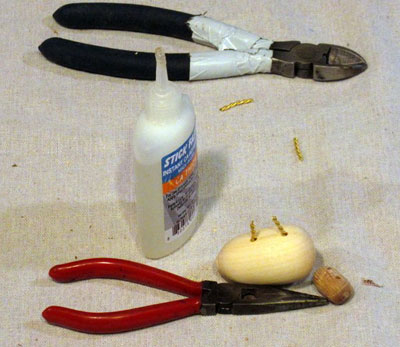
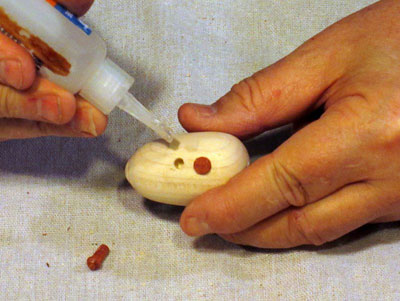
I glued in the struts to the lift envelope first, using
Thick CA Glue. After they were set, I trimmed the length to about 1/2 inch, and glued each strut into the appropriate hole in the gondola.
|
|
Figure 51 - The lift envelope gets struts
|
|
|
Figure 52 - Then the gondola is glued onto the struts
|
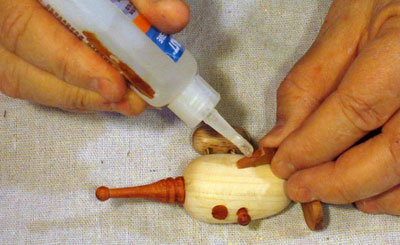
The lift envelope also gets the smokestack (that extra red plug you see is an oxygen ventilation shaft for the steam engine…it covers a hole I accidentally drilled in the wrong place).
|
|
Figure 53 - Gluing the smokestack into the lift envelope
|
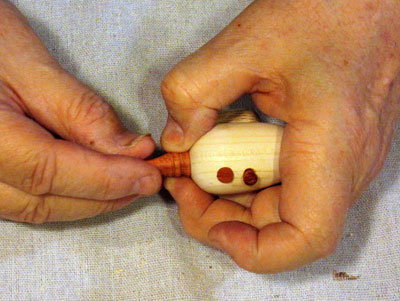
The propeller must be attached to the lift envelope also, via the propeller axle. I slipped the propeller onto the axle, applied some CA Glue to the hole in the lift envelope, and pushed the axle into the hole.
|
|
Figure 54 - The propeller and its axle
|

|
|
Figure 55 - Gluing the propeller and axle in place
|
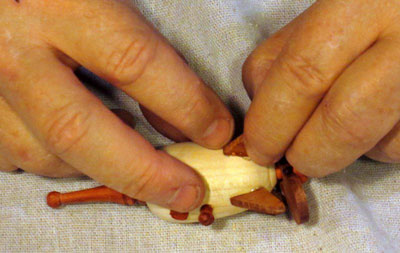
I attached the nose cone onto the front of the lift envelope with CA Glue. I applied the glue into the slight dish that I had turned into the nose cone's base, then held it in place for 10 to 15 seconds until the glue set.
|
|
Figure 56 - Gluing the nose cone onto the lift envelope
|
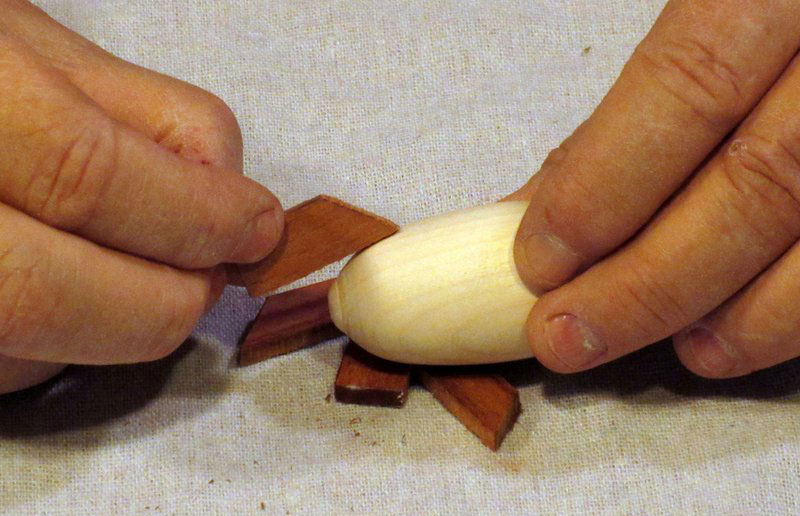
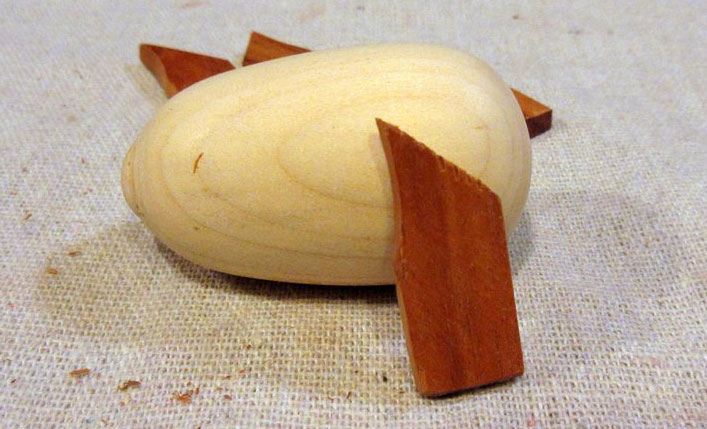
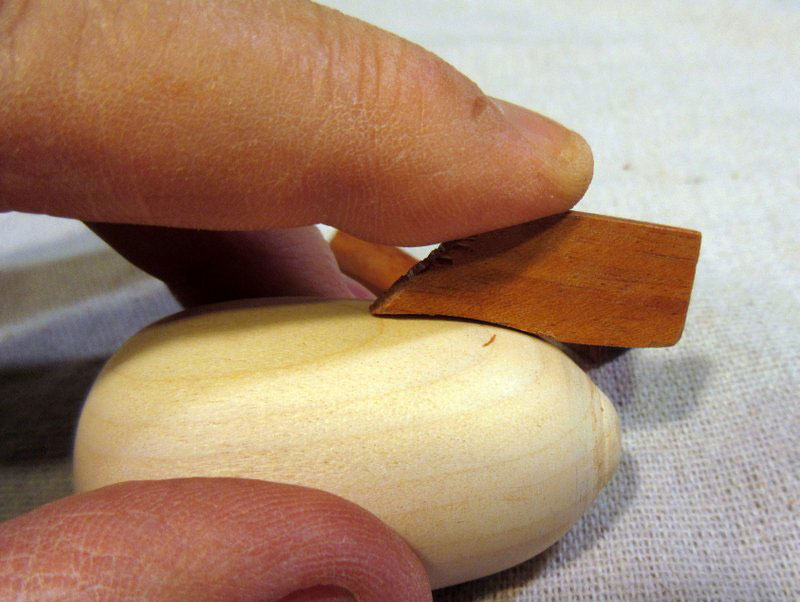
I glued the rudders and elevators in place on the lift body, applying CA Glue to the edge of the fins and holding them in place long enough to set. Positioning them just right was tricky, mainly because my fingers were in the way of my eyes, something I doubt the real steampunk engineers had to deal with.
|
|
Figure 57 - Preparing to glue on a rudder
|
|
|
Figure 58 - Gluing on an elevator
|
One last step…I formed a hanger loop from the brass-colored craft wire I had used for the struts. It is only 3/8 of an inch long, with a small eye at one end.

|
|
Figure 59 - The hanging loop for the ornament
|
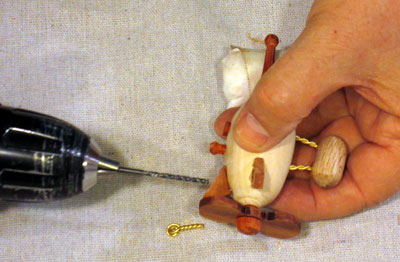
|
|
Figure 60 - Drilling the hole for the hanger loop
|
With the addition of the hanger loop, the only thing left to do was a little more sanding (a real challenge with all of the little pieces glued in place) and applying a coat of
Friction Polish
(without the friction).
|
|
Figure 61 - Finishing the dirigible
|
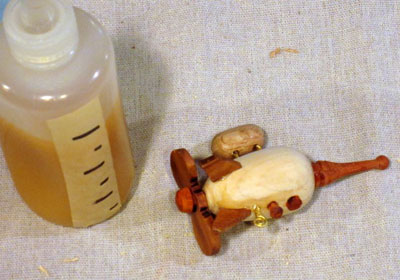
Finished! Well, almost…
|
|
Figure 62 - The (almost) finished Steampunk Flyer
|
That nose cone seems a little overpowering. It's as long as the entire lift envelope, so I had a word with the design engineer. We submitted an engineering change and whacked off most of the nose.

|
|
Figure 63 - The Steampunk Flyer with a snub nose
|
If you decide to try this yourself…
Bear in mind that I am a trained steampunk professional, having read at least a half dozen sci-fi steampunk books in the last year or so. And I've even done some woodturning before as well. I can tell you, this is not a simple project.
However, I've seen your resume, and I think it's within your reach. Here are a few suggestions, based on the mistakes I made along the way (Ha! I didn't show pictures of that, you know).
-
Finish each turned piece while it's still on the lathe, and can be friction-polished. I got a fairly lousy finish because I decided to postpone the finishing until all of the assembly work was done.
-
Make it bigger. The difficulty in making this is not in the various components (they are all simple shapes, easy to turn or saw out). However, the small size I picked, while ideal for a Christmas ornament, makes everything somewhat of a challenge. Although a larger size, say 4 inches long overall rather than 3, will add some weight to the ornament, it will make it easier to shape and assemble the parts.
-
Before removing the lift envelope from the lathe, drill a 1/4 inch hole all the way through, and use that hole to mount the propeller axle and the nose cone (adding a tenon to the nose cone, of course). The nose cone in particular was difficult to hold in the right place while the glue set…it wanted to slide all over the place.
-
Use some small pins (finishing nails with the heads cut off) to attach the rudders and elevators to the lift envelope. Holding those pieces in the exact right place was difficult as well, and the resulting joint was not particularly strong.
-
Be aware that this is not a toy
, and children should not be allowed to play with it. There are too many pieces that could detach and thereby be a choking hazard.
In conclusion, I found it also helped to wear heavy flight goggles and a leather flying helmet while making the steampunk dirigible. Kind of gets you in the proper steampunk spirit, you know!
Merry Christmas and a Happy Woodturning Year!
If you have any questions you can email Rick at
rickandcathymorris@gmail.com