Click on any picture to see a larger version.
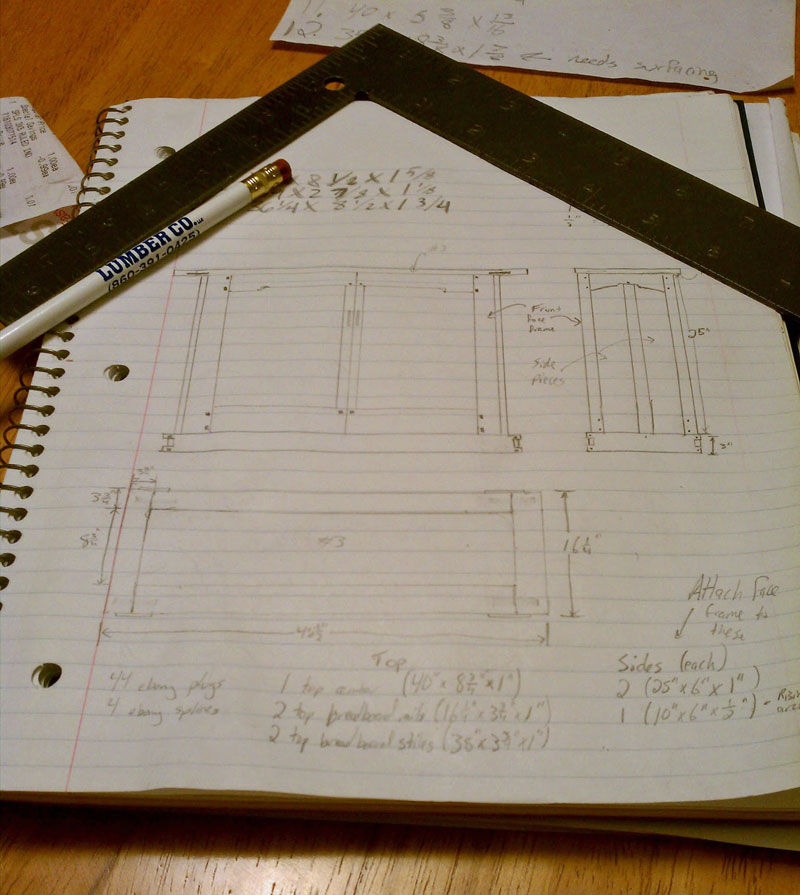
It began with a sketch...
Well actually…It began with a lot of Google image searches, but eventually it turned into a sketch.
When I started this project, it was initially to replace our TV stand from Target with something classy, timeless, and most importantly made by me. I gravitated to the Greene and Greene style after discovering it via Marc Spagnuolo and
Darrell Peart's great work
. Once I saw
Darrell's Aurora Media Cabinet
, I knew I had to try to build something like it.
The problem with that was this would be my first big furniture project. I had never done something with this level of detail, in this fine of material, or with this much joinery. It was going to take a very long time, but as David Farragut said at the Battle of Mobile Bay, "damn the torpedoes, full speed ahead!" So I sketched out my version of Darrell's cabinet and went off to buy lumber for this epic project.
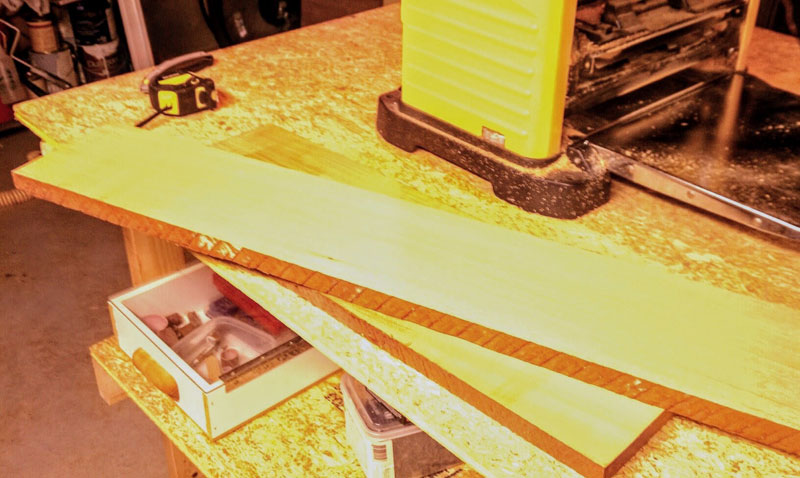
Just plane board
I went down to my local lumber yard to procure the stock for my project, not knowing half of what I needed to articulate clearly what I needed to buy. Thankfully, the staff at Connecticut River Lumber Company were very patient with me and also happened to have a pile of cheap offcuts from some yacht interiors. Score! So off I went, with my 5 dollar/foot pile of rough "mahogany" in hand to see what I could make. I discovered after planing the boards up that I had a very interesting mix of species underneath the veil of their rough exterior: Spanish Cedar (smelled great when you cut it!), Bloodwood, and Brazilian Cherry.
This was the first board I had ever planed, on the first fine furniture project I had ever started. Clearly, I was in over my head as I was soon to find out.
After planing up the Spanish Cedar, I got to the Bloodwood. Unfortunately, it was too wide for my power planer, so I'd have to go by hand. Having never planed anything by hand before, I bought a second hand Stanley Handyman (first mistake) and went at it. By Jove, this stuff is dense and full of silica that quickly dulls your tools. Add in a thorough ignorance of good sharpening practice at the time and I was in a world of tearout and expletives. I finally broke down and asked a helpful woodworking forum member for some hands on help with proper sharpening and hand planing technique and things started to go better. Even with that, I knew I still needed more outside help.
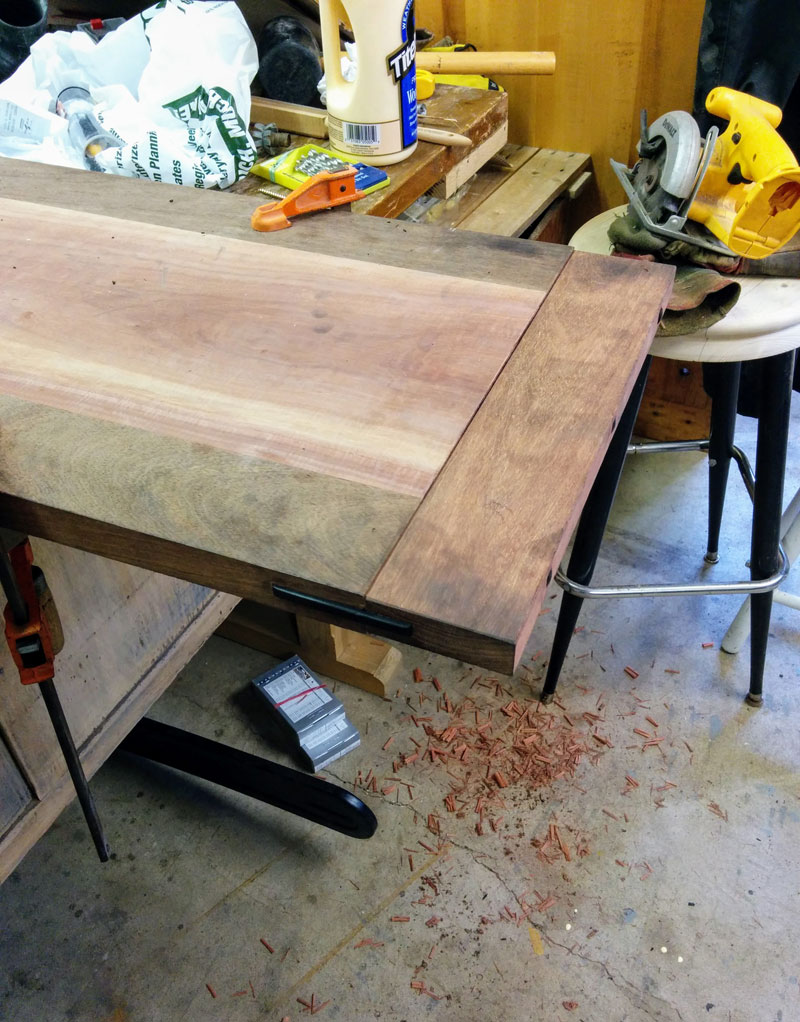
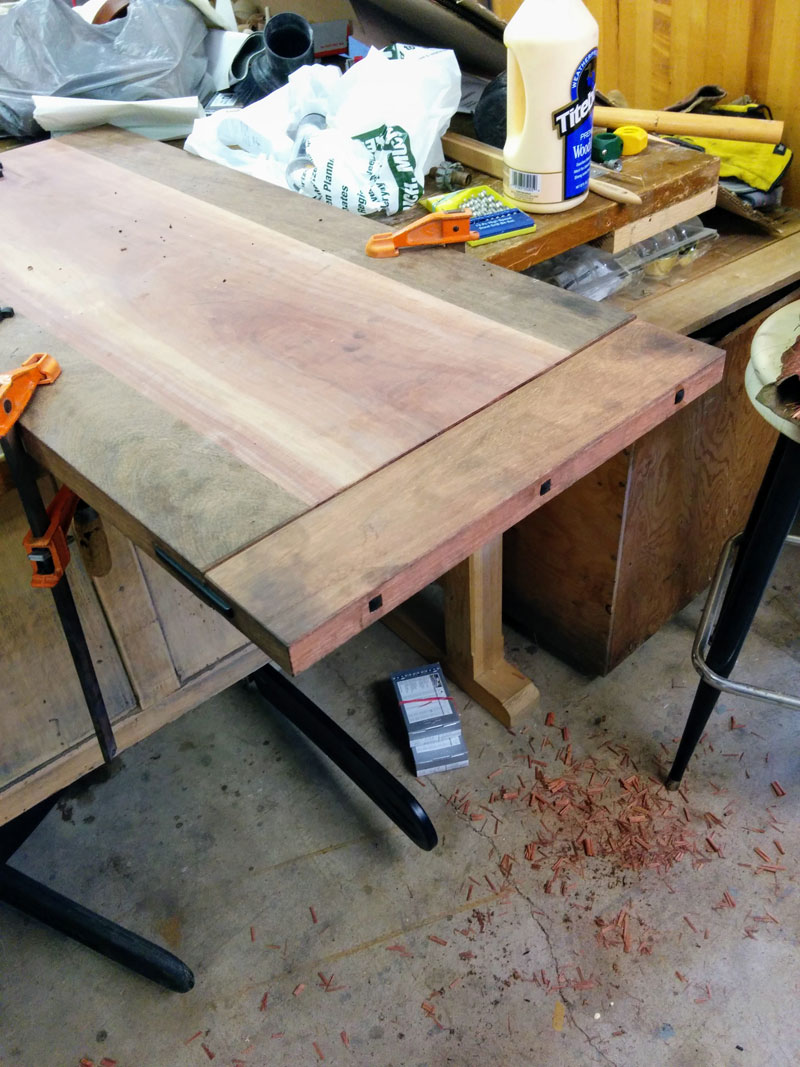
God bless Ken and his drum sander
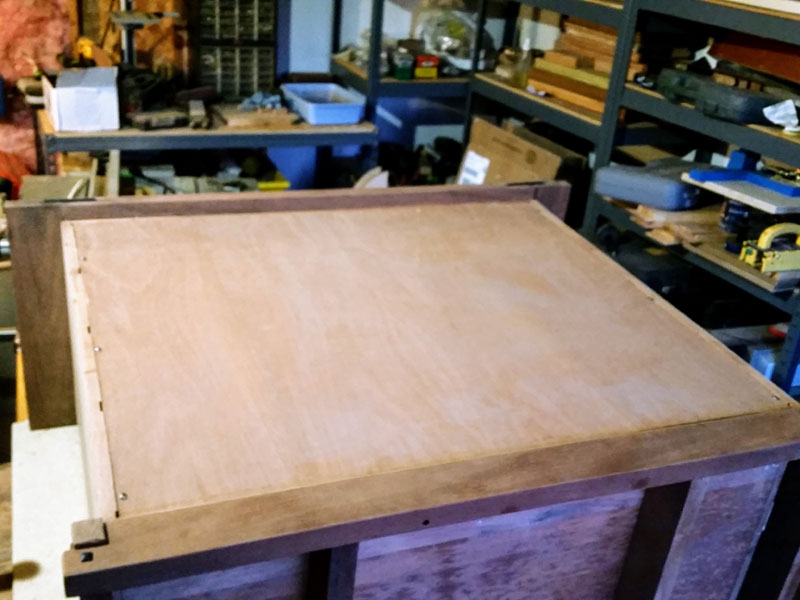
I came across Ken Rowe, who runs a small woodworking school from his house in Durham, CT after admitting I could use some help getting this project across the goal line. My wife gave me some lessons with him as a Christmas present (thanks Tracy!) to get started, and he really helped me get this project going. We first tackled the troublesome Bloodwood that I wanted to use for the top of the cabinet with his drum sander. Adding the Brazilian Cherry around it completed the beautiful breadboard ended top.
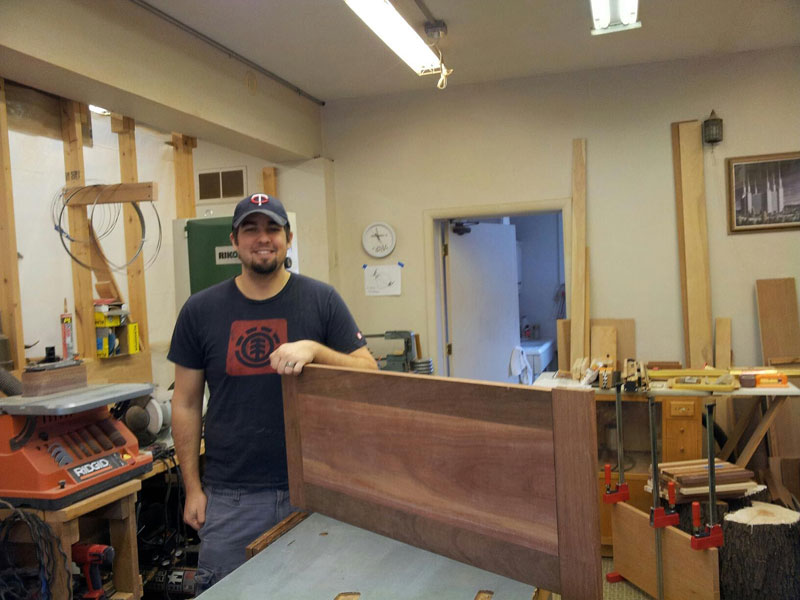
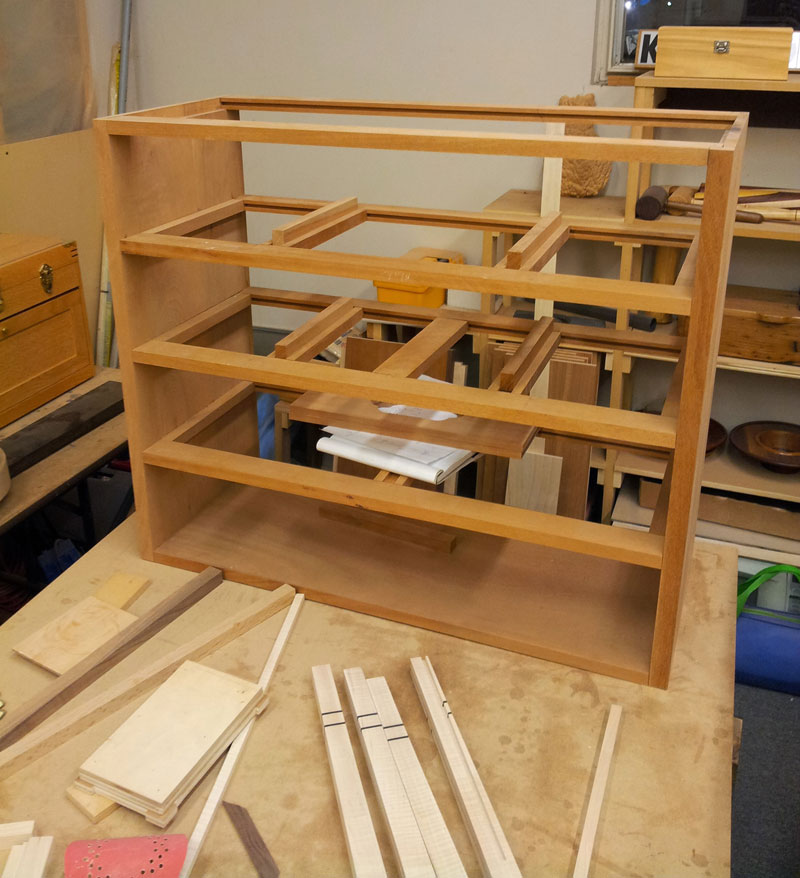
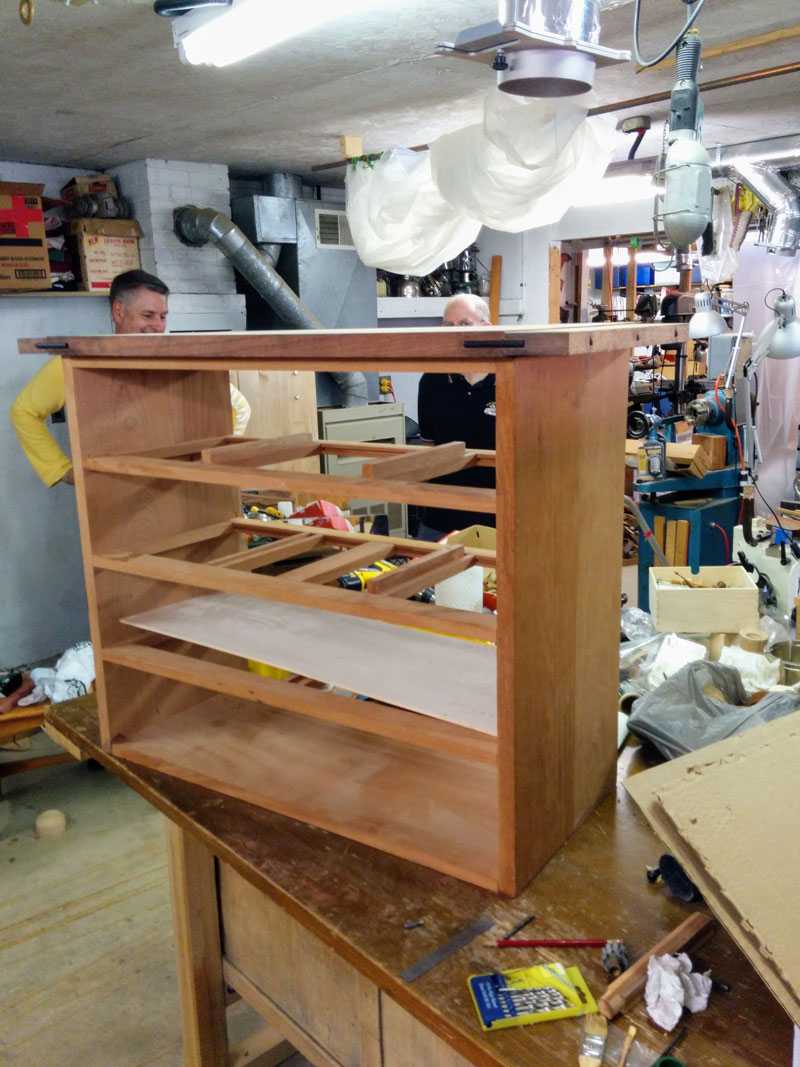
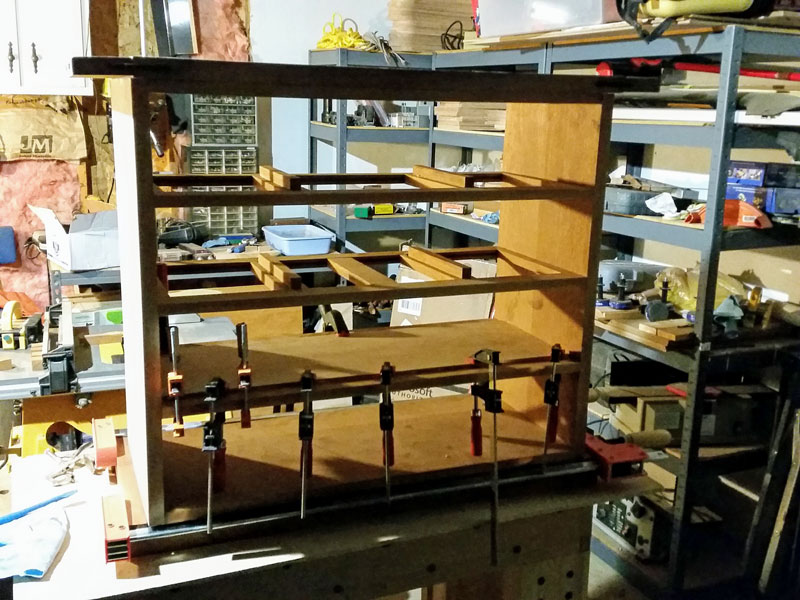
After getting the top together aside from the ebony accents, we went on to assemble the main carcass out of the Spanish Cedar (Ken was a great help in identifying the wood species I actually had). After a few weekends, we were making progress. Along the way we decided the doors would be too much extra work and transitioned the design to use drawers instead. Once that was done, making the web framed carcass was quick work!
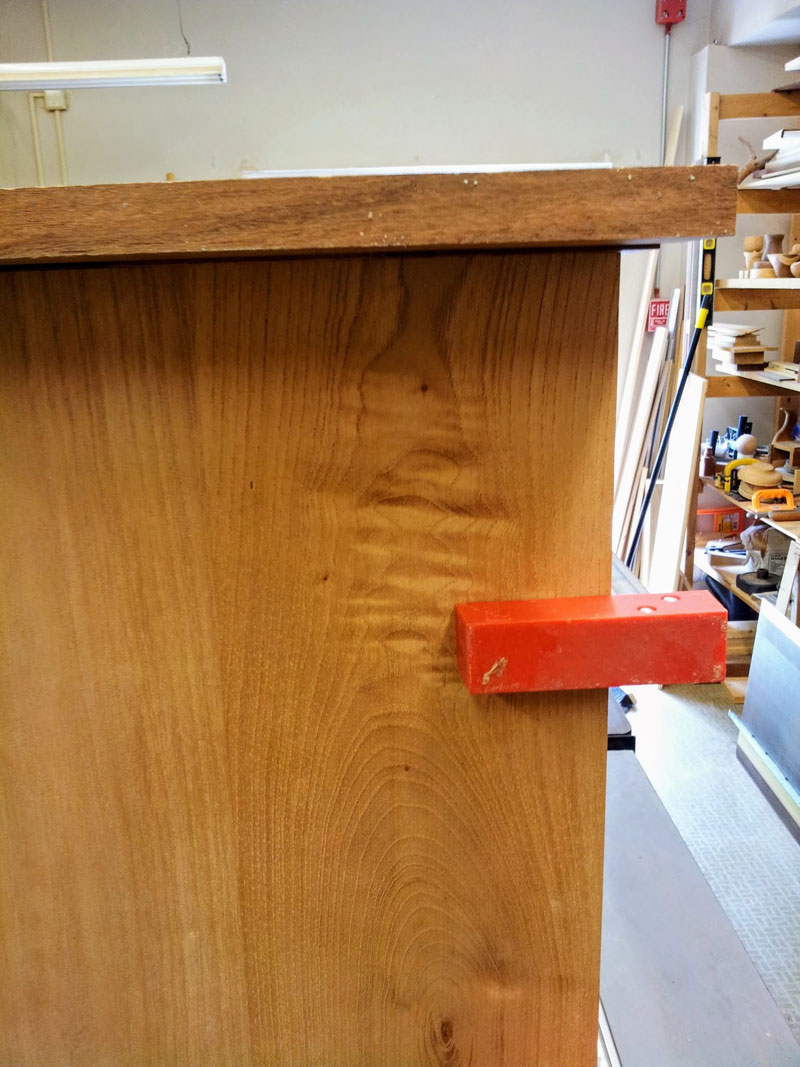
I really love how the figure of the Spanish Cedar is accented on the sides of the cabinet. It gets even better when finish is applied!
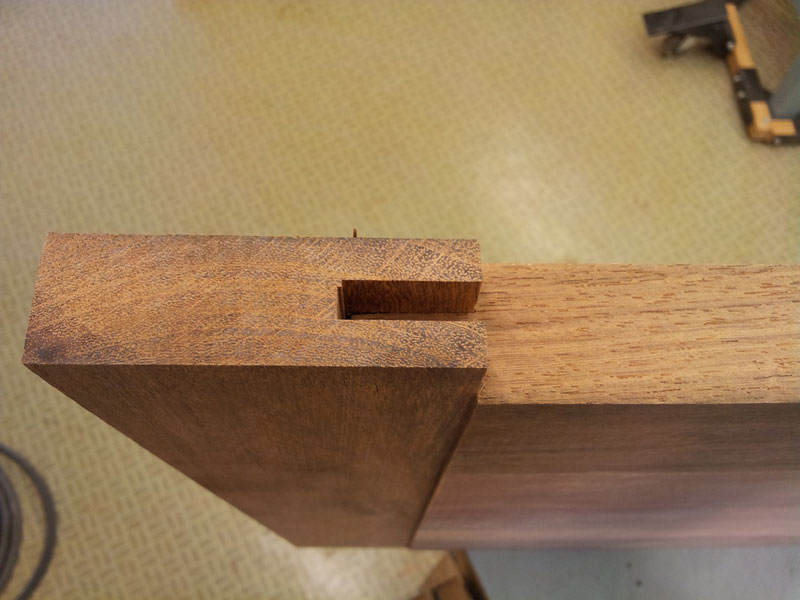
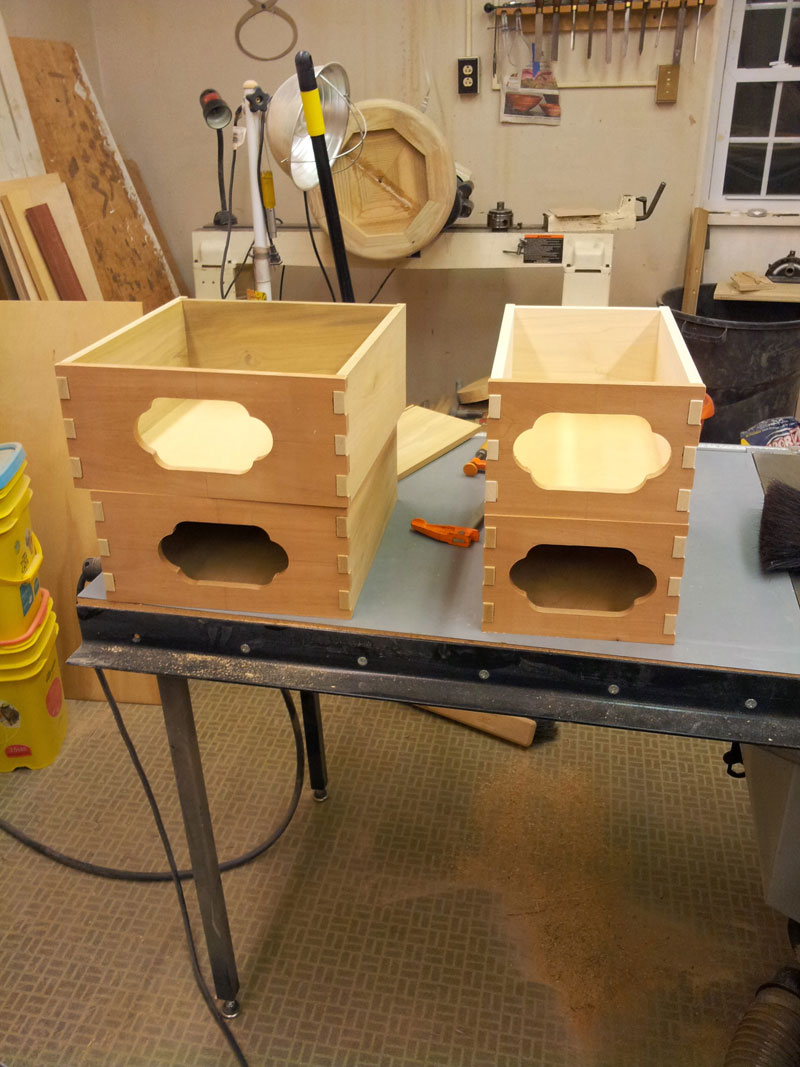
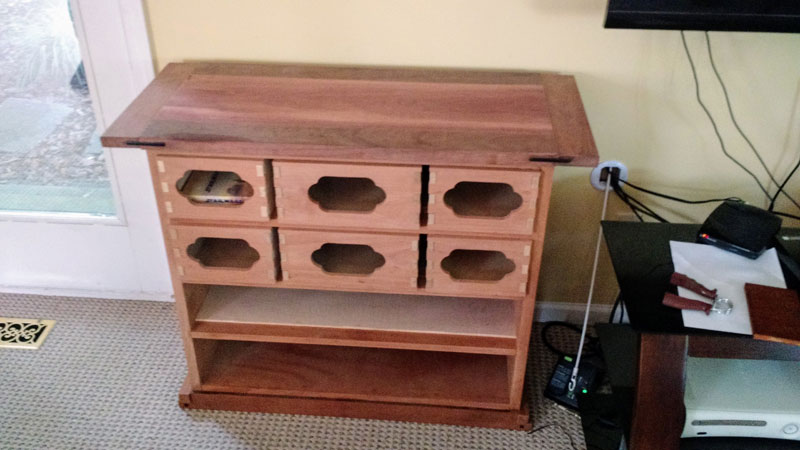
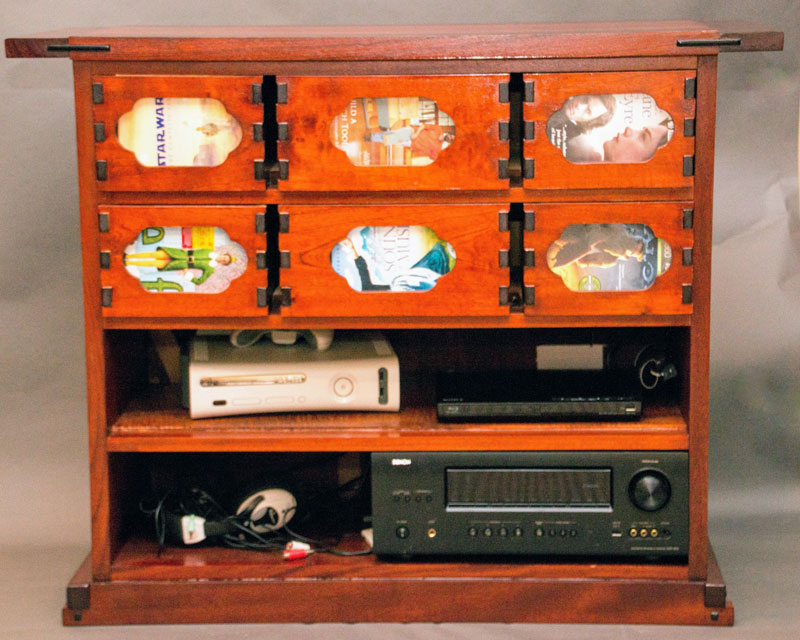
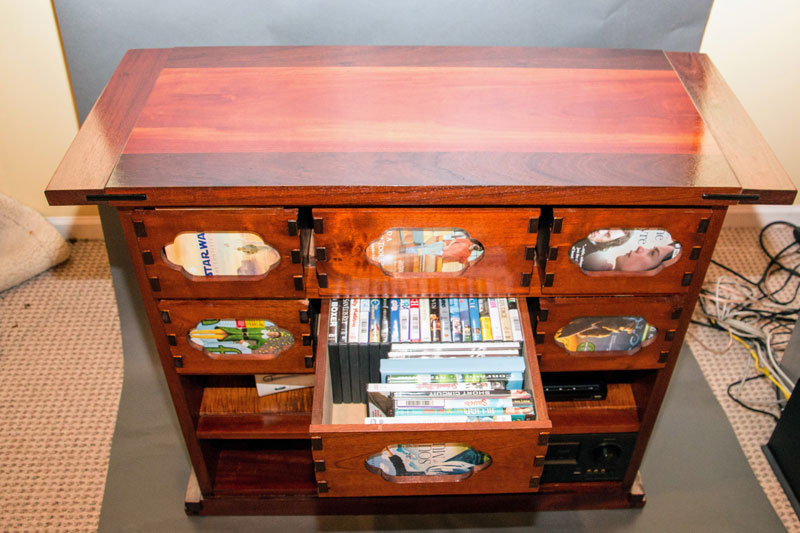
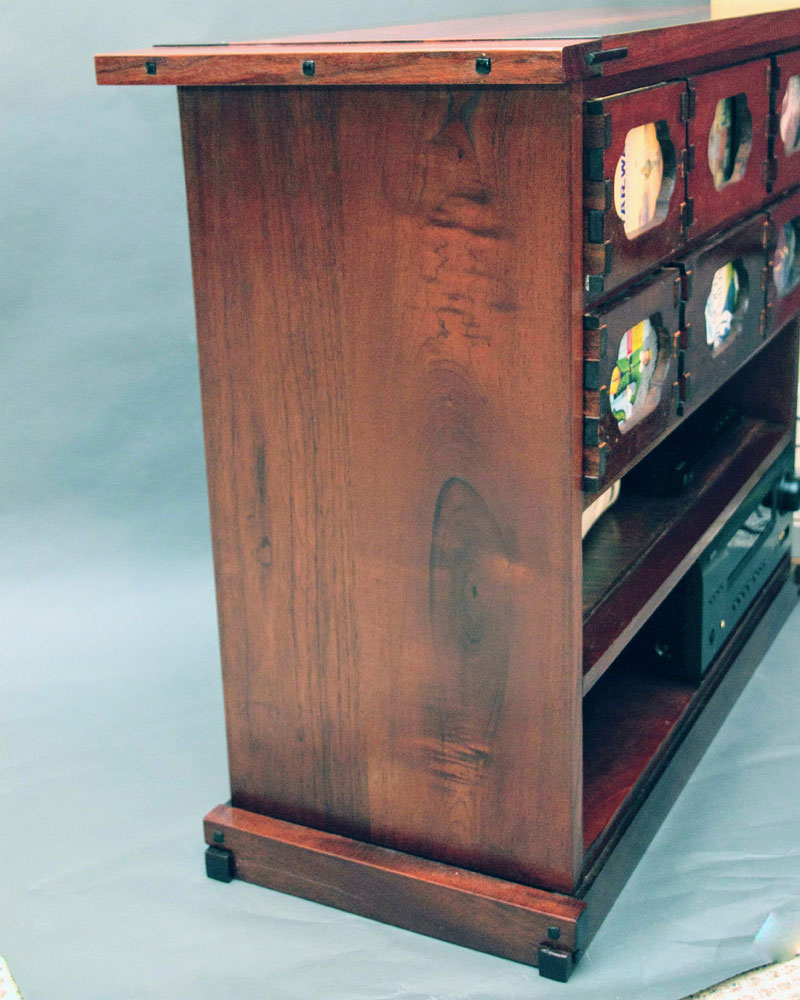
After the main carcass was complete, it was onto the drawers. I wanted to make these a big Greene and Greene statement, so we went with finger joints for the drawer joinery. Each one was made proud of the drawer front and rounded over for that classic Greene and Greene detail. The fronts also received a tsuba shaped cutout to complete the look. I had intended to put glass or a chalkboard into that recess but ended up just keeping it as is to show DVD covers through the opening.
Moving to Indiana
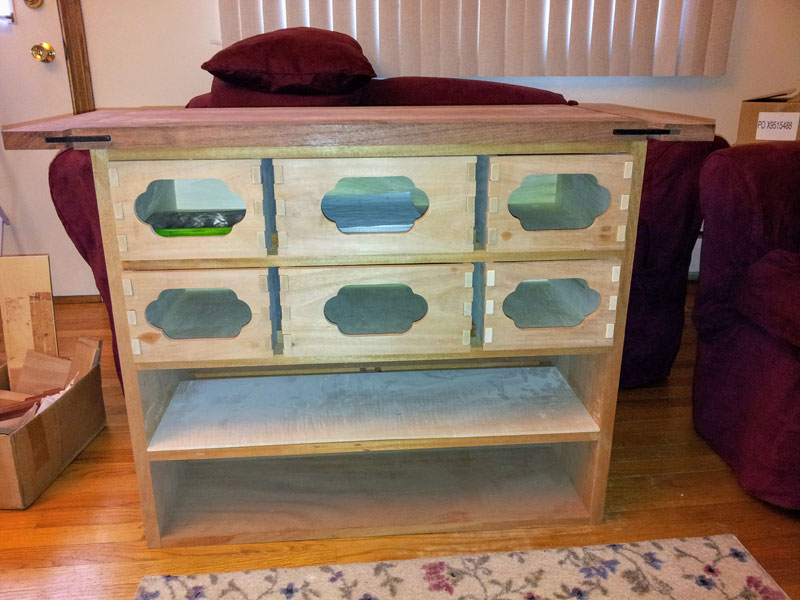
This project took so long I ended up moving houses twice before finishing it (did I mention my wife has the patience of a Saint?). Here's the progress that Ken and I made before the move from Connecticut to Indiana: web frame carcass, top, and drawers mostly complete. Still to come were the ebony accents, base structure, adding the back, and finishing. Lots to do!
Shortly after the move, a good family friend let me use his shop for a couple days to finish up the accents for the top of the table (sorry about the mess, Greg!) and cut the joinery for the cabinet base.
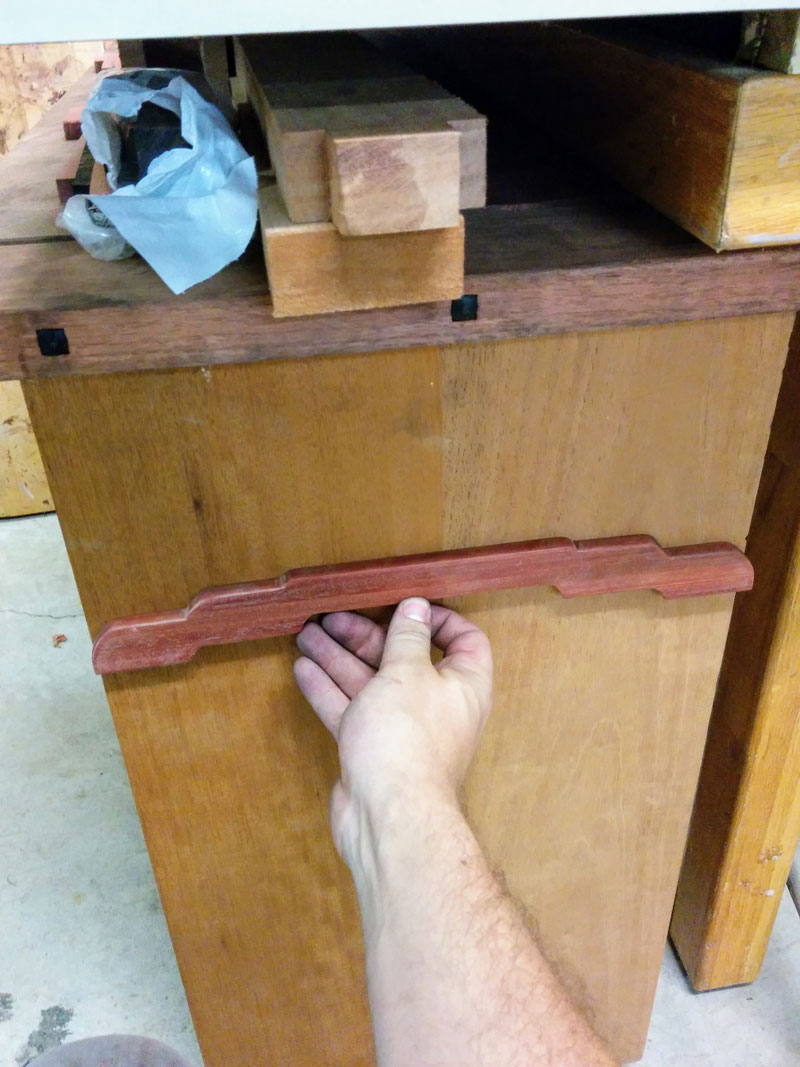
Ultimately, I didn't use this really cool Red Heart detail I had made for the side of the cabinet. I think it was just too much detail and made it too busy. Do you agree?
Home stretch
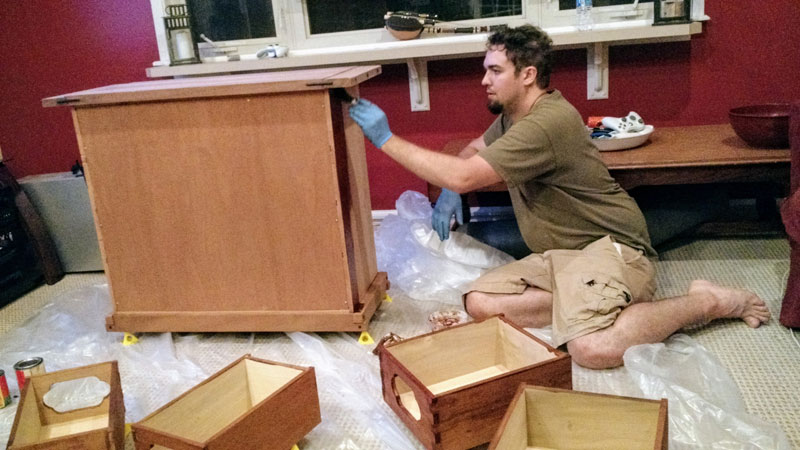
I got the cabinet back home and after unpacking our boxes, I finally got back to the project. Over the next few weeks I finished up the base of the cabinet, more ebony plugs for that, glued in the curly Maple shelf, and attached the back to the carcass. It was ready for some finish!
Then the cabinet got moved inside to make sure everything was as it needed to be before I put some finish on it. At this point I was ready for it to be done, and I'm sure my wife agreed. Below you can see it next to the TV stand it replaces. I think it's a good upgrade, even if it did take 4 years to get there...
Many, many coats of Waterlox later…
After the in-home visual test, it was time to sand everything one more time and get ready for finish! I really like
Waterlox
for that "dipped in honey" look, so I went with that for a topcoat over Darrell Peart's dye mixture to give it the Greene and Greene look.
From Darrell's post
:
General Finishes
dye stains come in several colors and can be infinitely mixed to achieve the desired results. I found that mixing 7 parts of their Orange dye stain with 4 parts of their Medium Brown Dye Stain produces a beautiful brown with orange overtones.
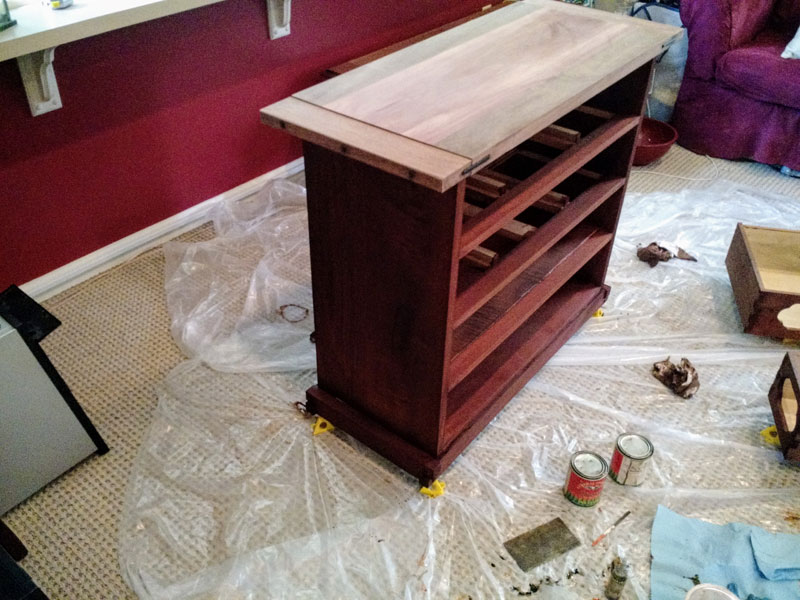
Finally, the moment we've all been waiting for: the finish! I took over the living room for a few days since it was too cold in the shop for Waterlox to cure properly. First, the dye!
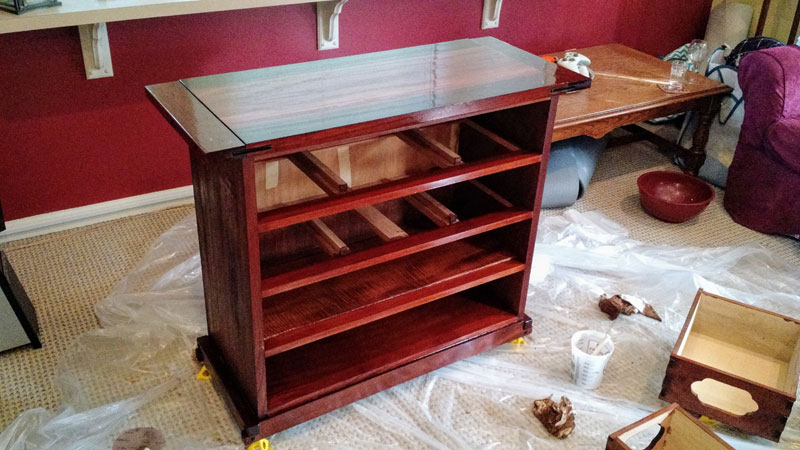
After the dye and a quick sanding, the Waterlox marathon began.
I knew after the first coat that this would be just what I was looking for! I looked forward each day to applying the next coat and making it that much better. I think the results speak for themselves!
Finally!
After 200+ hours of work and 4 years on and off of this project, it was finally finished and ready for many years of service in our home. I love looking at it every time I go into the living room and showing it off to anyone who comes over to our house. Thanks to everyone who helped along the way and inspired me to take on this crazy ambitious project!
You can email Dan at
dzehner2@gmail.com
. You can visit his Facebook page at
Zehner Woodworking
.
Return to the
Wood News Online
front page
|