
 by Steven D. Johnson
Racine, Wisconsin
(Page 2 of 3)
Previous Page
1
2
3
Next Page
A Chorus Line of Legs
Click on any picture to see a larger version.
Sometimes with tables, we start with building the top. There is a sort of "instant
gratification" factor. The problem, of course, is that once the top is made, we are constrained to
build everything else to fit. For my new desk, bookcase, and credenza, I am starting with legs.
After the legs are completed mortises can be cut, then stretchers, braces, drawers, shelves, panels,
and other pieces can be individually fitted, and the tops can be made last.
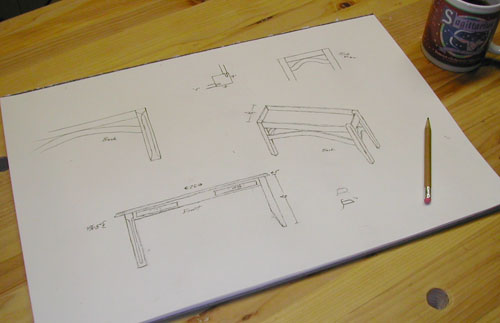
A couple of sketches and a few basic measurements are all that are guiding me. My "mental"
design calls for beefy cherry legs, maybe 3" X 3" or a smidge less. To build up leg stock to this
dimension, I started with 8/4 X 7+" stock. The first step was to hand plane the surface just enough
to knock off the high spots, clean up the surface, expose the grain, and allow a pencil mark to
show. For this I used a jack plane set to take a fairly aggressive cut, and made several passes at
roughly a 45-degree angle across the boards. Then I turned the boards end-for-end, and made a few
more passes. Pretty soon, things were starting to shape up, flatten out, and the grain was plainly
exposed. Planing both faces of seven boards, some as long as ten feet, took me only about two
hours. It would have taken less if I were not taking pictures and making video at the same
time.

|
|
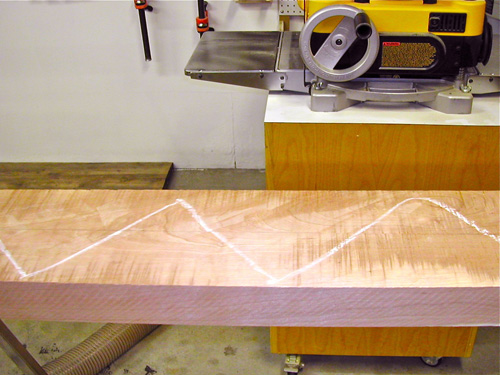
The next step was to mark any gross defects or areas to avoid, strike a pencil line down the
center of each board, and use chalk to mark the faces for re-matching later. My portable table saw
would be underpowered and scarily dangerous for ripping boards of this size, so I turned to the band
saw. With a 1/2"
Wood Slicer
blade
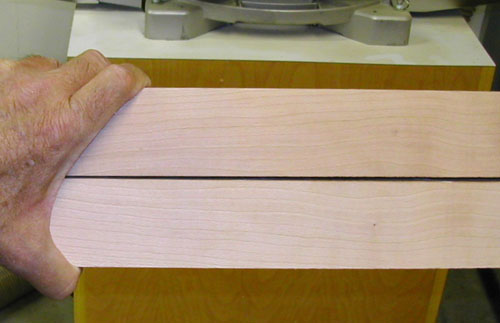
installed, a fence is really unnecessary. It was easy to "freehand" the cut, following
the penciled line. After ripping, I was left with fourteen boards, each measuring roughly 2" X 3-1/2" X 4".
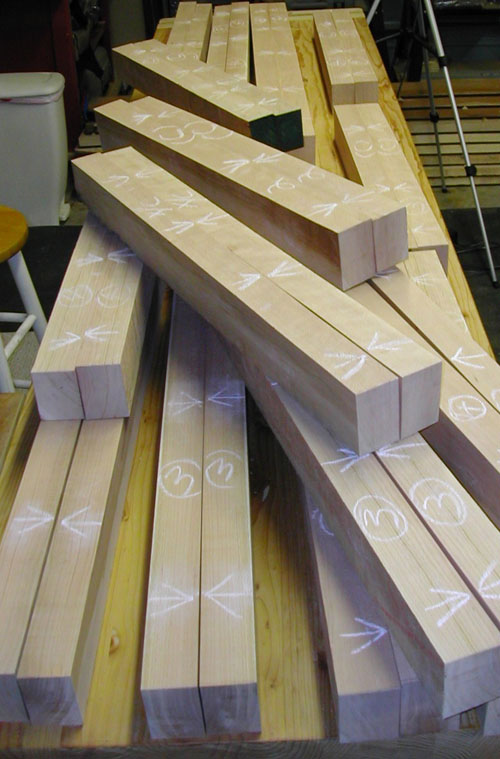
I went through a rather arduous and deliberative process of "mapping" out from which sections of
which boards each leg pair would be cut. My "plans" call for four legs each cut oversize to 30",
26", and 42" in length. I also wanted to have a "spare" leg in each length, too, for tests and
"mess-ups." That's a total of fifteen legs, about half the chorus line of the Rockettes.
As I was obsessing over grain patterns and marking lengths for my chorus line of legs, it
appeared obvious that all the day's planing and ripping had released a lot of internal tensions in
the wood, so I decided to let things "rest" for a couple of days. It is really critical that this
leg stock be stable.
After a couple of days of rest and reviewing the location of the cuts one more time for best
grain pattern and overall "look" of the wood, I cut the ripped pairs of wood to rough length.

With some 30 pieces of wood, it was critical (at least for me) to develop a strategy for staying
organized. I marked all the desk leg pairs with a circled "X" and used a "C" and "B" to mark the
legs for the credenza and bookcase. The faces of the boards were marked previously so that I could
re-match the rip cuts, and it was those partially-planed faces that I concentrated on next to
prepare for glue-up.

I used the jointer to achieve relatively flat surfaces on the previously planed sides and to
establish one straight adjacent edge. Finishing up with a jointer plane made the surfaces
"glue-ready." I then turned these faces toward one another (being sure to keep the orientation the
same and the grain lined up) and glued them together. Again, straight and stable is the key here,
so I slopped the glue on both faces pretty liberally and clamped them tight.
After I am sure the glue has set up solid, I will use the reference edge established earlier and
the jointer and then the thickness planer to arrive at square, symmetrical legs.
You can watch a short, 2-part video of the entire process, on the Highland Woodworking YouTube site.
To watch Part 1, click here and then click here for Part 2.
I am still trying to decide whether to taper the legs or leave them square and use a surface
device (cove, inlay, etc.) to achieve the appearance of a taper or "flow" with the arched
stretchers. That decision can be deferred for a while, since I will cut the mortises and make the
stretchers first anyway. If I decide to taper the legs, I can do that later.
For now I am going to set aside the leg stock for the bookcase and credenza, and concentrate on
the desk. My shop simply isn't large enough for three big projects at once, and my brain isn't
large enough to keep all the different measurements straight.
Next month follow along as I cut some mortises first and then the matching tenons (my preferred
way to work), but also as I cut some tenons first and then fit the mortises (a little trickier, but
sometimes necessary). With the straight and arched stretchers cut and fit, I can then start on the
internal components for drawer supports. We might even get far enough to start scoping out the
perfect boards for the top!
(Page 2 of 3)
Previous Page
1
2
3
Next Page
Return to
Wood News
front page

