Cutting Compound Tenons on the Tablesaw
by Jeff Fleisher
New Market, VA
It seems that every month there is another article in one of the popular woodworking magazines on building a tenoning jig for your shop. Each new jig has some new 'special' feature...T-slots, vertical clamps, x-y axis rotation around the center of the Earth and much more!! However, all these homemade shop jigs only cut straight tenons. What happens if you want to cut a compound angled tenon on the end of a board? There are a few commercial jigs that will cut a compound angle for between $500 and $1000 and a few shop built router jigs that will cut an angled tenon using a router. This article presents an extremely easy way to build a tenon jig to cut compound angled tenons on your table saw.
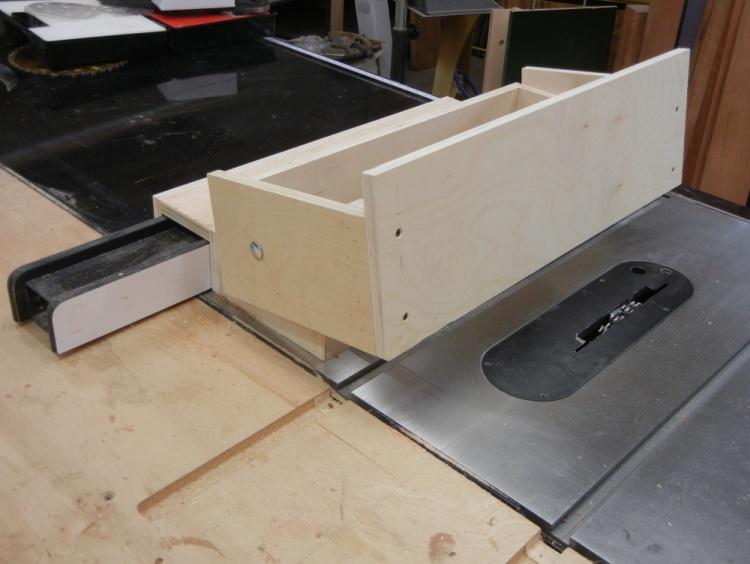
The jig shown in the first two images is made out of 1/4" plywood, except for two small hardwood blocks that I'll explain later. The jig fits over the rip fence of your table saw and glides back and forth on top of the fence. The heart of the jig is a rotating face plate that will hold the part to be cut. The face plate can rotate up or down so that the first angle of the compound will sit flat on the surface of the table saw. The part can also be rotated back and forth along the surface of the face plate so that the cut along the second angle on the end of the board also sits flat on the table saw. This may sound confusing because it is hard to visualize a compound angle on the end of a board, but we'll work through this in a little bit.
As I said, the jig is made using 1/4" plywood or you can use MDF. All parts are glued and nailed or screwed together except for the face plate. Since a backer board is screwed to the face plate to help eliminate tear out, it is continually being moved around depending on the position of the part to be cut. The face plate will eventually need to be replaced because of all the screw holes. Therefore, I glued two hardwood blocks to the front inside edge of the rocking arms to hold the face plate. I just screw the face plate to the blocks and it can be removed and replaced at some point in the future. The rotating arms are held in place using two 3/8" x 2-1/2" carriage bolts, washers and wing nuts.
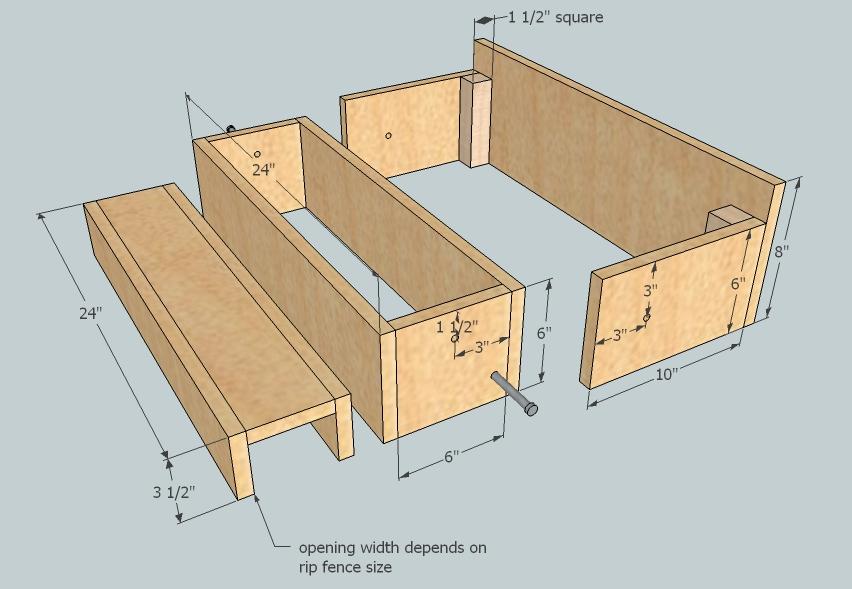
Here is a picture of a SketchUp drawing of the jig with dimensions. The size of the jig is very flexible and can be adjusted to fit any size table saw. The wooden tunnel that fits over the rip fence needs to be measured and cut to fit your particular rip fence. The SketchUp file is available if you send me an email at the address at the end of this article.

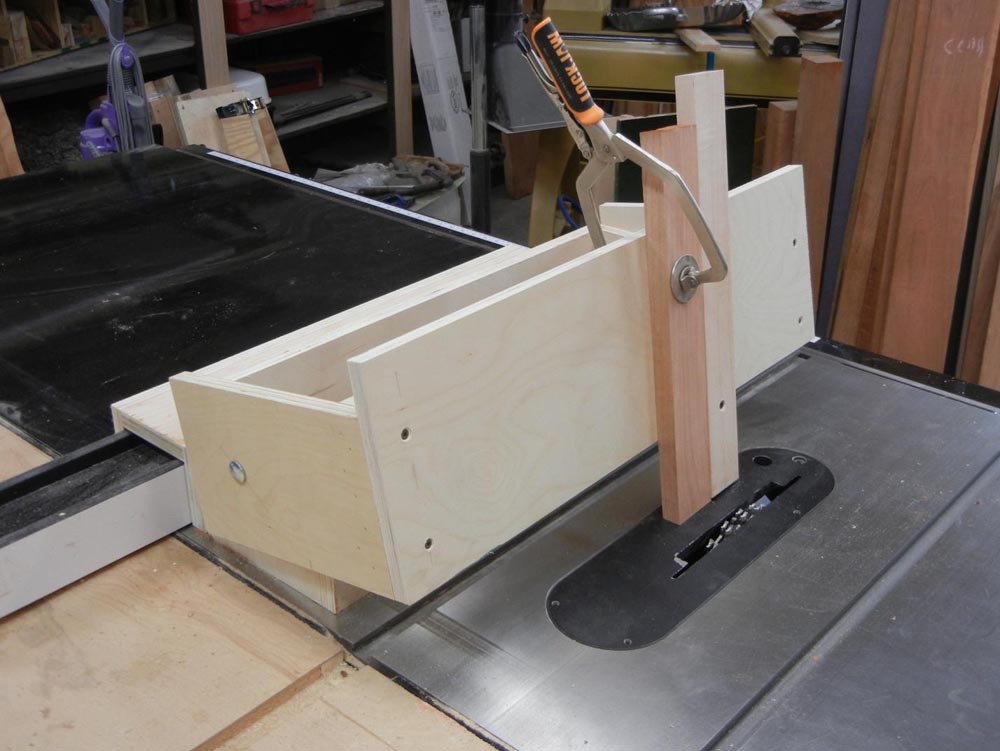
So, how does the jig work in practice? Here is a picture of the furniture part ready to be cut. The part could be a chair rail just below the seat where the seat is wider in the front than in the back and the seat slopes down from the front to the back. This will require a rail that uses a compound angled tenon.

You can see that the cherry rail is held flat against the face plate and held in place with a clamp. The bottom surface of the part is flush to the table saw surface. The face plate is rotated upwards to compensate for the first angle of the compound tenon and the piece is rotated backwards slightly to compensate for the second angle. The backer board is screwed in place so nothing moves during the cut and to prevent tear out on the back of the cherry rail as the cut is made.
Okay, let us see how we got to this point. The first step in cutting a compound angle tenon is to create a compound angle on the end of the board that corresponds to your design needs. In this picture, the table saw blade is tilted to match the first required angle. The miter gauge is also angled to match the required second angle.

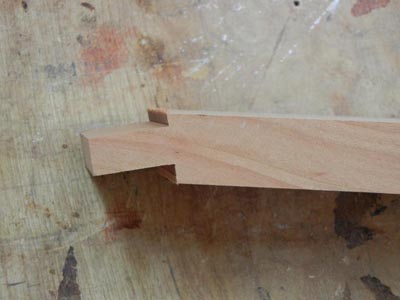
After the cut is made, the end of the board looks like this.
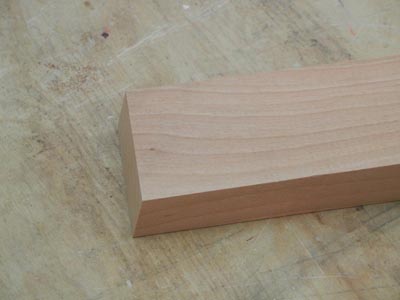
You can see that the end of the board has about a 10 degree bevel and about a 5 degree angle off from 90 degrees square. Now we need to lay out our tenon. Since this board is 3/4" thick, let's say we want a tenon that is 3/8" thick and an inch long.
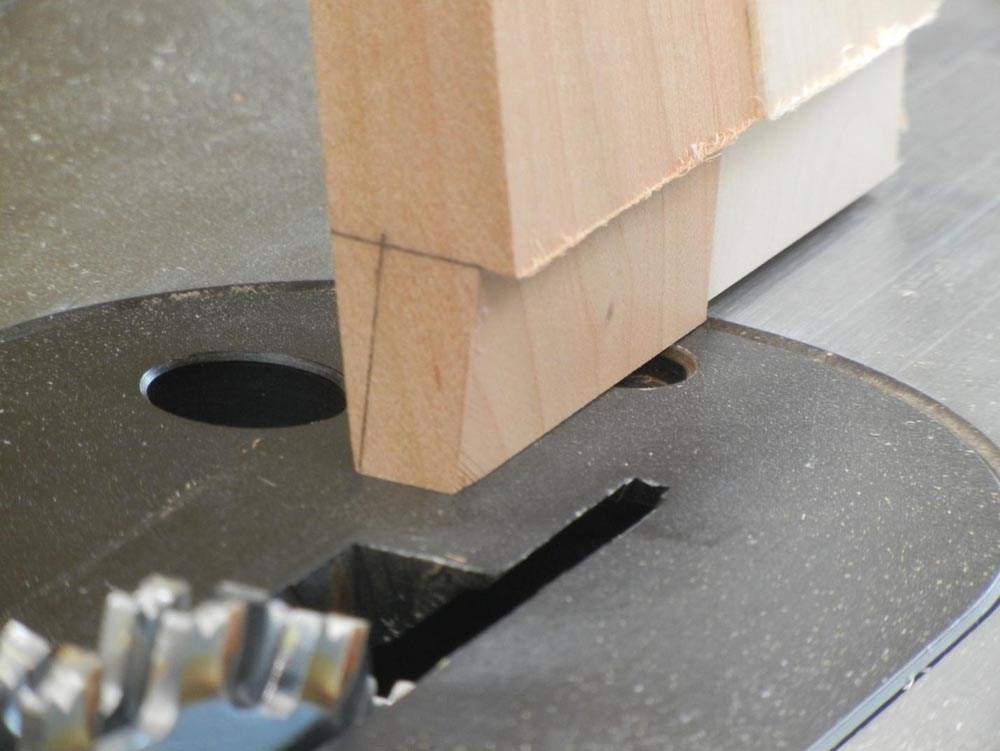
Here is a picture of the board with the tenon laid out and mounted in the jig. The jig is holding the board so the bottom edge is flush to the table saw table top and the lines showing the edges of the tenon are perpendicular to the table and parallel to the saw blade.
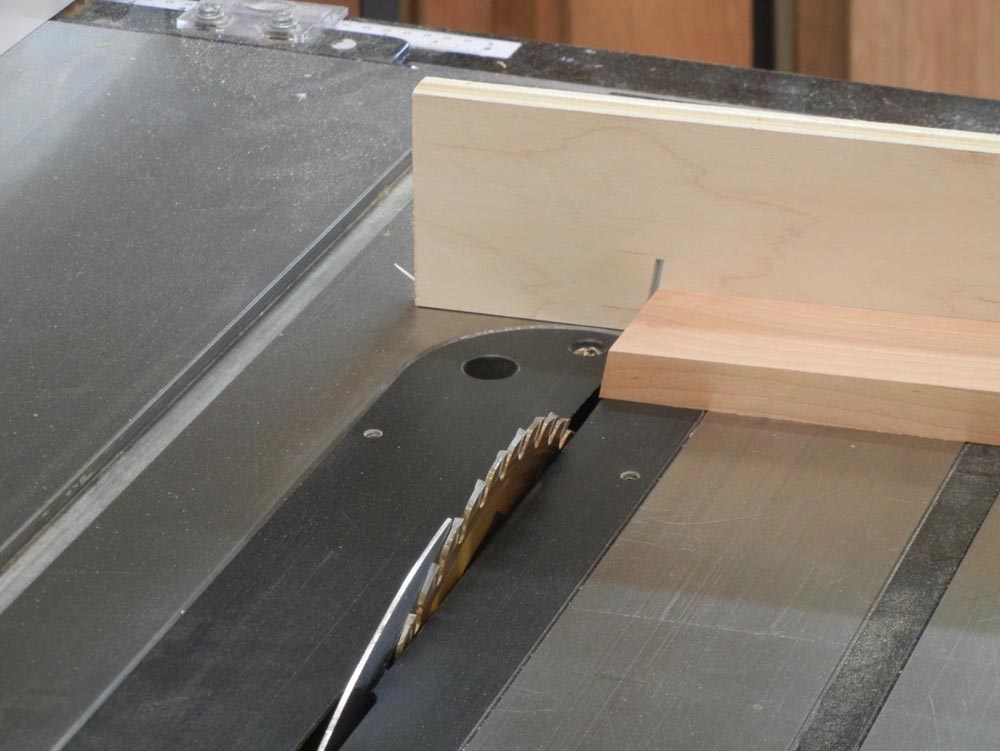
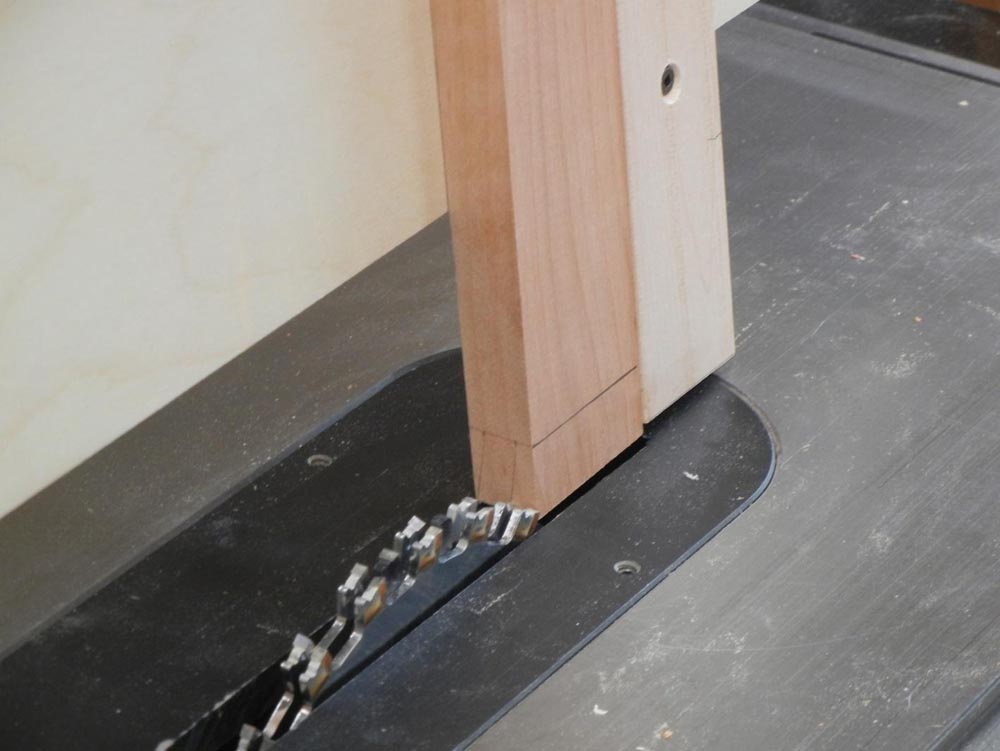
Here is a close up view. Notice the lines are perpendicular to the table top and the saw blade tooth is lined up to make the first cut. The blade is set for the correct height and is set to cut one side of the tenon. I'm using a dado blade to make the cut in one pass but you can use a regular saw blade and make repeated, overlapping cuts by moving the rip fence between cuts.

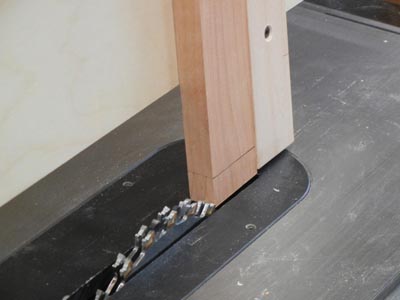
Here is a view after I've made the first pass. You can see that one side of the tenon is cut and the backer board prevented any tear out. Now you can move the rip fence and make the cut on the opposite side of the tenon.

The angled tenon is completely cut after the two passes. You can cut the shoulders on the ends of the tenon in your usual way. I mark them and rough cut them on the bandsaw and then pare them flush using a chisel.
This simple jig makes cutting angled tenons extremely easy. The jig can be made using scrap materials that you have lying around the shop and is very easy to build in an afternoon. If you have a lot of angled tenons to cut for a project, this jig is will make cutting them easy and quick.
Jeffrey Fleisher has been a woodworker for approximately 20 years and a professional woodworker for the past 6 years. He is the president of his local woodturning club, the Woodturners of the Virginias and past president of the Northern Virginia Carvers. You can see some of the furniture he has made at
www.jeffswooddesigns.com
. He can be reached by email at
chpcrvr@shentel.net
.
Return to
Wood News
front page