Making a Zero Clearance Insert for a Table Saw
by Rod Scott
Hayden, ID
Click on any picture to see a larger version.
A zero clearance insert is a necessity for reducing chipout and cutting very thin strips. Manufacturers often provide these inserts for their equipment and after-market inserts can be found for most machines. The following article will show how to make a custom insert for your machine, at little or no cost.
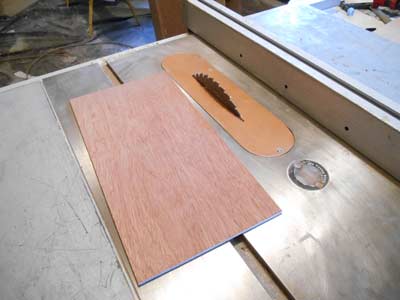
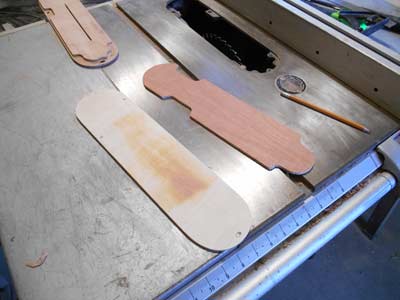
Find a piece of ¼ inch hardwood plywood that is twice as long as and slightly wider than the insert slot in your machine. Pieces of Plexiglas could be used but it can be a little harder to mill and glue and seeing through the insert is not a requirement. I use scraps from other projects. Cut two pieces that will cover the hole. Continue to mill the top piece until it fits snugly. It should slide into the hole without binding and rest on the support lugs. Allow for a little space for future expansion in the wood and to ease removal. The bottom piece should be milled until it will not rest on any side ledge or support lugs in the slot. Some slots are milled around the entire circumference. Mine has three lugs that are approximately ¼ inch below the table surface. All three have leveling screws and tapped holes for the mounting screws.
|
|
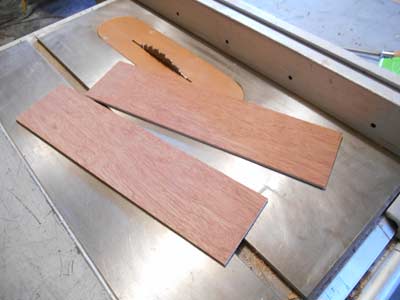
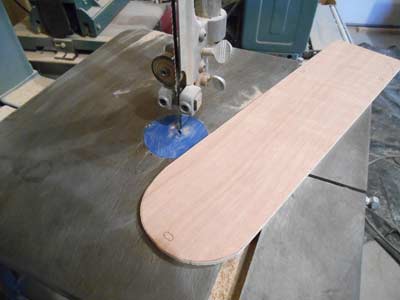
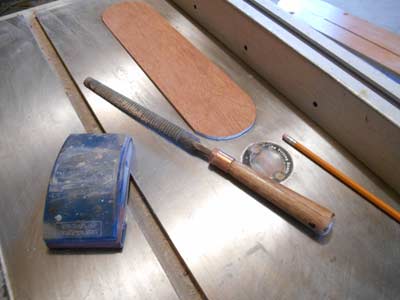
Mark the ends of the top piece to the rounded shape of the slot and cut both ends on a band saw or use a jigsaw. The piece can be marked from the insert provided by the manufacturer. Leave the mark lines when cutting and refine the shape until the piece fits into the slot. Make sure the leveling screws under the insert are completely hidden before further fitting. If the insert sits below the table top raise the leveling screws to flush the insert. I find that ¼ inch plywood is usually slightly thicker than the slot so I thickness sand it until is sits flush. I have a wide belt sander that works great for this job but careful planning or sanding will do the job. One of my lugs is slightly higher than the other two so some special fitting is required there. Finally, smooth the curved ends and ease all the edges with sandpaper.
|
|
The bottom piece is milled until it will pass completely through the slot. I find that if I raise the saw blade high enough to support the piece during this process it helps keep the piece from falling completely through. This piece is used only to support and stabilize the top so the exact shape is relatively unimportant. I try to make this piece cover as much area as possible without interference. This keeps the top from deflecting or vibrating excessively. When the shape is established, smooth the bottom piece and break all edges. Finishing the bottom piece is not necessary as it will never show but I like to make it as neat as the top. Even if no one else knows it is not completely finished, I will.
|
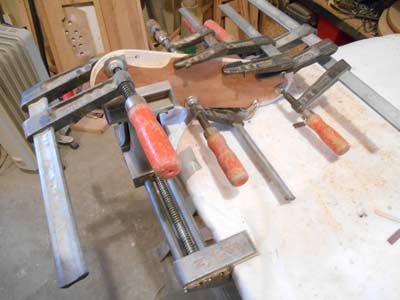
Mark the underside of the top piece at the positions of the mounting screw holes and approximate position of the bottom piece. Glue the two pieces together and clamp near the edges. Make sure the bottom piece is properly positioned as you are looking at the insert from the underside. As the bottom piece is not symmetrical, it can be embarrassing to find out the insert is up-side-down after gluing.
|
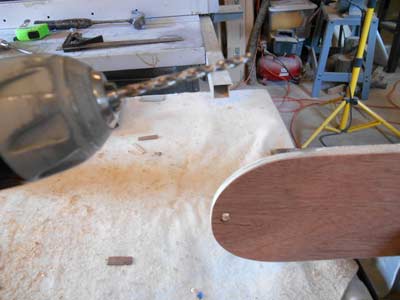
When the glue is set mark the installation screw holes and drill. I start with an undersized hole and verify they are in correct alignment. Ream and reposition the holes as necessary. Next, place the insert in the saw and put in the mounting screws to assure everything fits. After all the screws are in place, remove one screw at a time and counter sink the head just below the insert’s surface. Be gentle with the countersink as the material is rather thin and it can “blow” through easily. I don’t apply any finish on the wood. If you like a coat of urethane or lacquer followed by a coat of wax would make the wood look nice and make the insert slicker when stock is fed over it. However, this could lead to residue on stock that passes over the insert.
|

|
When all the screws are in place, start the saw motor and raise the blade through the insert. Sometimes the insert sandwich is a little too thick and keeps the saw blade from turning. Loosen the screws, raise the insert slightly, start the saw, and carefully tighten them back down. A ½ inch insert may be thick enough at the arbor to rub on the blade stabilizer when the blade is fully extended. A mortise could be made in the underside where the stabilizer interferes, however I usually don’t bother as I seldom (never) fully raise the blade.
I keep extra inserts and change them when the throat hole wears. I also reserve a fresh insert for those delicate jobs that require extra care. I find these inserts are easy to make and avoid the cost and time required to purchase factory made ones.
You can email Rod at
dyle.scott@yahoo.com
.
Return to
Wood News
front page


