
 by Steven D. Johnson
Racine, Wisconsin
(Page 4 of 4)
Previous Page
1
2
3
4
Outfeed Table Wrap-Up --- Off The Cutting Room Floor
Click on any picture to see a larger version.
In the old days of film production, the good "takes" of film were cut from the rest and spliced together to make a finished movie. The cutaway unused bits landed on "the cutting room floor." Those outtakes and flubbed scenes are now electronically deselected, but the old cutting room floor terminology survives.
As I finished up the SawStop Outfeed Table project (
Part 6A
and
Part 6B
are available now) I looked back at some of the cutting room floor rejected bits of video. There are quite a few. There is almost 4-1/2 hours of video that was shot to produce the combined half-hour or so of Parts 6A and 6B. Much of that rejected footage was duplicate takes of a particular segment, but some was good material that was ultimately cut in order to shorten the total running time of the finished video.
For example, back in
Part 4B
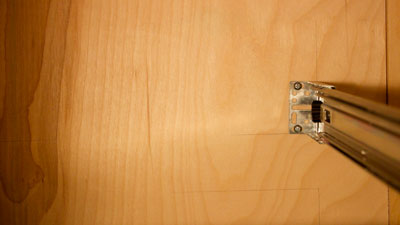
, there was a pretty good tip about how to align the rear of the drawer slide mounting brackets, but there just wasn't time. In the video clips from the cutting room floor, a segment shows how I stacked the face frame on top of the solid rear panel before assembling the base cabinet and used a pencil to trace the inside lines of the face frame onto the panel. When it came time to mount the rear brackets for the drawer slides, there were already handy location marks on the panel.
|
Figure 14 - The pencil marks made before the base cabinet
was assembled show exactly where to place the rear drawer
slide brackets

|
When applying a darker (garnet) mix of shellac to the MDF top, I masked off the walnut trim around the top so that it would not get darker than the rest of the walnut where I used a lighter shade (orange) shellac. Unfortunately, some footage had to go to keep the video running time in check, and that was one of the steps that hit the cutting room floor.
Some other good stuff had to be sacrificed, too… Shots of building the template used to rout the miter slot extension grooves and shots of making the bottoms for the drawers, for example. It's just a guess, and sometimes the flip of a coin, as to what gets cut and what gets included. Sometimes I guess right, sometimes not. So if there is any step of the process for which you would like more information or that you have questions about,
please email me
.
Along with the final two installments of the video, the drawings are now available in the
Highland Woodworking Library
. Each drawing is a separate PDF file so you can download them easily regardless the speed of your internet connection.
-----
Next month I will wrap up, as promised, with some final thoughts on the SawStop PCS table saw and how it performed during this project, along with a few tips and tricks I learned through the process.
(Page 4 of 4)
Previous Page
1
2
3
4
Steven Johnson is retired from an almost 30-year career selling medical equipment and
supplies, and now enjoys improving his shop, his skills, and his designs on a full time basis
(although he says home improvement projects and furniture building have been hobbies for most of his
adult life).
Steven can be reached directly via email at
downtoearthwoodworks@me.com
.
Return to
Wood News
front page


