Building Our First Shaker Blanket Chest
by Brian (Ziggy) Liloia
Berea, KY
Click on any picture to see a larger version.
When my significant other, April suggested the idea of building a wooden chest together this winter, I thought it would be a fun little project. The key word here is "little", as in quick and simple. Needless to say, I didn't have the expectation of building a bomb-proof, fully dovetailed and beautiful piece of furniture.
Once we got the bug in our heads and started looking at Shaker designs online, one thing led to another. Soon after, during a "woodworking vacation" to hang with out
our friend Greg Pennington
, he started showing off his amazing cherry wood supply and things definitely started looking a bit different from that terribly simple image I first conjured up in my mind. We ended up finding a set of Shaker blanket chest plans we really liked, and all of a sudden the outlook was looking like a significant project, and potentially very beautiful, too. Though having never cut any dovetails before, we set ourselves up with a pretty ambitious task.
Finding Shaker Blanket Chest Plans
The plans we found that particularly spoke to us were from Fine Woodworking magazine:
(Click here to view the PDF)
. Though there's no shortage of plans available on the internet, the single drawer design, and the plinth with curved legs were more aesthetically appealing than some others we came across. Having never cut dovetails, made a drawer, or... really, done anything in the way of building carcass furniture previously, it was intimidating but seemed relatively achievable. Thankfully we had the advantage of building this alongside Greg, who we were sure could easily guide us through some of the unfamiliar process.
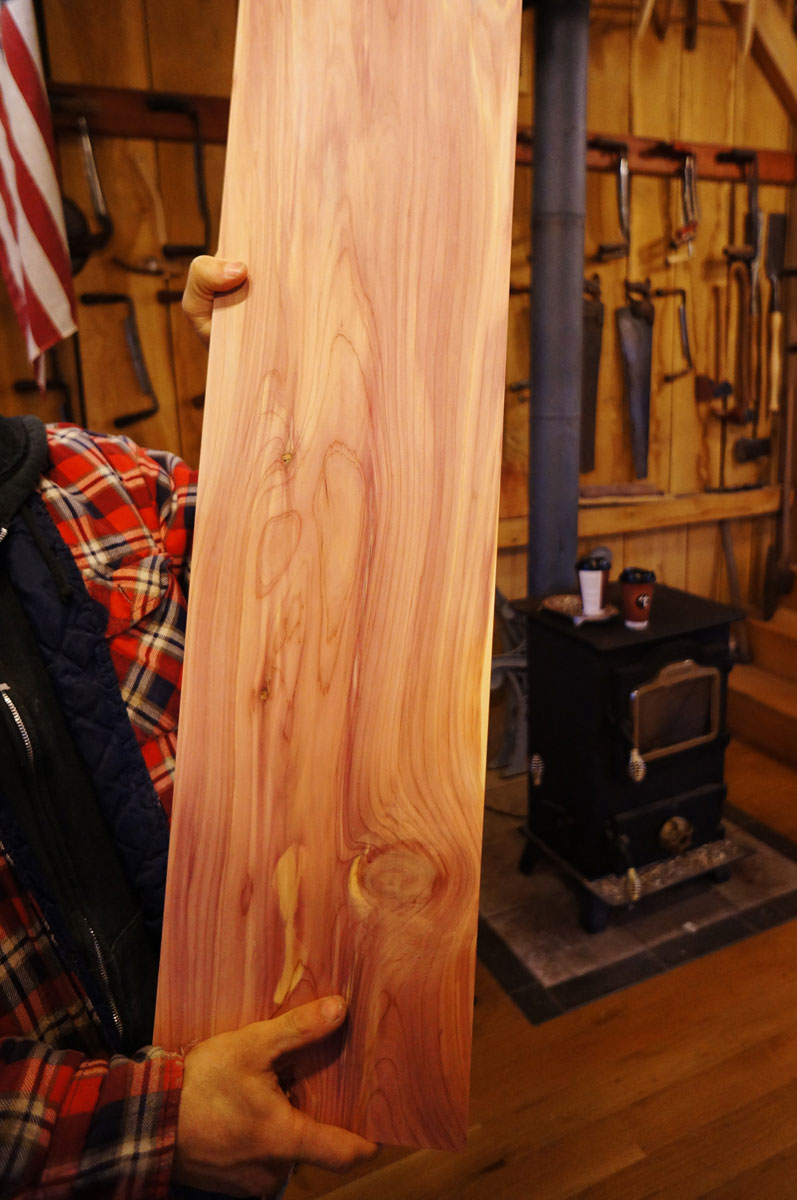
Picking Cherry
Our first stop was the wood shed to choose material for the carcass, the main body of the chest. We laminated pieces for the wide sides, back, and lid, and fortunately, we were able to use a single piece for the front. We knew the cherry was curly, but exactly how curly was hard to tell in the unfinished state of the wood. Once we did our material selection, it was time to mill the wood, cutting it to length and width and planing it all down to an equal thickness. Some of that fine curl was starting to reveal itself.
Cutting Dovetails and Assembling the Carcass
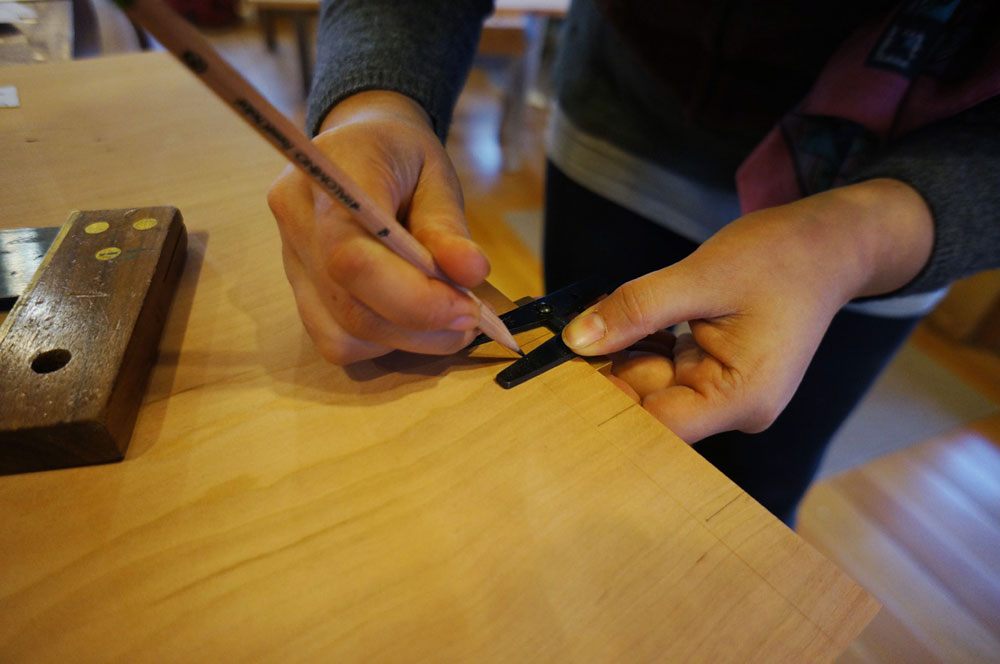
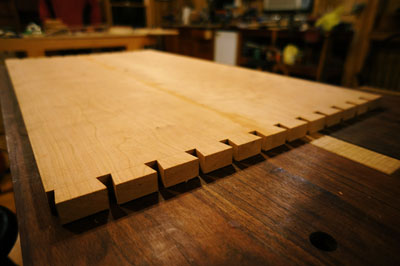
After a good layout rundown, we proceeded with marking out our carcass pieces for dovetails, which was surprisingly simple.
Having never cut dovetails, I was initially a bit intimated. I soon realized this was no different than timber framing, with which I am more familiar. Timber framing is nothing more than furniture making on a big scale, after all. And vice versa, furniture is not too different than timber framing on a micro scale.

|
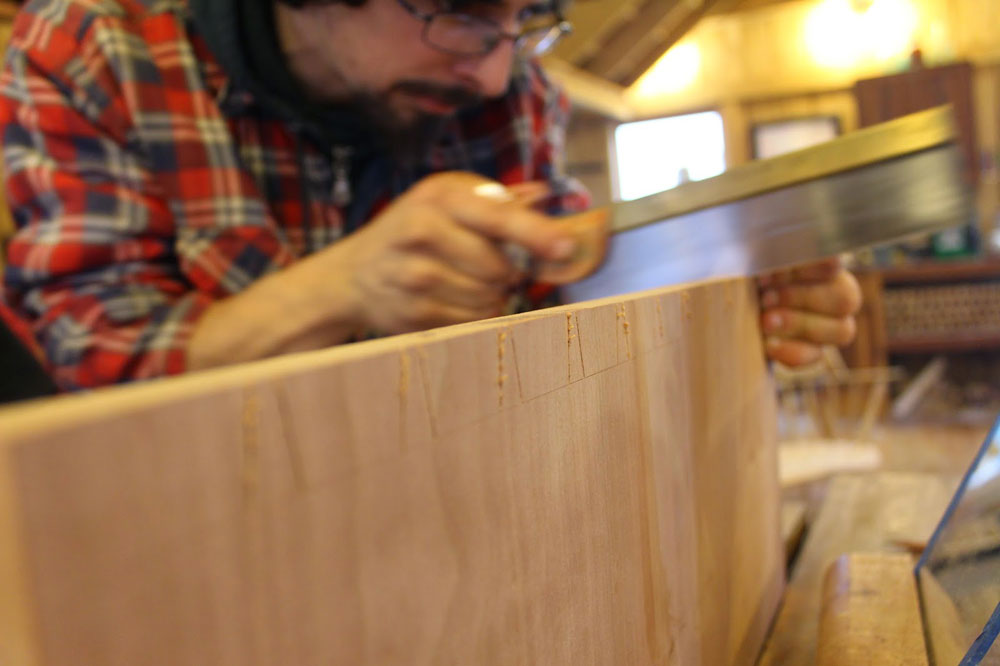
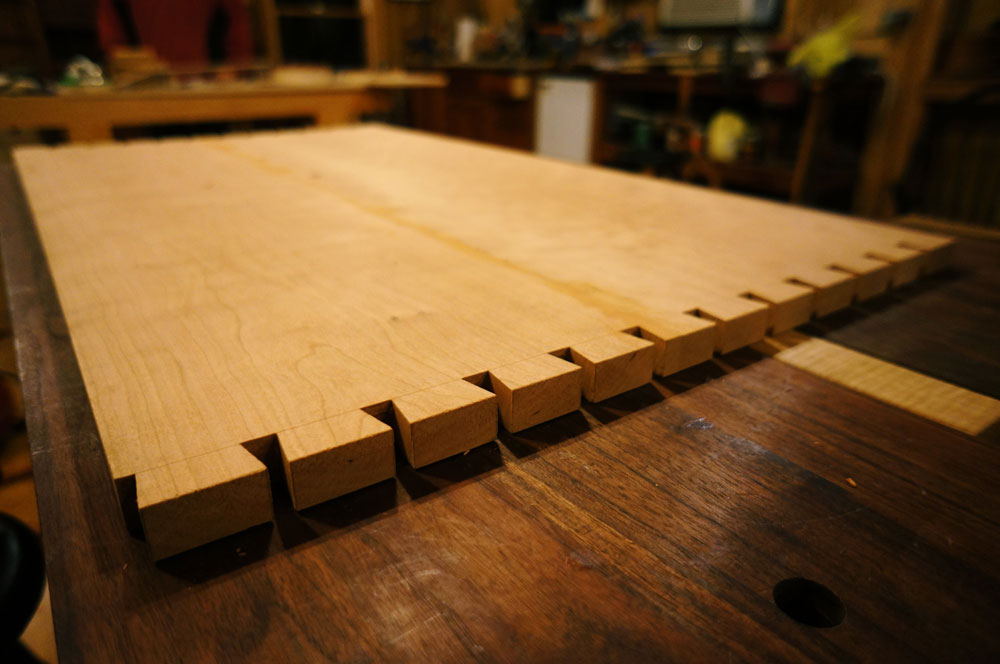
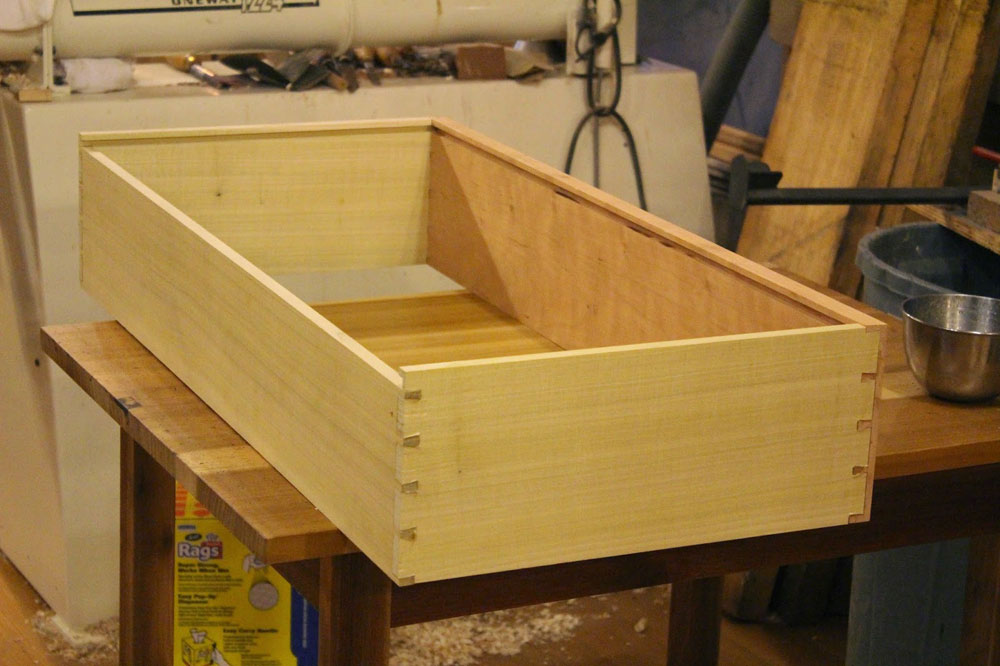
And so next came sawing out the freshly laid out joints (we did the tails first), which was really quite simple. The dovetail saw zipped right through the wood. Though there were many tails to cut, the work was all very manageable. All of the hand saw practice I've gained over the years came in handy here, because soon enough we were ready to chop out the waste wood with chisel and mallet. Again, not too dissimilar from timber framing, just smaller wood. It was a little difficult to avoid the temptation of blasting out hunks of wood all at a time, but I stayed my hand and eventually, half of the joinery was cut and complete. We used the tails to lay out the pins on the side pieces, tracing the joints we just cut, and proceeded with the process. The dovetail "veil" was soon lifted and the mystery gone. I was into it.
|
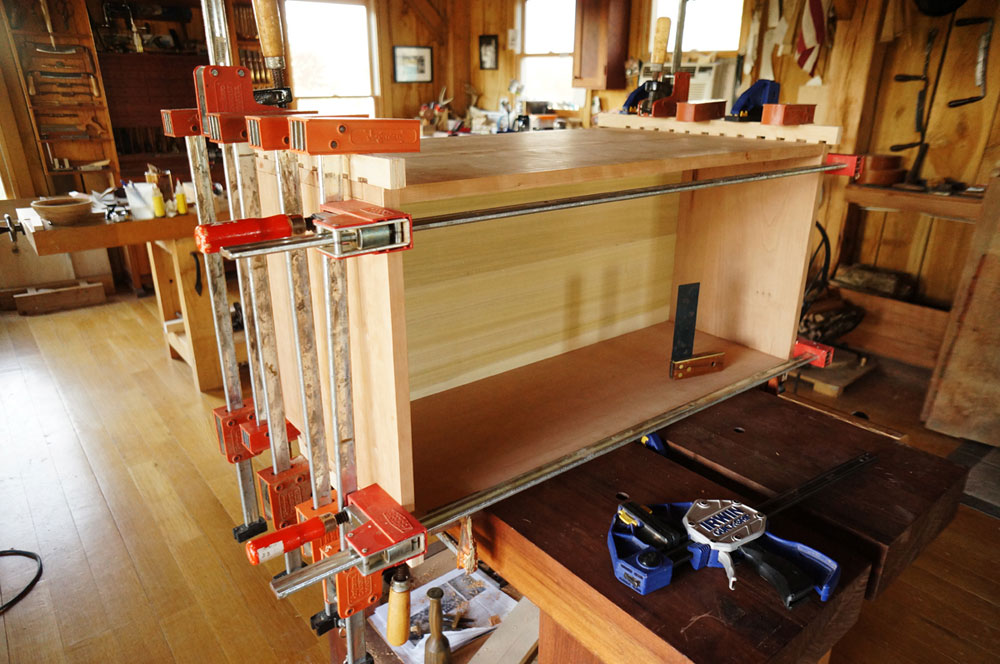
The reward for our dovetail cutting efforts came when it was time to test fit, and then finally glue up our carcass. Opting for the traditional route, we used hide glue. It was a bit tricky to get pieces mated in an appropriate amount of time and the clamps in place, but thankfully everything went off without a hitch. Best of all, the joints looked really good! Not much in the way of gaps or cracks to repair, and the box was fabulously square, to boot.
Building the Plinth
With the carcass more or less out of the way, the next step was figuring out how to build the plinth. First we had to make a frame and panel bottom that would act as the drawer bottom. We used a lot of machines to do this step: table saw, jointer, chop saw, mortiser. Really, the whole frame and panel was cut with power tools. I thought about how the Shakers would have done this step without any aid of power tools, and really appreciated the great effort it would have required. Next time I'll take the opportunity to replicate this process using more hand tools to do the work.
After getting the dimensions off of the carcass, I got material ready for the plinth, and all of a sudden we were cutting dovetails again. Though these dovetails were fewer than the carcass, of course. After cutting them, we decided how to shape the curve of the legs and cut them out, and cleaned up the profile with spokeshave and sandpaper.
In the blanket chest plans we used, the plinth gets attached to the carcass with screws. In reality, I think this makes good sense. Of course the screws are entirely invisible, plus the plinth can then be easily detached and repaired/replaced if the need ever arises. Molding eventually mates plinth and carcass, which is a clean and attractive detail. So despite my general bias against screws, really, it was a good choice.
All in the Details: Drawer, Dovetail Keys, Molding, and More
When we first approached this project, I thought the carcass dovetails were going to be the most difficult part. As it turned out, the numerous details to follow ended up being more challenging and time-consuming than I would have anticipated. Despite the simple, almost austere appearance of the blanket chest, there are some intricate details that really make the chest what it is.
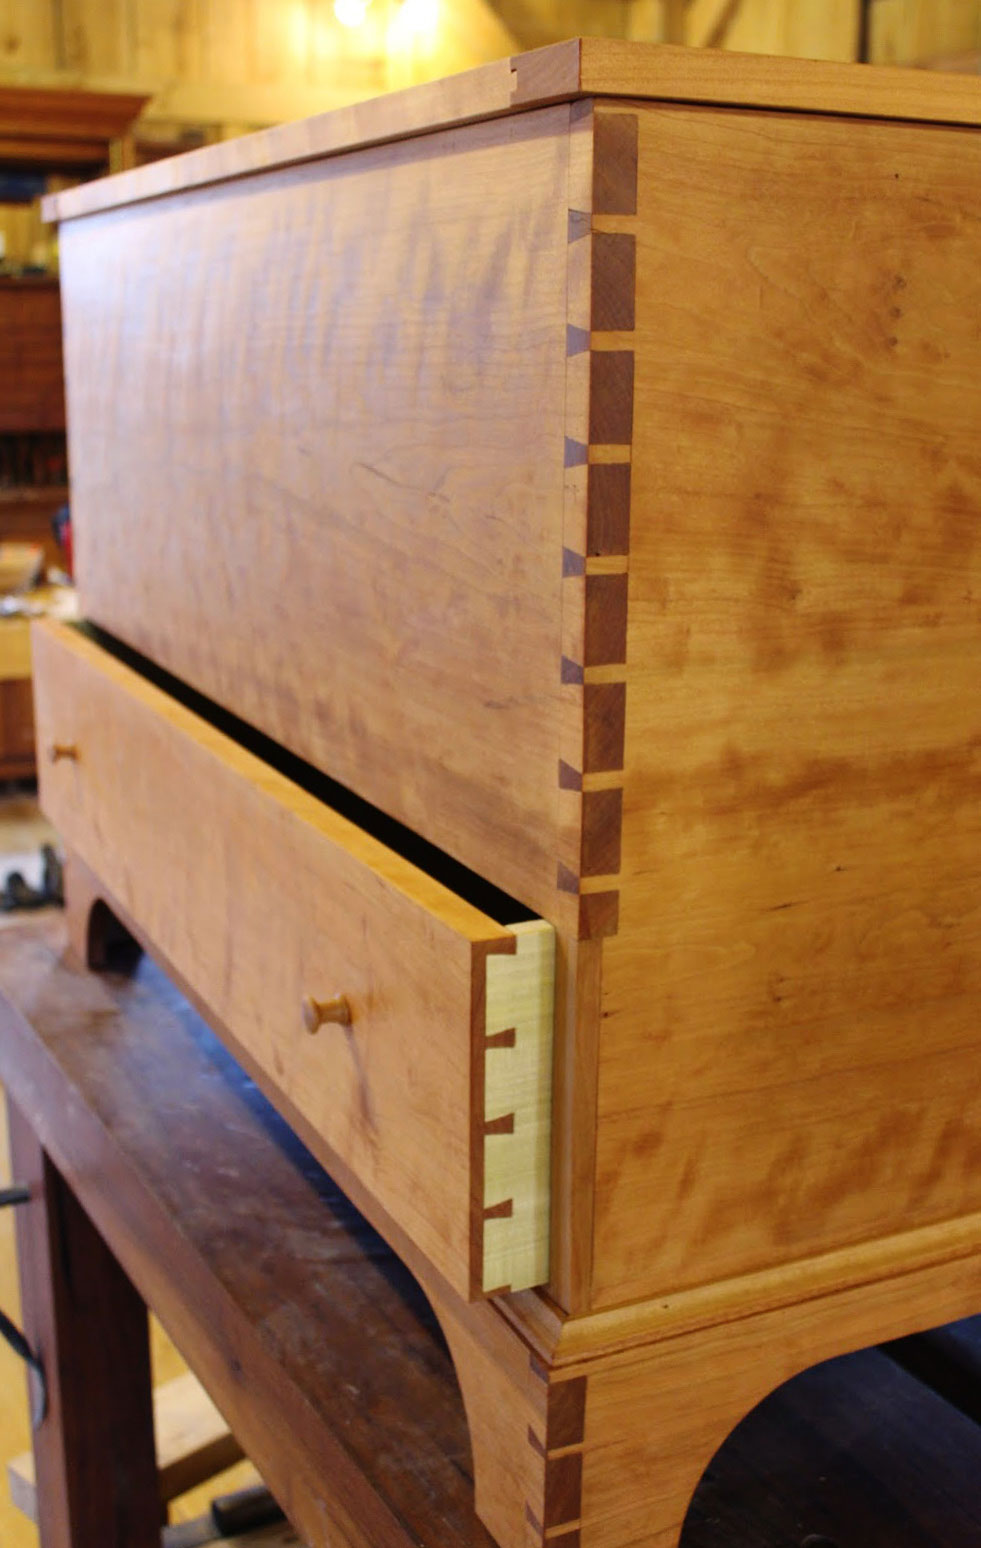
Take, for example, the sliding dovetail keys that cover the end grain on the carcass that would otherwise be visible when the drawer is open. Simply nailing or screwing on a piece of wood over this patch of end grain would never suffice, because of the natural seasonal movement of wood. Instead, someone somewhere along the line devised this smart trick to basically create a piece of sliding trim that would never shift in an unsightly way. That one little detail alone took a good bit of time to figure out and implement.
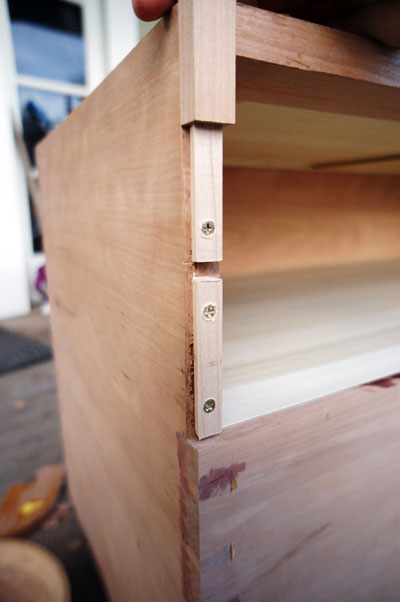
|
The drawer itself was another exercise in fine-tuning. Again, having never built a drawer before, it was difficult to fully appreciate what kind of tolerances were necessary to make a drawer actually good and functional. We strayed from the plans here, opting for a drawer flush with the face of the carcass, which in a way was easier than a lipped-front drawer. We used quartersawn poplar for the body of the drawer, a buttery treat to cut and chop out. The half-blind dovetails were more challenging to cut than the through dovetails, but especially tricky was carefully whittling down the overall drawer dimensions with a belt sander, far from my most favorite tool in the shop. Eventually, we got the drawer to slide in its cavity just so. Getting the drawer bottom beveled and fitting properly took a fair amount of stopping and checking, too.
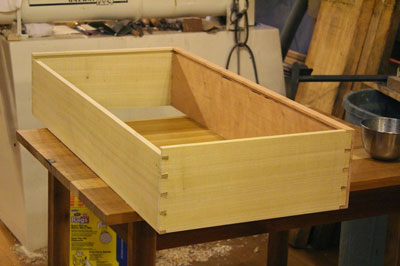
|
I definitely gained a better appreciation for good drawers in this process, and some enthusiasm for making more in the future. Finally getting the dimensions just right and seeing the drawer slide in and out with ease was a rewarding feeling.
A Breadboard Lid and Finishing Details
Straying one more time from the plans, we chose to build a breadboard lid for the chest, which was another fascinating exercise in designing for wood movement. The bulk of the lid is three laminated pieces of cherry, but the ends are capped with a narrow piece (the breadboard itself) running perpendicular to the lid. This piece is joined with a bit of mortise and tenon joinery, and pegged together. However, the two outside tenons aren't glued at all, so that the piece can swell and shrink freely as ambient humidity changes. Not only that, the peg holes are widened so there is no chance of splitting when the chest does eventually swell up. The finished look is simple but elegant.
April turned the knobs for the drawer, and she sized them to be "delightfully tiny" (in the words of John Kassay in
The Book of Shaker Furniture
.) These we split and wedged in the face of the drawer.
For the chest interior, we milled 3/8 inch thick cedar boards with a ship lap. Cedar is the traditional insect protection method for fabrics, of course, and this wood was simply tacked in place in the box. There is almost no smell better than that of freshly planed cedar. (Freshly planed sassafras is incredible, too.)
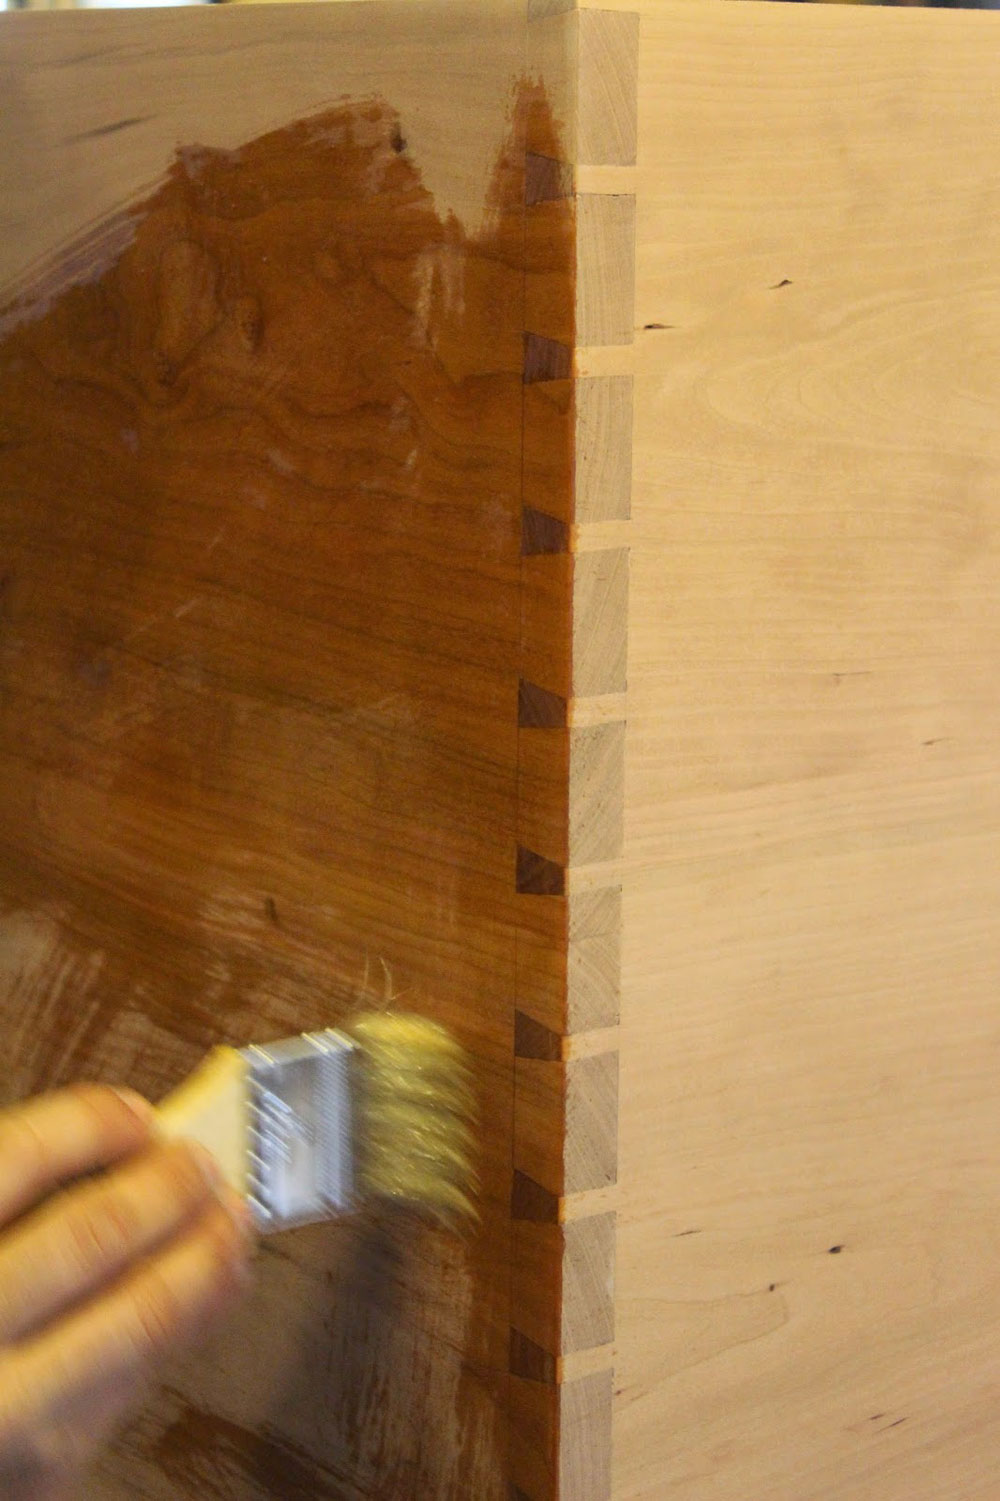
While April turned the two drawer knobs, I had the pleasure of applying the oil finish (1:1:1 boiled linseed oil, mineral spirits, and varnish) to the box. This is probably my favorite part of making anything -- getting to see the natural wood grain pop is a truly lovely experience, especially when it has a ton of curl like this cherry. It really wasn't apparent just how much was going on until now....
After waxing the drawer bottom to slide more easily, and wiping down the oil, things were looking and feeling pretty good. After returning home with our new Shaker-inspired blanket chest, we installed hinges (from Horton Brasses), and the chest project came to a satisfying close.
We'll be enjoying this piece of furniture for many years from now, and taking our new experience cutting dovetails and making drawers into future projects.
You can email Brian at
evacindustry@gmail.com
and take a look at his website at
http://www.theyearofmud.com
Return to
Wood News
front page