Carving a Bernese Mountain Dog
by Linda Master
Dexter City, OH
Click on any picture to see a larger version.
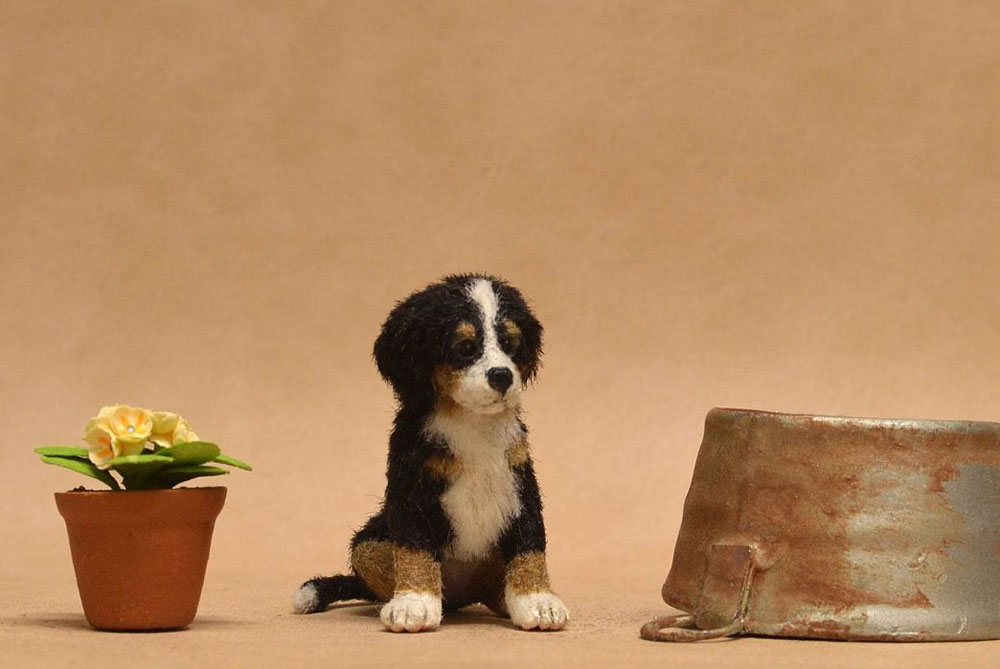
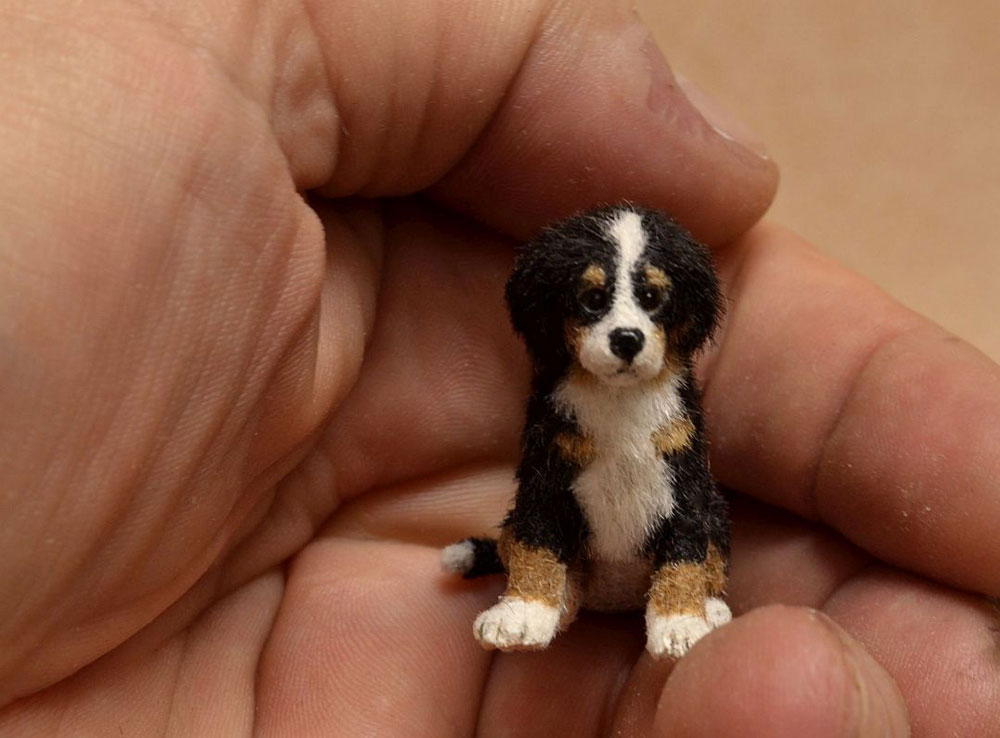
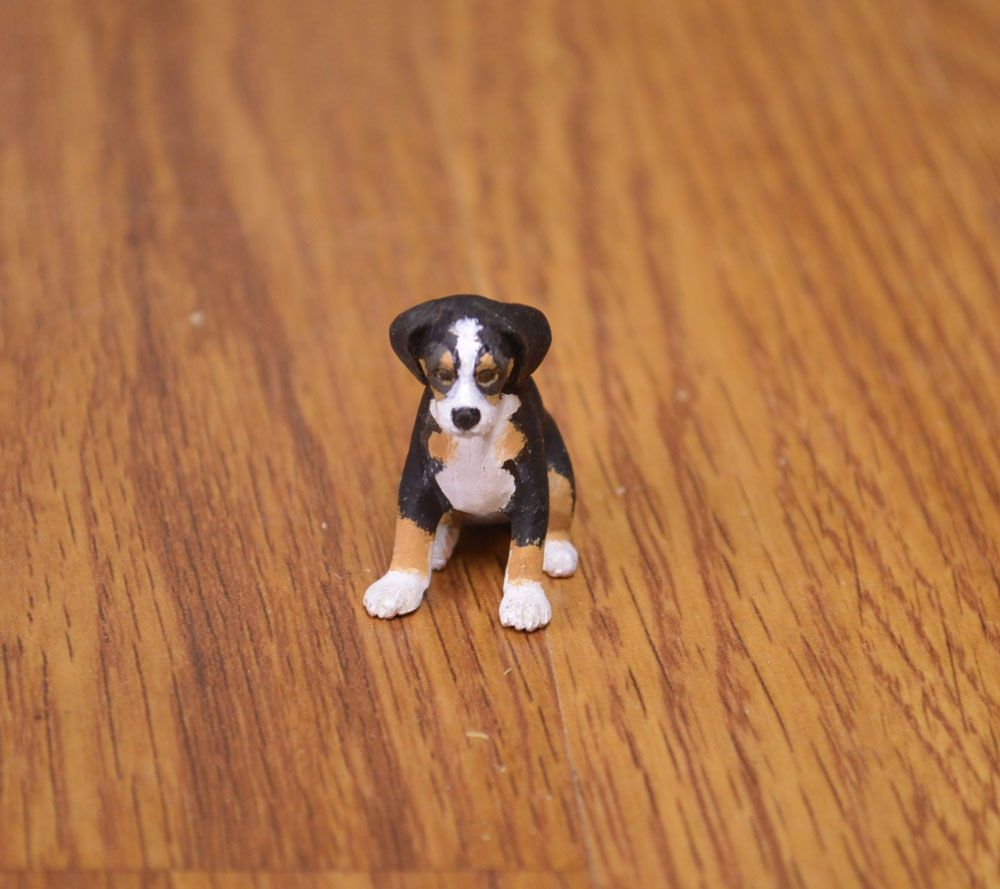
This is a miniature hand carved wood Bernese Mountain Dog
puppy. The wood I use is called Jelutong. I am a miniaturist
specializing in carving animals. I have attained Fellow status
in the International Guild of Miniature Artisans (IGMA). I also
had the honor of having my work on the cover of Chip-Chats, the
National Woodcarvers Association magazine.
This little puppy is done in 1:12 scale. It is carved with
every attention to detail, including carved toes, toenails, and
paw pads. I have recently begun to fur my animals, giving them a
look that is the height of realism. I use alpaca fiber, an all
natural fiber for the fur. I do any shading or
striping/markings with fur as opposed to brushing anything on
the coat.
The Carving Process
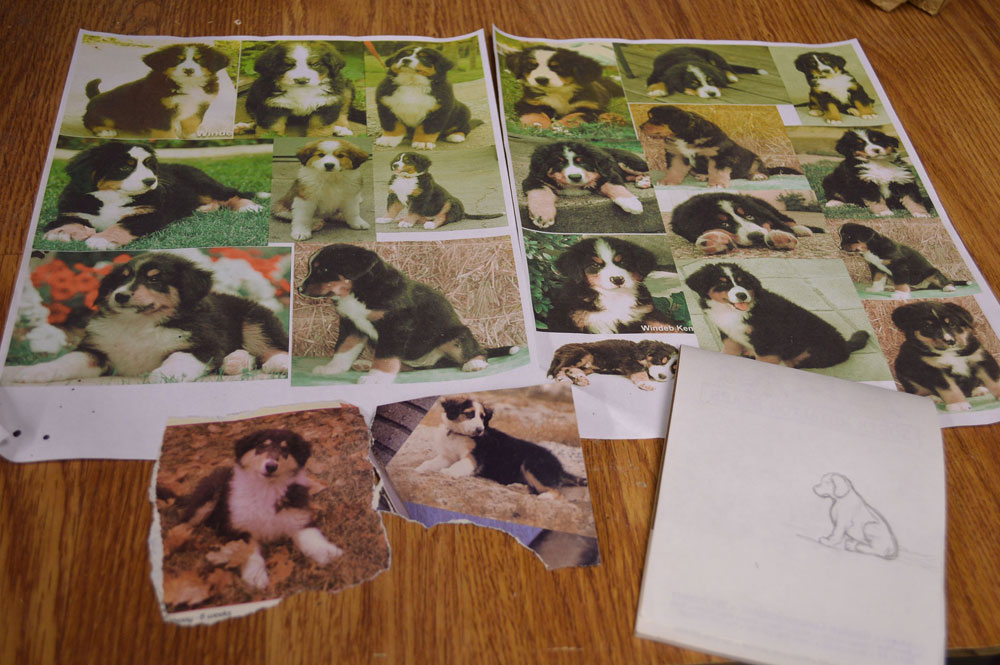
I start by getting together several good photos. This process is much easier now thanks to
Google! I get many different views and then decide on a pose.
Usually you get a measurement of an animal at the shoulder. Then
I scale this to 1:12th and draw the animal.
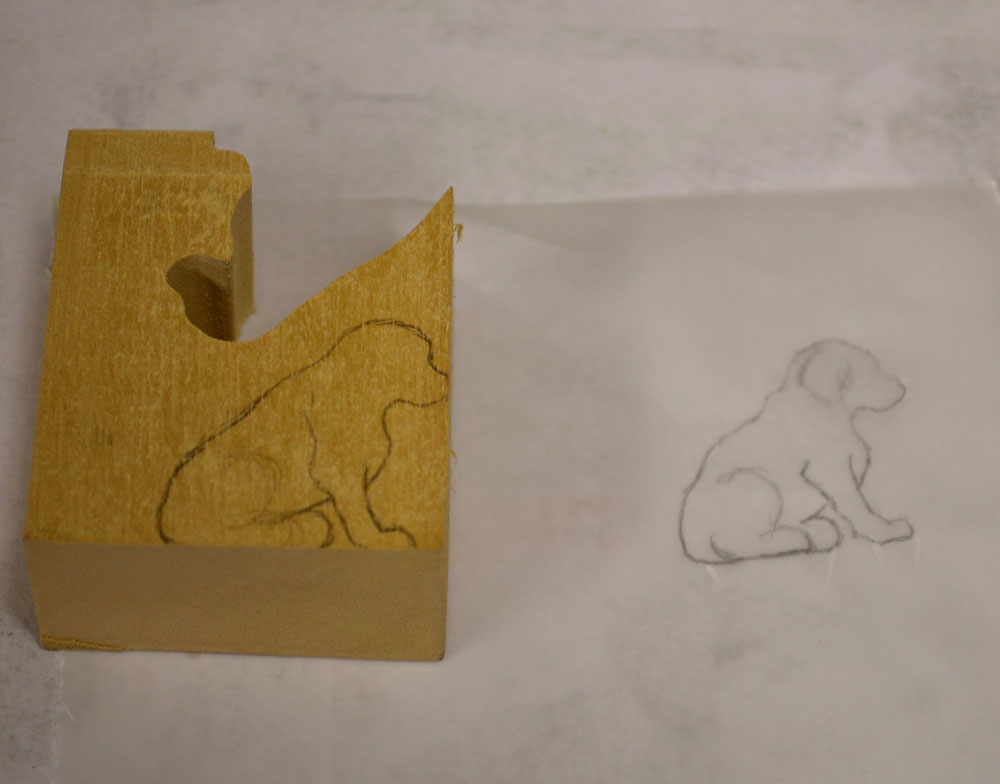
The next step is to pick out or cut a block of wood that is a
good size and then transfer the drawing to the wood.
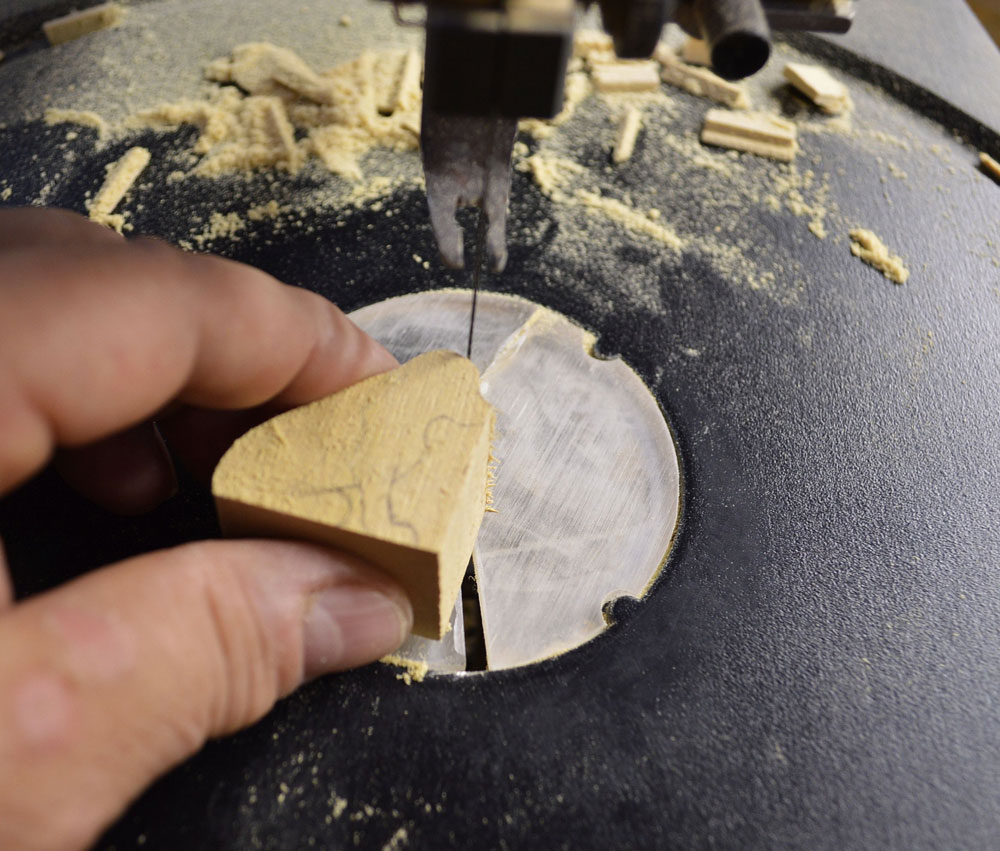
Then it is over to my scroll saw where I proceed to cut out my
design.
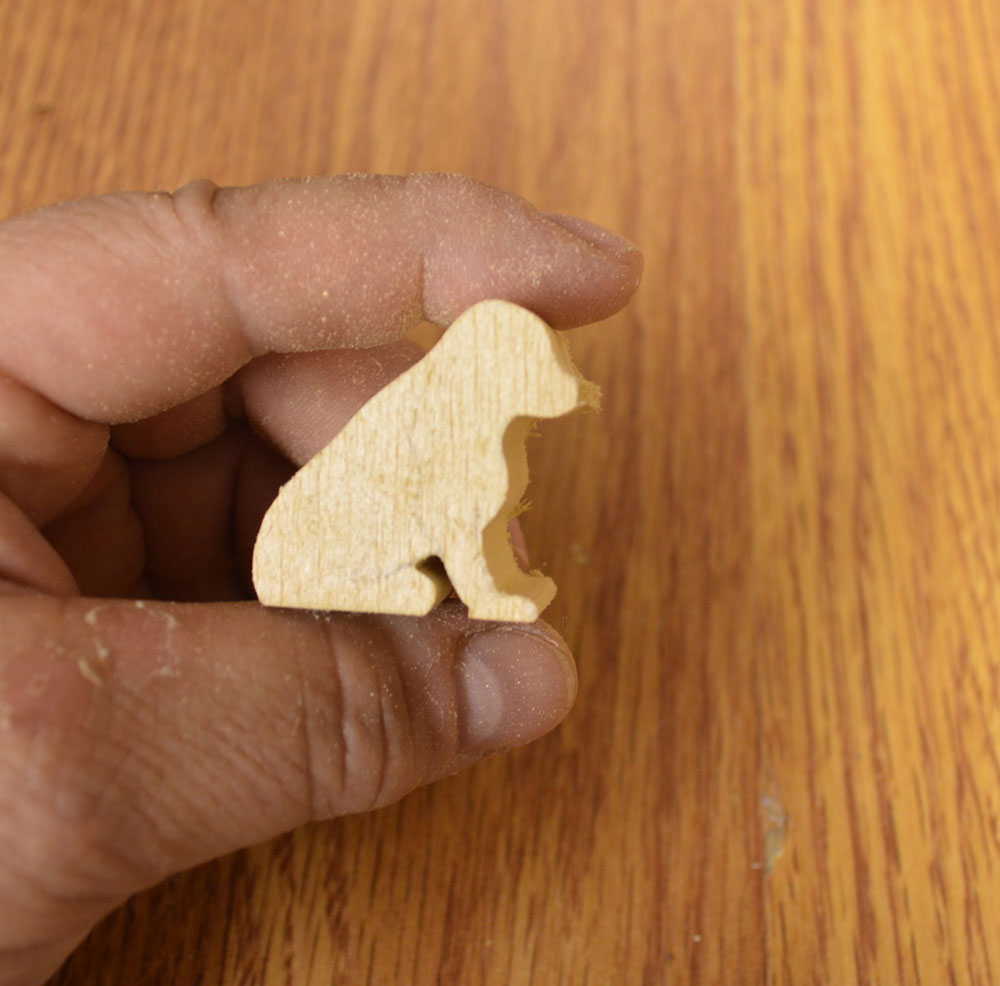
Here is what the dog looks like after one profile is cut. From
the front view, the dog is still square.
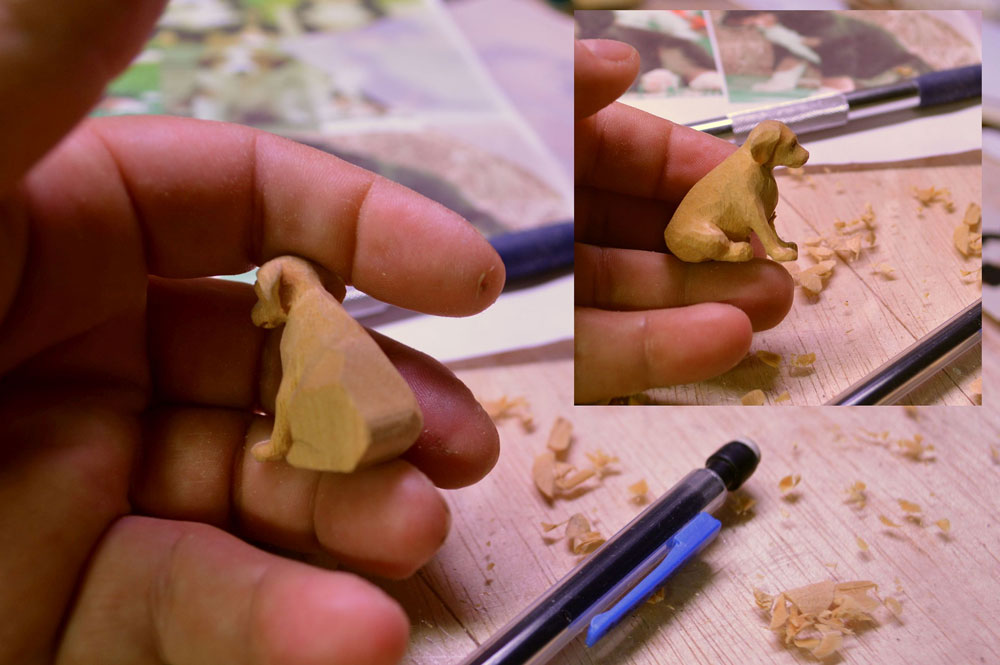
Now the fun begins! The actual carving of the dog. I start with
the nose, continue on to the rest of the head, and everything
falls into place. If I'm lucky that is! If something breaks or
too much wood is removed, I have to scrap it and start over. You
can see in this photo how the legs are still square. The dog
has no tail because this will be made separate from wire,
inserted, then furred. This is the starting point of the furring
process. The tip of the tail. Then much like shingling a roof,
you work your way up and over and around, layering the fur on.
The fiber that is not thick hair such as that which is found on
the muzzle and paws is called flocking. The goal here is to take
your fiber and cut it up into dust! Furring an animal is
a very intense, laborious process.
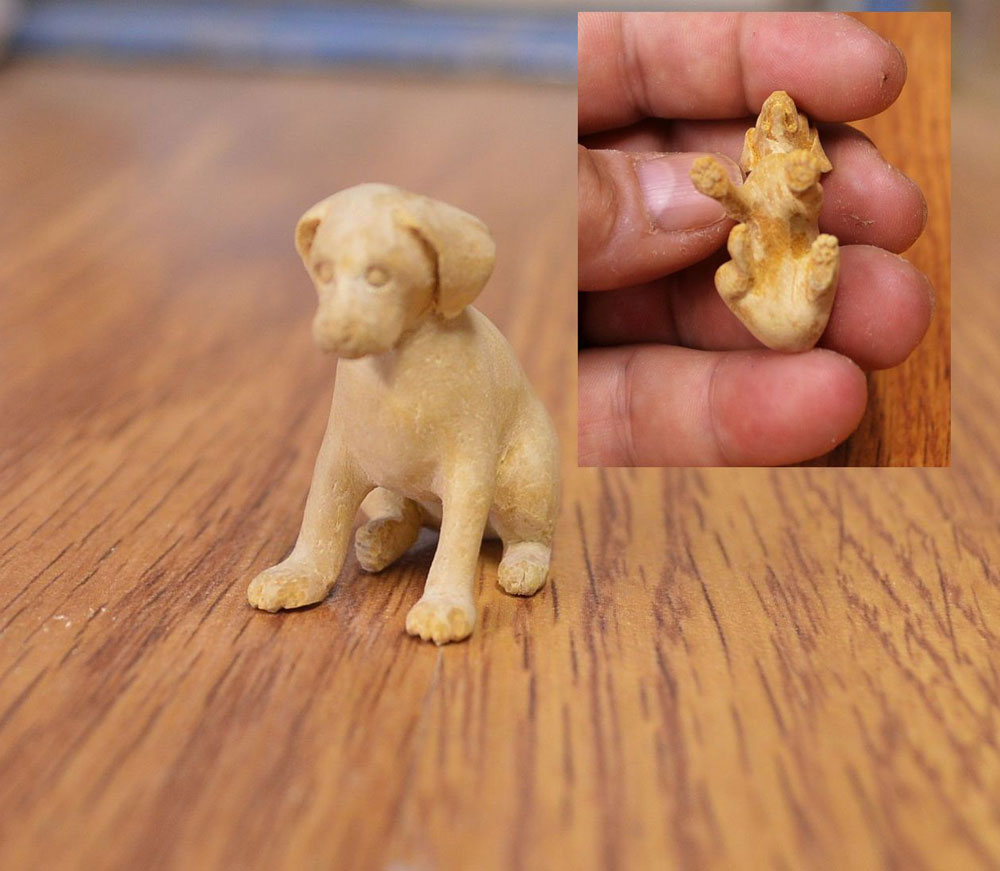
The carving is done and the piece is then sanded smooth. Here
you can see the paw pads and mouth details.
I now paint the piece, as this will correspond with the colors
of fur. But the belly and between the legs is pink. like the
skin would be, then flocked lightly so the skin shows through.
Linda has had several other articles published in Wood News Online including:
Building a Thickness Sander and Re-Saw Jig
and
Here's My Woodcarving!
.
You can email Linda at
miraclechicken@msn.com
. You can also visit her website at
http://www.miraclechickenminiatures.com
Return to
Wood News
front page