|
The Poor Man's Roubo Bench Build - Part 4
To start at Part 1 of this series, Click Here
In building this Roubo bench (with a twist), I have maintained that this is to be a workbench that will be used as a workhorse and as another tool for my shop. A workholding and clamping platform.
Modern woodworkers, by and large, can tend to be of two minds when it comes to our
workbenches
. On the one hand, we know that a workbench is a requirement to comfortably and efficiently work wood. We clamp to it, we use it to hold our work pieces, and we use it as a sturdy platform on which to manipulate our work. It is a tool.
On the other hand, building our own workbench has traditionally been a rite of passage for woodworkers. We agonize (I do at least) over which style to build, what material to use, and what type of
vise
to hang on it. We lovingly mill the timbers to exacting dimensions and then glue-up a thick and heavy top, and we take great pains to lay out and cut whatever joinery we are going to use to put the thing all together.
So it is then, that it is understandable if a modern woodworker ends up with what I call a "Shop Queen" for their workbench. A "Shop Queen" is a bench that is treated with kid gloves. One that is more furniture than tool.
I write these words as something of an admission. I am guilty of this myself. Mea culpa, mea culpa, mea maxima culpa.
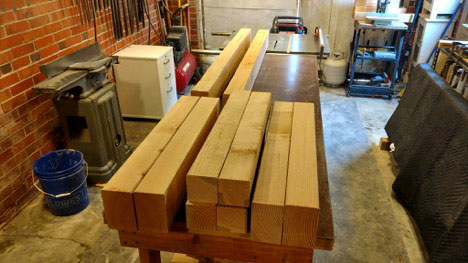
The bench I am chronicling here, as I have mentioned, is destined to be used hard and with joyful fearlessness. It is with this in mind that I elected to take a very economical view of its construction primarily with respect to the materials chosen (BORG sourced, Douglas Fir). It is a project designed to be finished with both financial economy as well as economy in time.
This is not to say that I am not taking care to do this right. Throughout the build so far, I have used established best practices where I could, and well thought out alternative means where practical (using the small electric hand plane for pre-flattening the top for example).
Now, with the layout and the cutting of the joinery, I slow things down, and ensure that both the accuracy of my math, and my attention to detail, are the focus. These joints will be expected to function for a long, long time. There is no room for anything resembling a shortcut here.
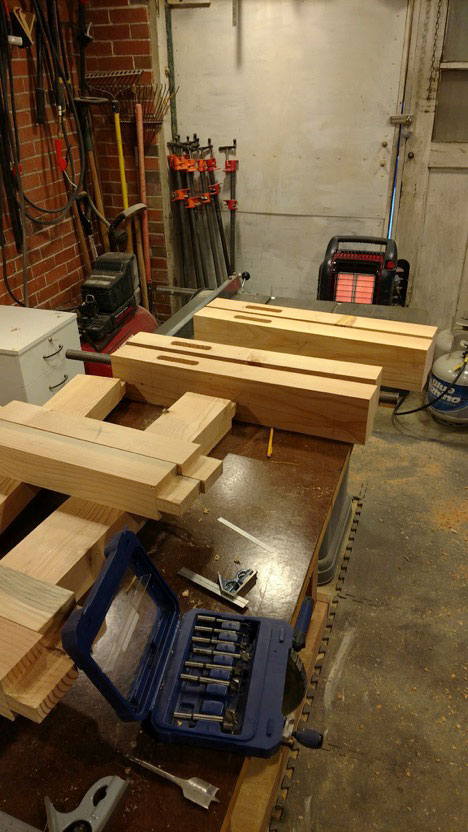
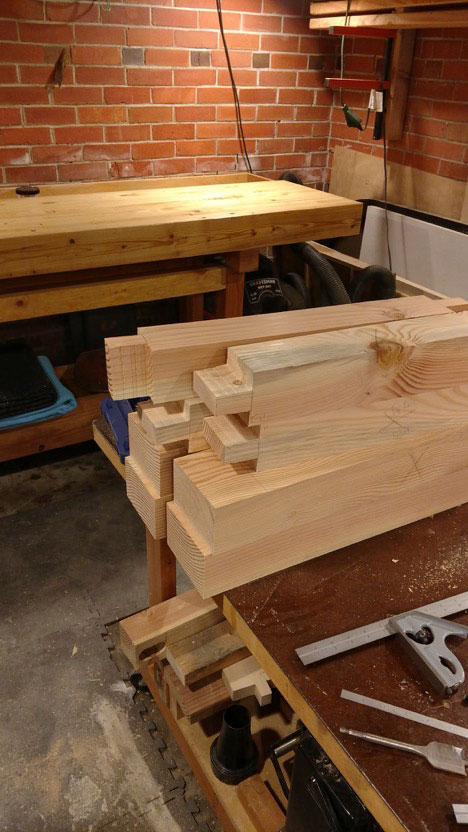
For this build I am using captured, or "blind" mortise and tenon joinery exclusively. For material that has the heft that bench legs and stretchers, etc, have, it is important to make your tenons long and thick, and your mortises deep. You will thank yourself later once the thing is together.
For these joints, I used the
Drill Press
and appropriately sized
Forstner Bit
to bore out the waste and a chisel to clean the cheeks and floor of the mortises.
The tenons I cut on the table saw with a dado stack and mitre gauge outfitted with back and flip stop for repeatable cuts.
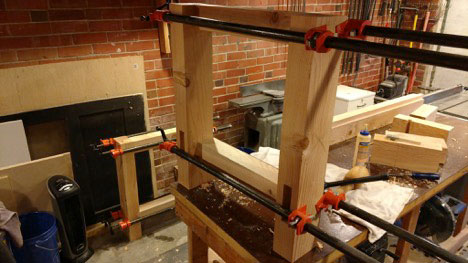
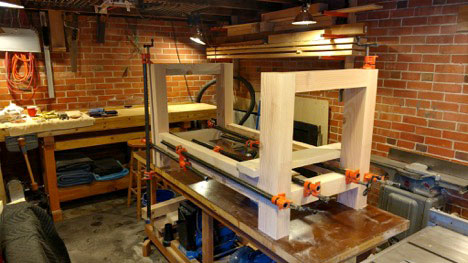
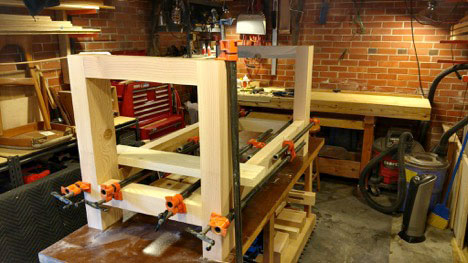
At this point in the build, I knew that once I started gluing up the base parts I would need to be getting creative with my clamping. For one thing, I was rapidly losing space in the shop with the S.S. Roubo aircraft carrier top still laying on the old outfeed table (upside down) and with the assembly of the legs and trestles, my space was getting ever more claustrophobic.
In addition, while being just fine for gluing up the leg assemblies, my clamps were just a little too short to make the reach needed to join the two ends together with the trestle stretchers.
My solution was to glue up each ends set of legs first.
Once they were ready, I then tied the two ends together by using two clamps, each clamping against each other "handshake" style on each side.
This was a little tricky for me as I was flying solo in the shop. If you have someone to lend a hand with this particular type of glue-up, that is highly recommended, as is going through a dry run of the glue-up beforehand to ensure that all joints fit well and that you are confident in the clamping placement.
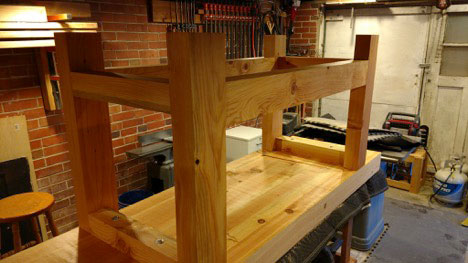
Once the joints had enough time to dry, I had my son, beast that he is, come help me lift the benchtop back onto the outfeed table and out of the way. I then flipped the base over and prepared to attach it by drilling elongated holes in the base cross members. The elongation was done to account and allow for movement in the top.
Nice, long, hefty lag bolts and washers were used to set the top.
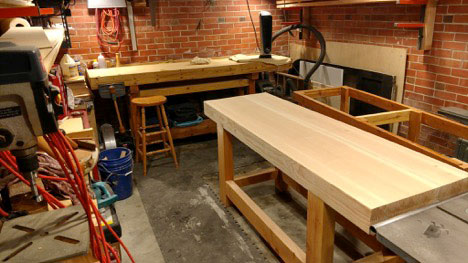
Once the top was lagged to the base, it was time to slide both the outfeed table (on wheels) and the newly assembled Roubo to one side in preparation of getting the behemoth up on its own four feet. We simply shifted the two benches as far to one side of
The Tiny Shop
as we could, and then rolled the Roubo over onto its feet. The old outfeed table is to be disassembled in place later.
At this point in the build, and without a vise or the shelf underneath, I estimate this bench to be weighing in at a svelte 375-400 pounds. Make sure you get help with manipulating this thing if you go to build one.
If you have to build the top first as I did, or you are as pressed for space as I was, or you find that you just had to go through this same sequence for whatever reason, then take my advice. Be sure you have help available for some of the operations. It's just not worth the potential injury.
In the next article, I will go over the vise selection and installation, as well as some odds and ends in finishing up this series.
I welcome any comments, questions, and even just a little discussion. Please feel free to email me at
madcapwoodwright@gmail.com
.
John McBride is a professional woodwright, blogger, and writer, living and working joyfully and with abandon in Denver, Colorado.
Return to the
Wood News Online
front page
|