|
Click on any image to see a larger version.
One of the most responded to articles that I have written is the Ring 'n String puzzle instructions in the
October 2015 issue of The Highland Woodturner. The puzzle continues to be a staple in my shop for people visiting. As a simple child's toy, it continues to delightfully confound adults who visit my summer, twice-weekly, Living History woodturning demonstrations in the colonial wood shop at the Wilson Museum in Castine, Maine.
Building on that success, I spent a considerable time researching other complex puzzles seeking one that could be easily designed into a woodturning project. Happily, I found one which is a challenging but simple(r) project for turners eager to confound their family and friends this coming holiday season.
For those who decide to take this project on, the order of making the parts is completely at your discretion. My suggestions here make sense to me because I typically make multiples, and this order seems to work efficiently in my shop.

|
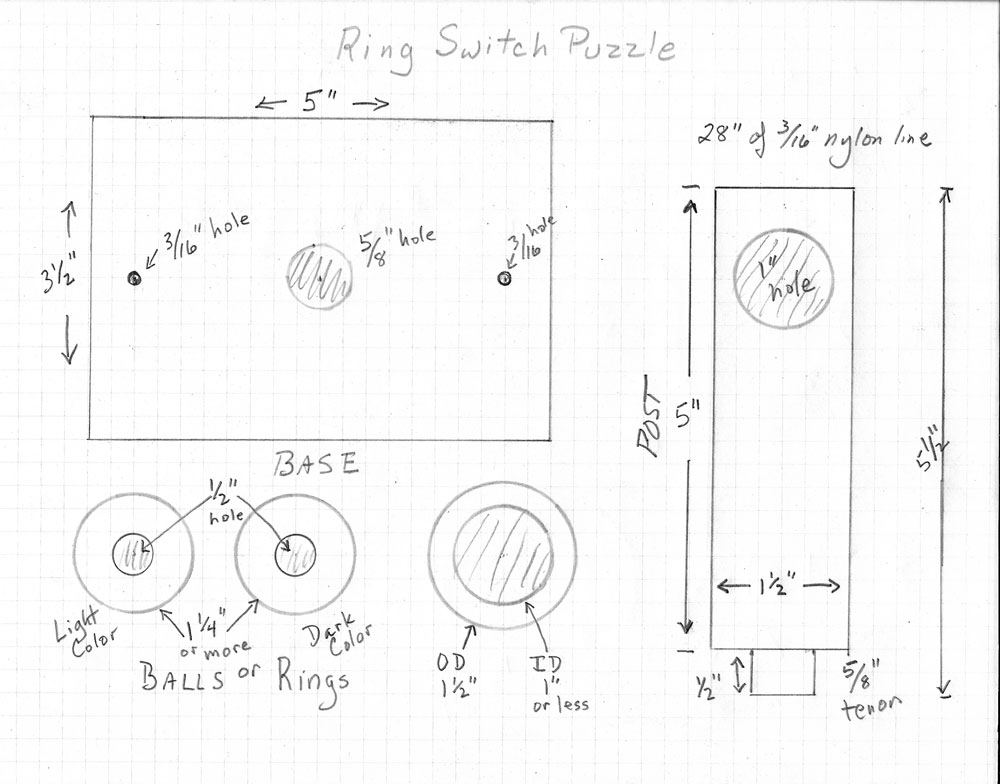
Several measurements are, however, critical to make the puzzle possible to solve and it would seem prudent to make a sample puzzle from the design offered before trying to elaborate.
|
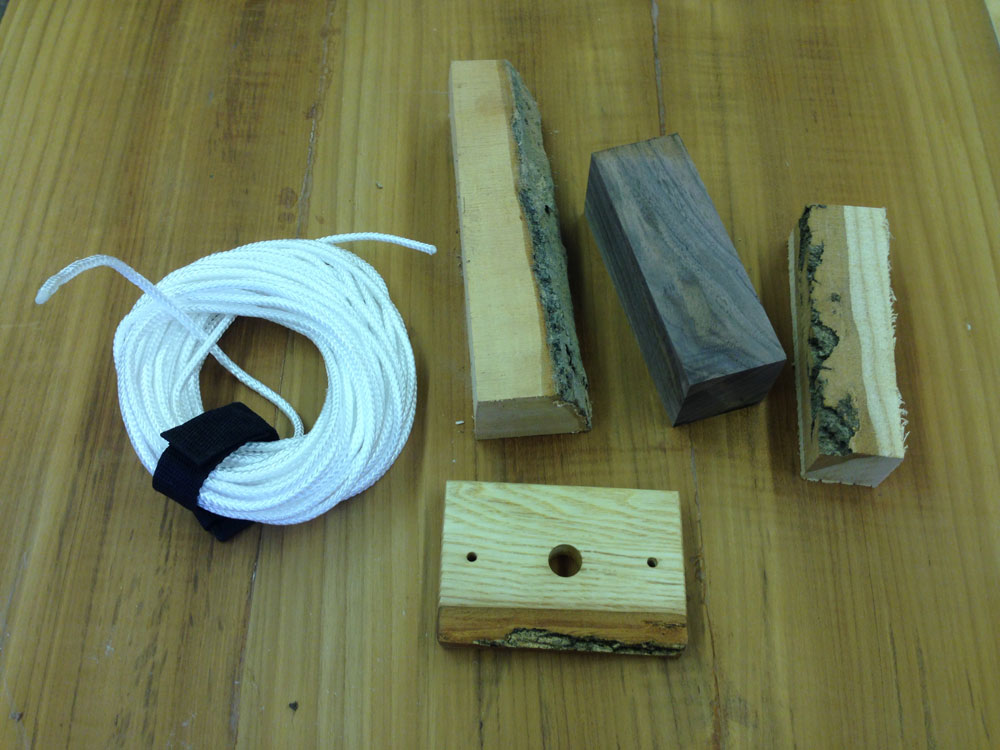
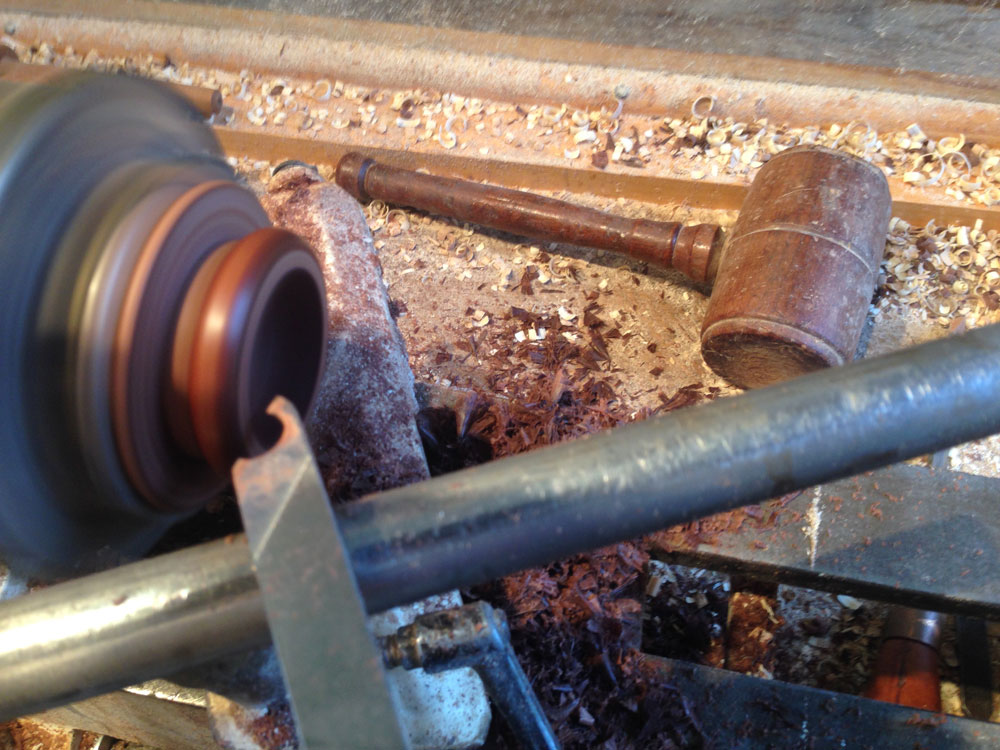
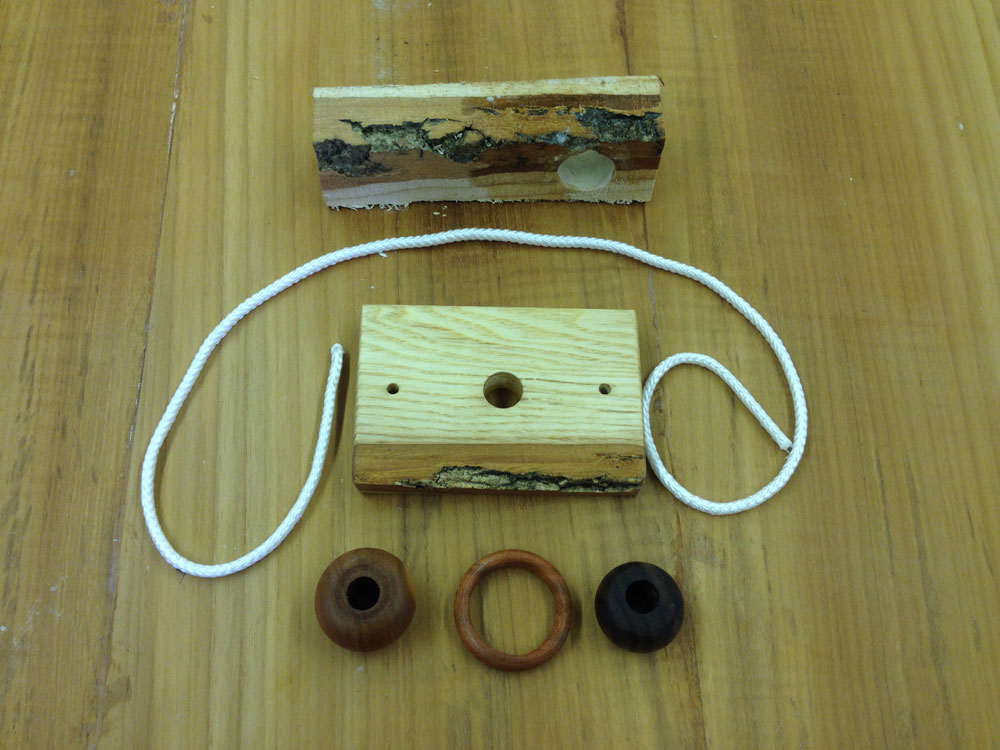
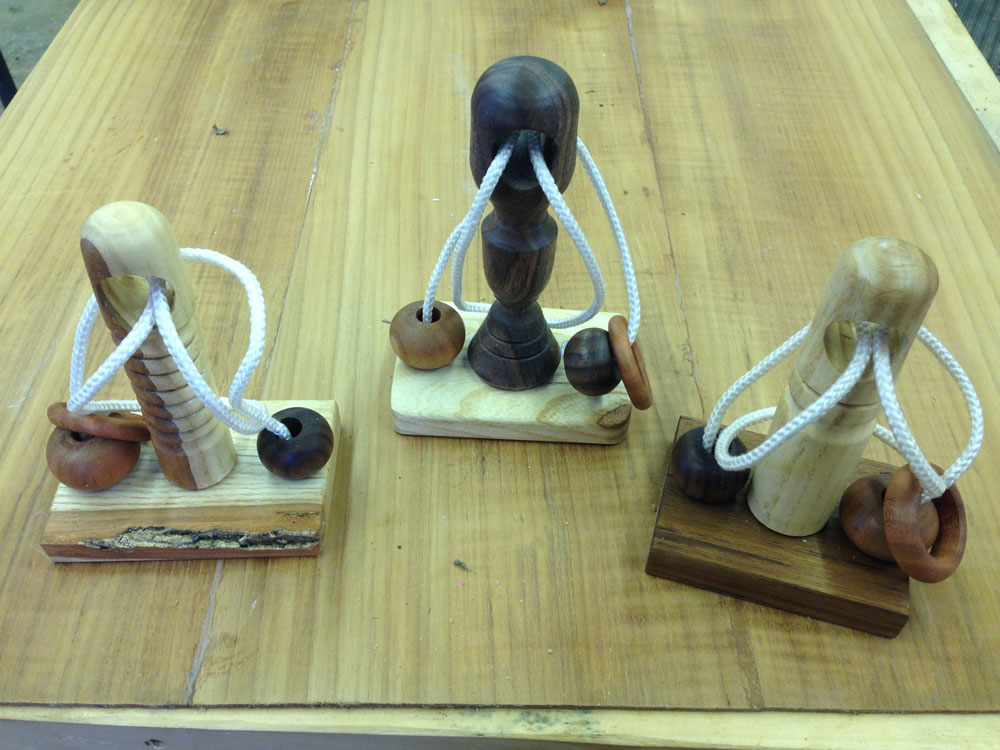
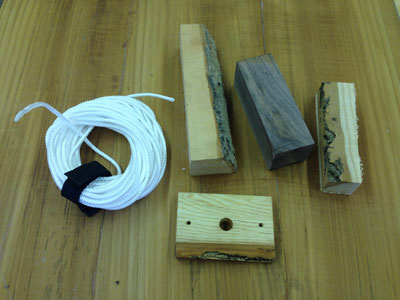
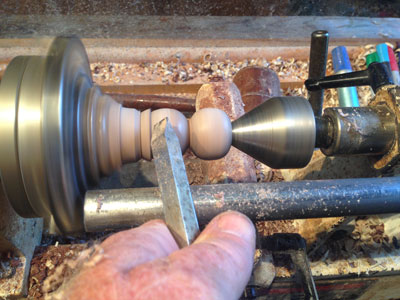
Begin by preparing the parts and cutting the bases – one or many depending on your end-goal. For this example, the base and post are white ash, one bead is walnut, one bead is locust, and the all-important ring (sometimes called the "cursor ring") is cherry. Whether or not the ring will fit over a bead is not a critical issue, but the size of the ring is.
Making different parts of the puzzle from different wood offers an aesthetically pleasing visual for the puzzle as a whole object. Similarly, paying attention to making the ring a full size, well-sanded, well-finished object offers an opportunity for the turner to show off their skills and allows a focus on achieving excellence. Making choices that might include bark, such as in the base for this sample, or other enhanced natural features in the base blank enriches the visual appeal of the finished product, even for those who choose to not attempt the challenge. Finally, making the beads, ring, and post should begin with drilling the hole. In both cases this ensures that the hole will be centered and properly placed.
|
Turning each bead and the ring from different colored woods offers an attractive way to make them different from each other. This is both interesting and facilitates communication: "Move the ring from the black bead to the red bead."
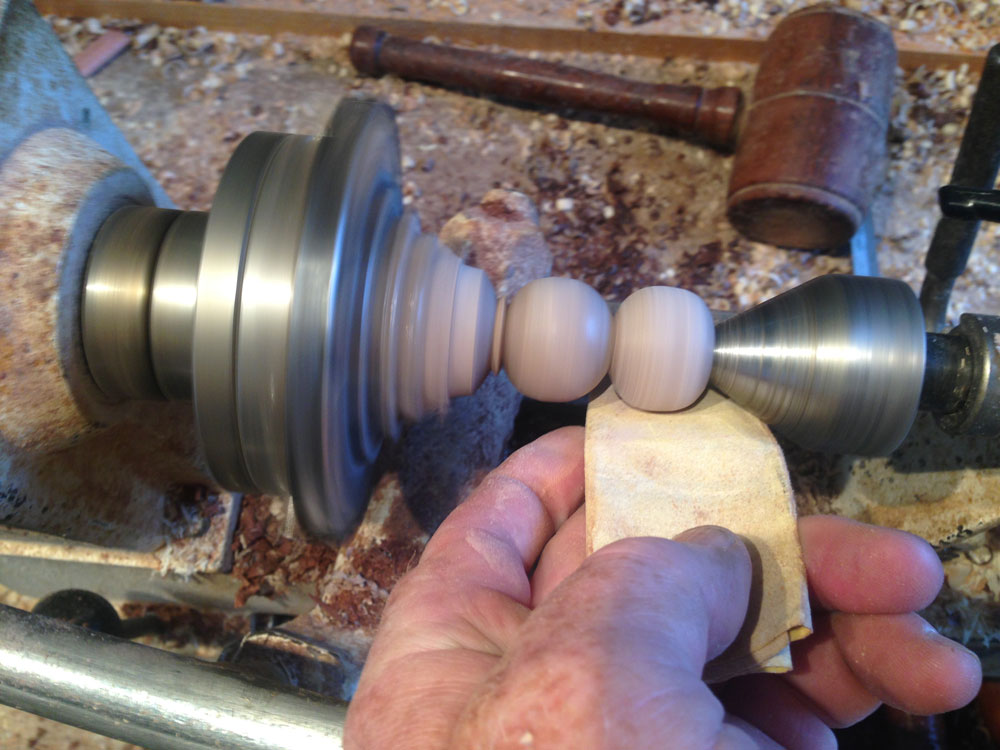
After drilling the hole for the beads, the mounted blank can be turned round and marked between centers.
|
Given the unique nature of these puzzle parts, the beads may be carefully measured … or for the dauntless … turned by eye. Because of the set-up time, making several beads from each blank adds to efficiency and promotes the idea of making several puzzles at one time.
|
As a turner gains experience and practice, the hand and eye complement each other and frequently reward the artist with a pleasing shape that exceeds the measured marker.

|
Before making the final cut to free the beads, sand and apply the
friction polish. The is far easier when done on the lathe than later by hand.
|
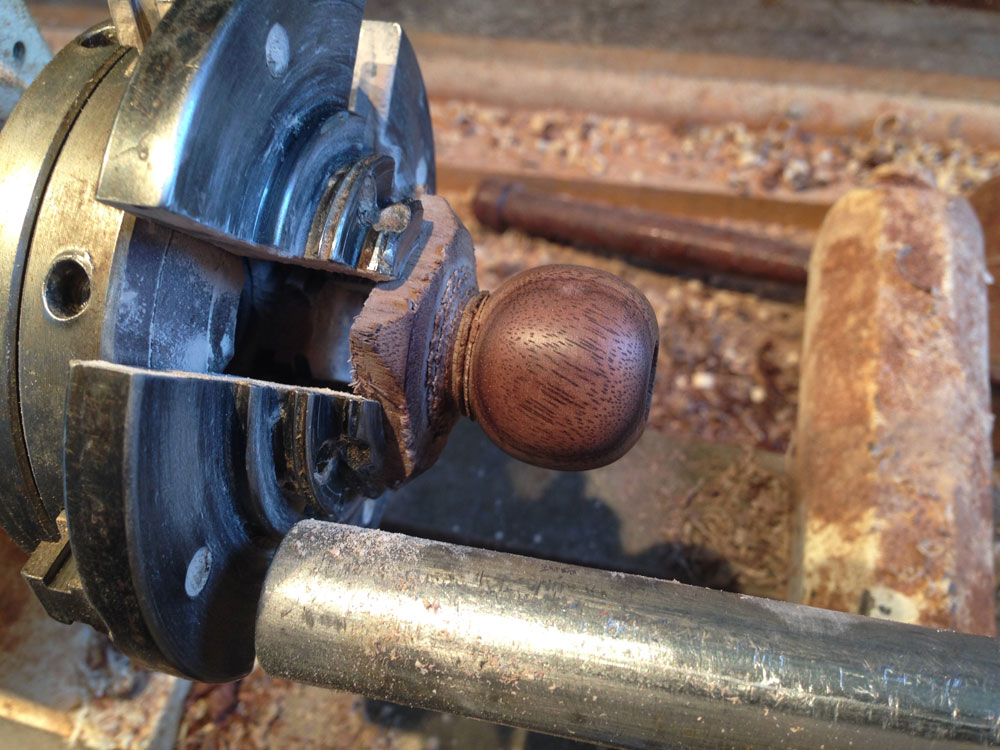
Once cut off, a little hand-sanding will be necessary, and the friction polish finish applies easily even off the lathe. Mix 1/3 each of shellac, boiled linseed oil, and turpentine in an air-tight bottle (empty/clean dish detergent bottles excel here), then shake the bottle to mix the isolated ingredients. The solution you end up with offers an amazing friction polish with a universally pleasing odor.
|
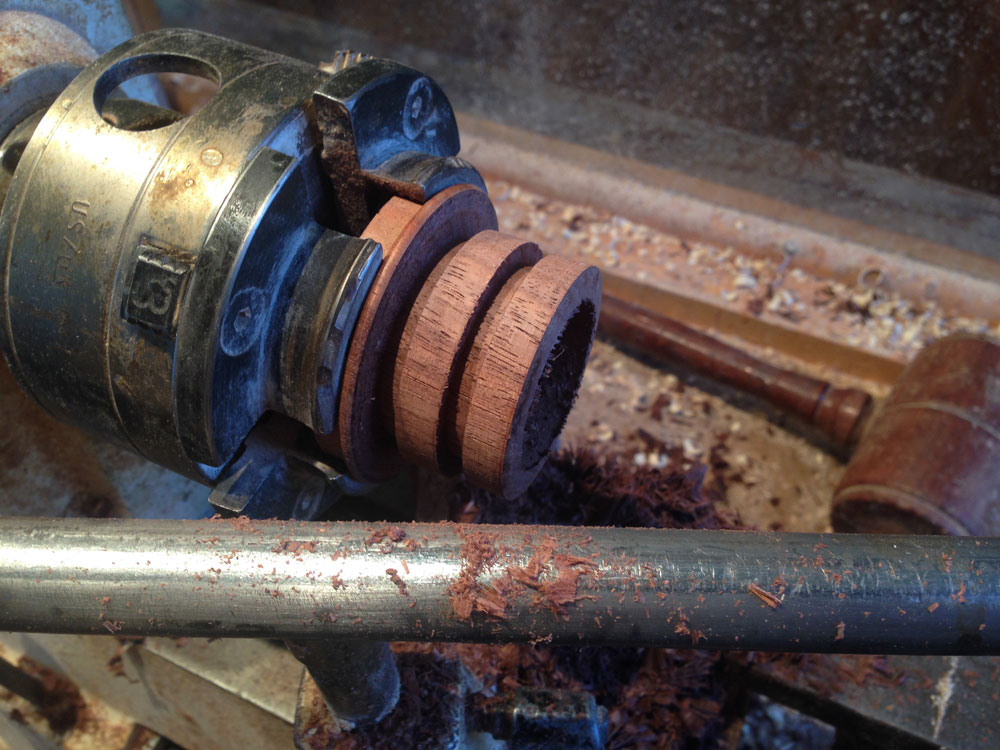
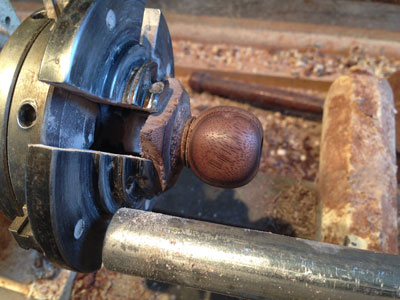
Turning rings for the puzzles also presents an interesting skill challenge. Typically, the hole is drilled first (remember to slow the speed if using a
forstner bit).
Mark off the future rings with a
parting tool.
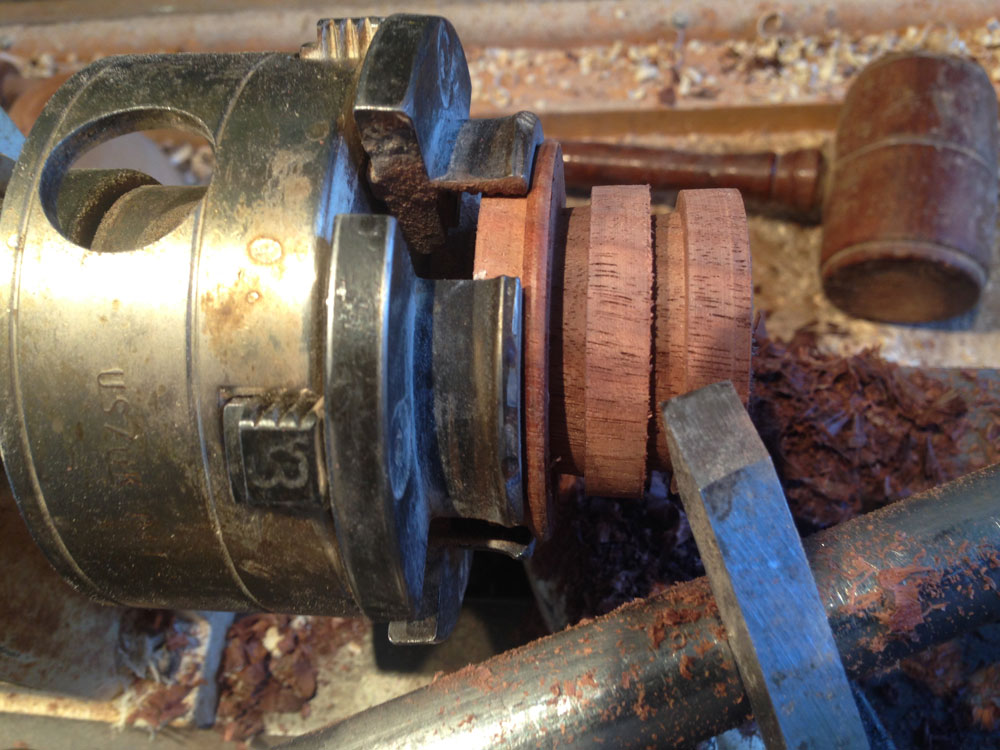
Shape the top and sides of the rings with a 3/8" beading and parting tool, not quite cutting through.
Once the top and sides have been rounded, sand and finish before completing the ring.
If the turner has a "bead scraper" available, it does well to round at least one side of the inside of the ring.
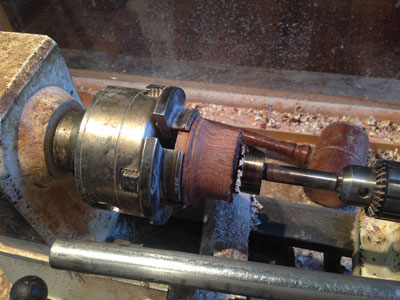
Cut the first ring free with a sharp
skew chisel.
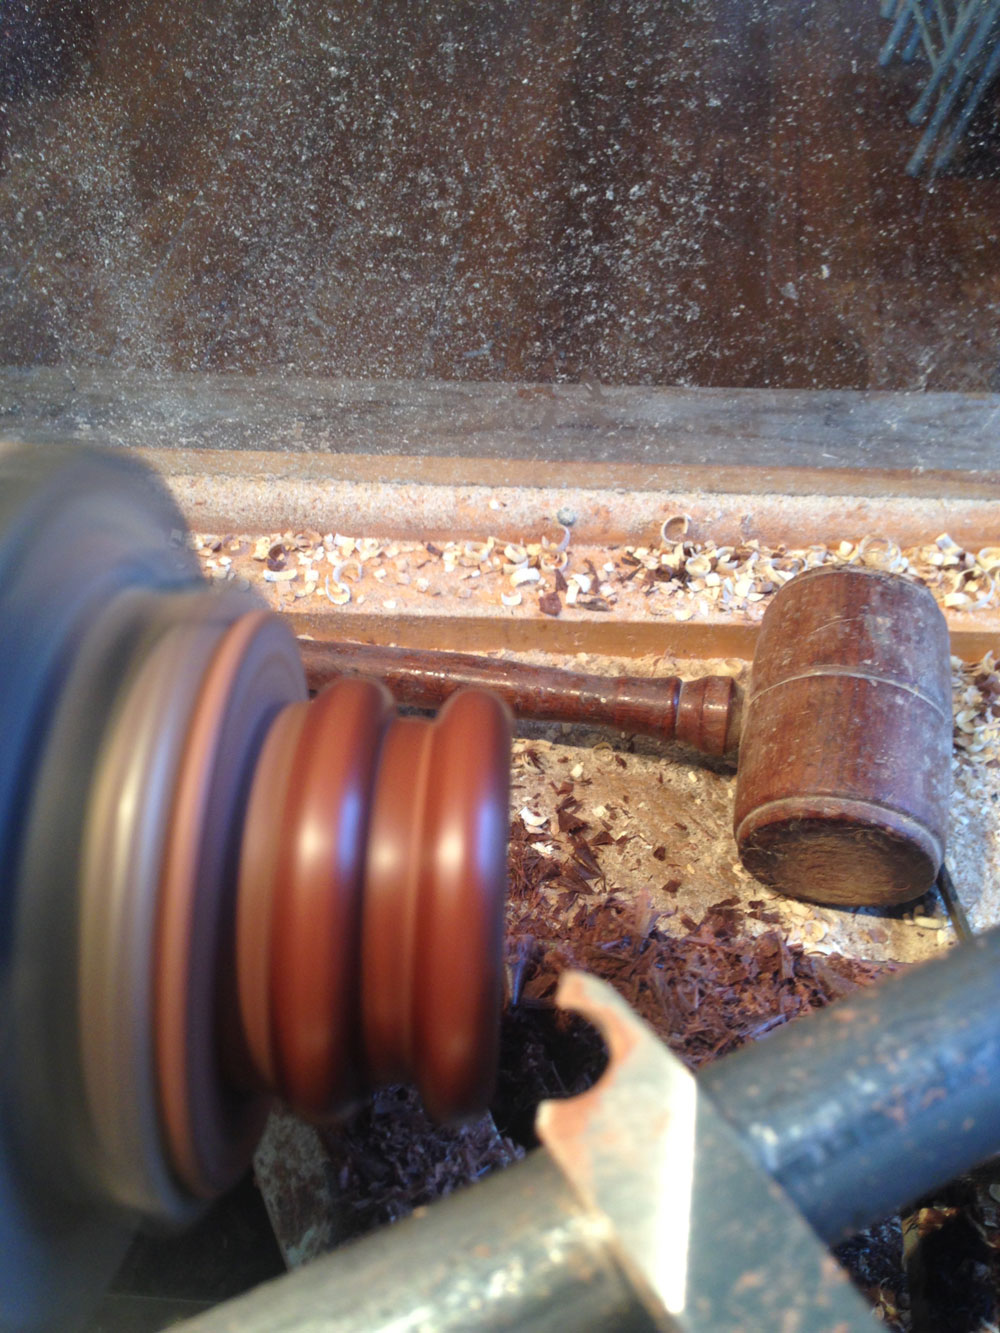
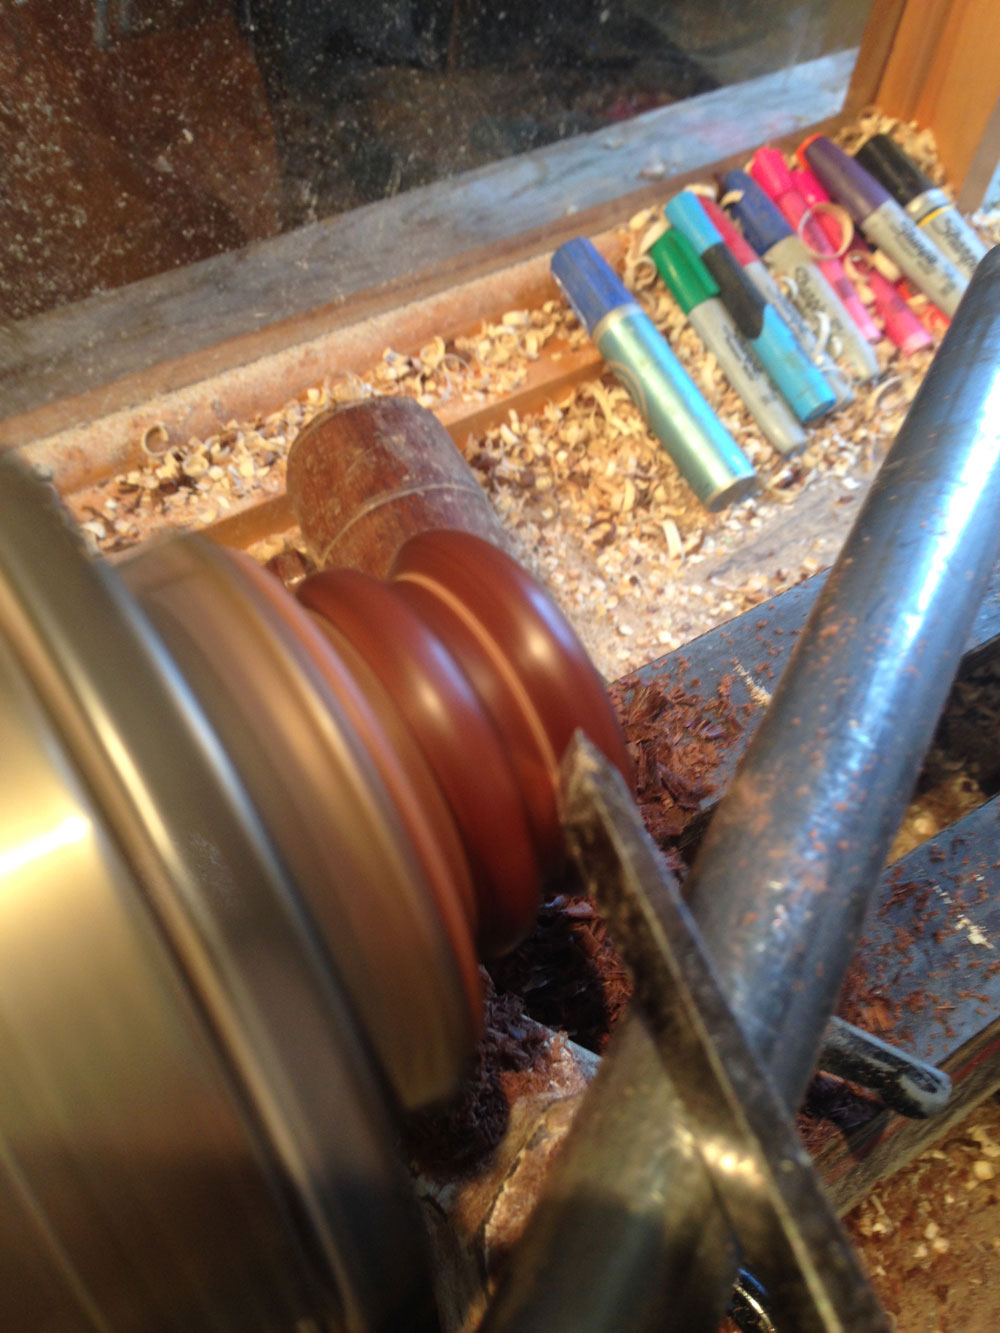
Finish the second ring with the scraper as was done with the first ring and cut the ring free with a skew.
Hand finish the other rounding on each ring by sanding, and then re-polish.
With the ring and beads (remember, different colors for the beads) complete, cut the 3/16" nylon line to the correct length of 27". This critical measurement must be adjusted if the height of the post is raised from the base beyond this design. After the turner has made one or many of these, it might be interesting to lengthen both. Shortening or lengthening the nylon line excessively may lead to a puzzle impossible to solve.
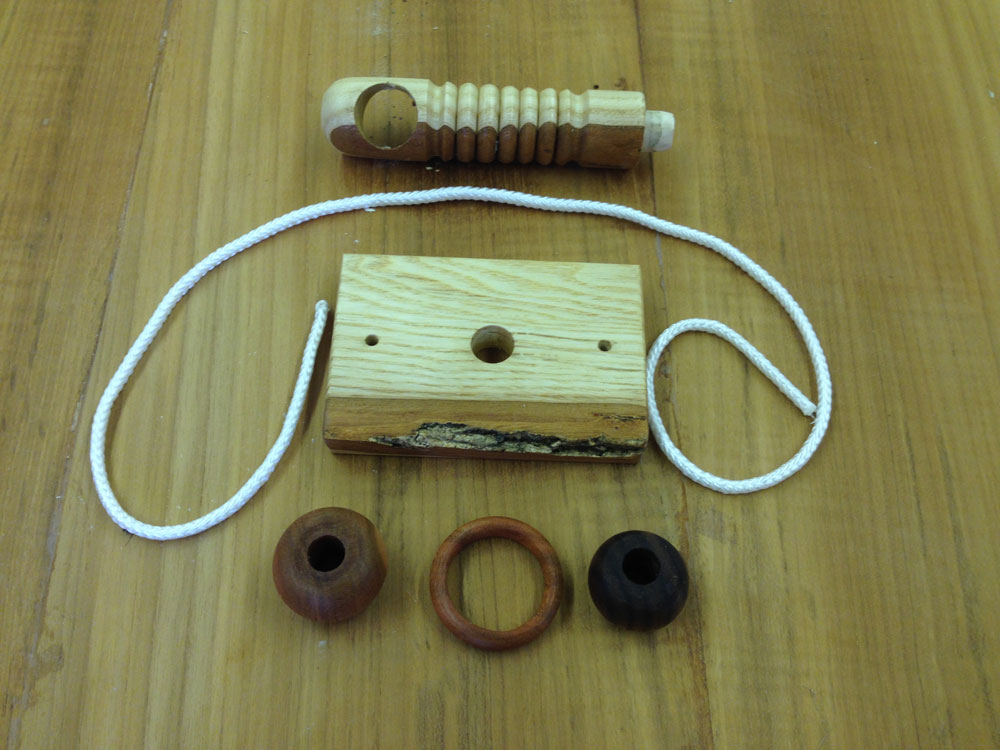
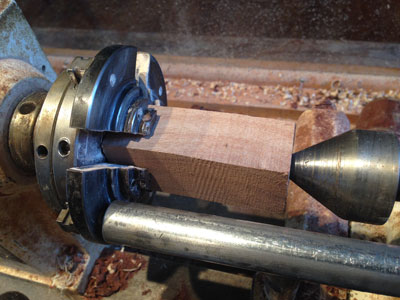
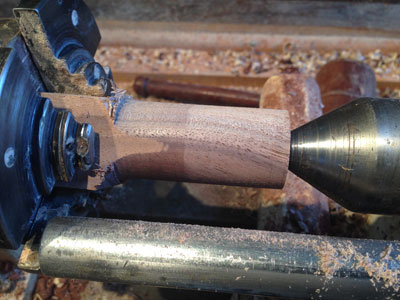
As in most turning projects, drilling the hole in the post first is a good practice. If the piece includes special figure or bark sections, this will aid in centering the piece on the lathe for turning to protect that feature.
With the base made, finish applied and holes drilled, the turner can focus attention on making the other parts an interesting and attractive blend of wood and form.
Shape, form, color, texture, size – these features typify the woodturner's art. Doing these puzzles in multiple numbers gives the turner opportunities to experiment with different ideas about how pleasing some shapes are and how boring and uninteresting others can be.
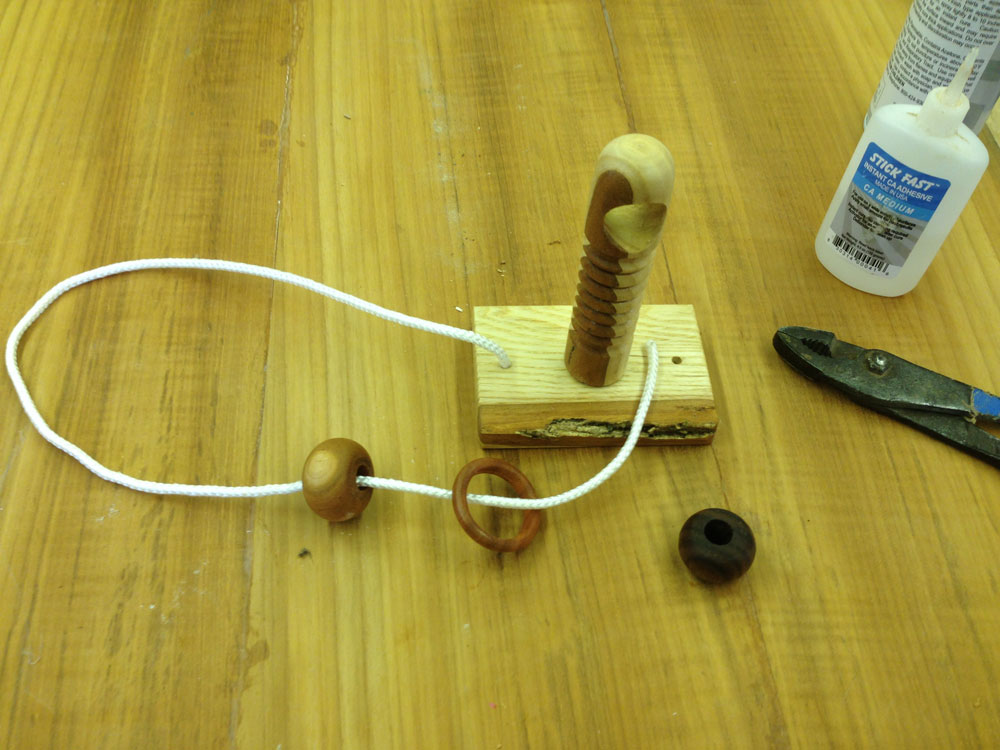
With all the parts made and finishes applied, the post should be glued in place on the base. Because this puzzle is a closed form (the string is glued in place and all of the parts are captured permanently), assembly is a critical part of making it possible to succeed.
Using
medium CA glue
(or another glue if preferred), fashion one end of the string in the 3/16" drilled hole.
Add one of the beads and the ring to the length of 3/16" line.
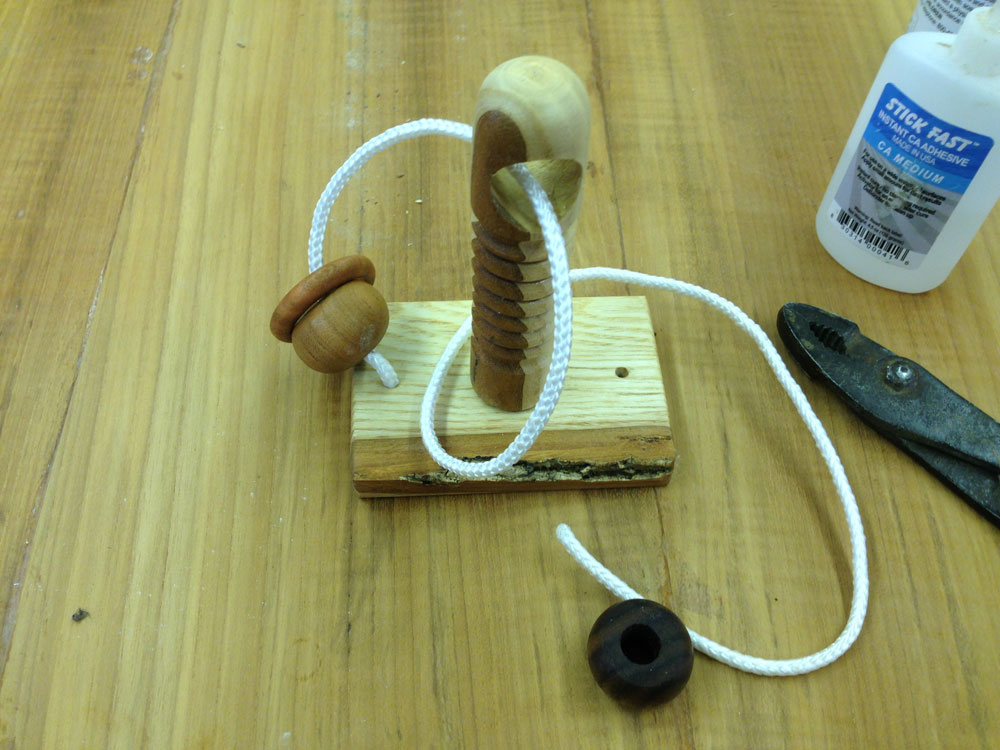
Thread the line through the hole in the post, and wind it back around behind the post.
Thread it back through the hole in the post from the front before threading it through the other bead.
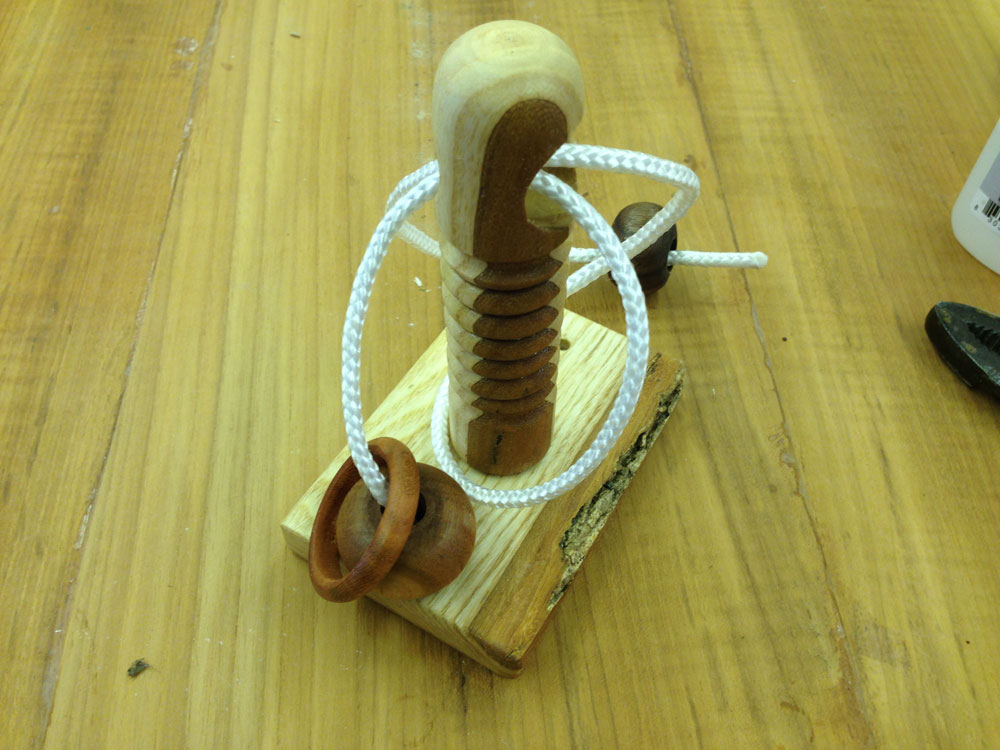
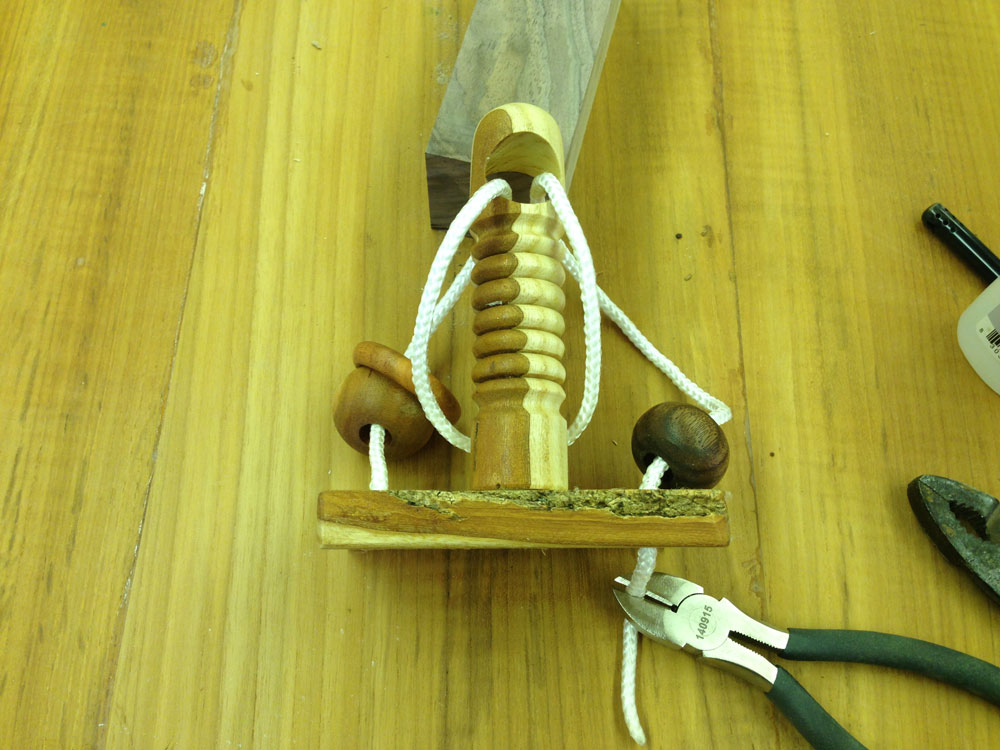
Thread the end of the line through the other 3/16" drilled hole in the base and glue it in place, cutting off up to 2" of it.
When cutting the nylon line (slippery works well for this puzzle), it will fray badly unless the turner burns (and twist-to-point) the plastic ends.
After gluing the second end of the line in place, a puzzle-master might smooth the bottom of the base on a belt sander before burning in the maker's name.
This puzzle, like the original Ring ‘n String puzzle of 2015 is relatively easy for those who know the trick to solve it. Puzzlers across generations and talents can be challenged with some unexpectedly successful self-solvers and some equally unexpectedly frustrated participants.
The prize is two-fold. First, this is a fun game that people can share and challenge their wits. For the turner, this offers a pleasing gift (for many) with an infinite variety of opportunities for using up beautiful scraps of wood and creating an artistically pleasing piece of wood-turned art.
The goal of this puzzle is to switch the single ring from its nesting place on one of the beads over to the other side nesting next to the other bead. It is possible to do it, and in some respects this is easier than the 2015 Ring ‘n String puzzle because it is a closed environment.
As learned before with the earlier puzzle, even people who ask for the solution do not really want it, and if it is given too easily, they get mad. Hopefully reader/turners will decide to make this toy puzzle and then learn to solve it themselves (a genuine pleasure).
For those who struggle with this challenge and who remain confounded, there are solution instructions available via
email to me.
Confound your friends and neighbors with this puzzle. One of the most interesting things is to watch people struggle with it and to recognize both the good efforts that do not lead to success and to the amazing analysis and efforts that lead to discovering the solution.
Enjoy the challenge!
Located in Castine, Maine, Highlands Woodturning gallery and shop offers woodturning classes and shop time, a gallery of woodturned art, custom woodturning for repairs, renovations, and architectural installations. You can email Temple at
temple@highlandswoodturning.com. Take a look at Temple's Website at
http://www.highlandswoodturning.com/.
Return to
The Highland Woodturner
front page
|