|
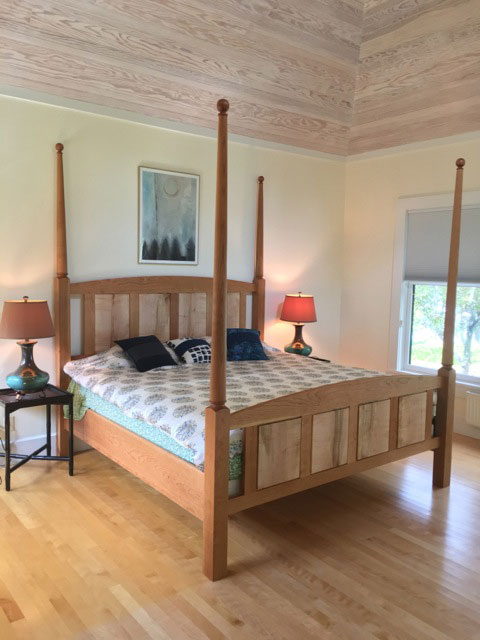
In this 3-Part Series, Temple Blackwood has been commissioned to make the turnings for a 4-post cherry bed being made by his friend Geoffrey Warner.
Part 1 of this series
was featured in our July 2016 issue of The Highland Woodturner where he discussed the turning and preparing of the Base Pommels.
Part 2 was featured in our September 2016 issue of The Highland Woodturner
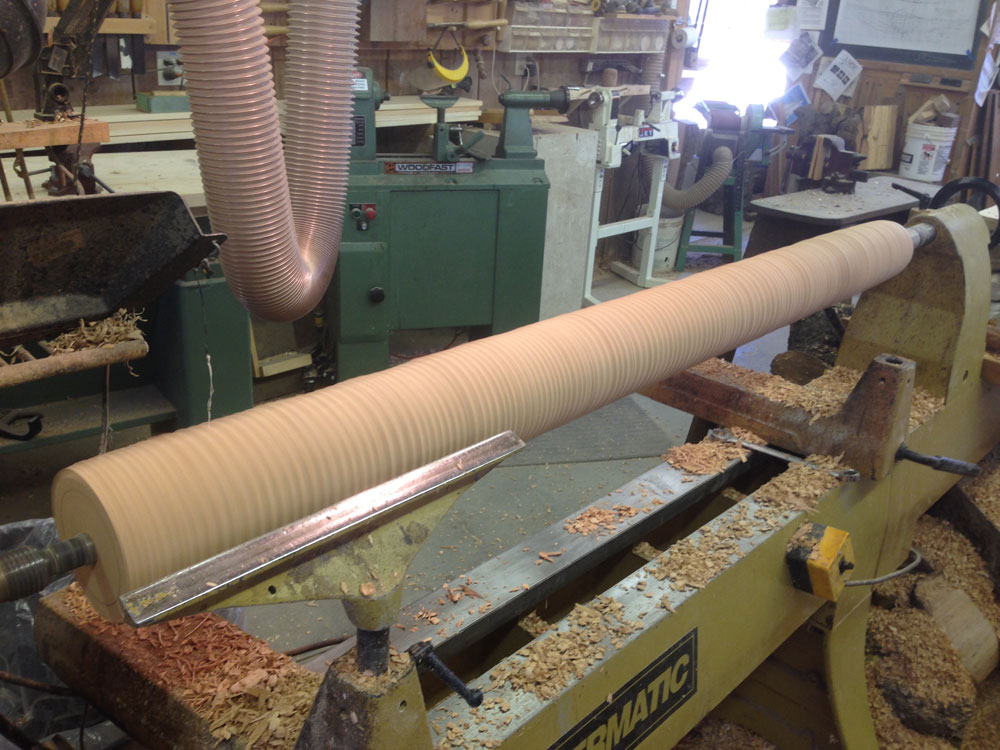
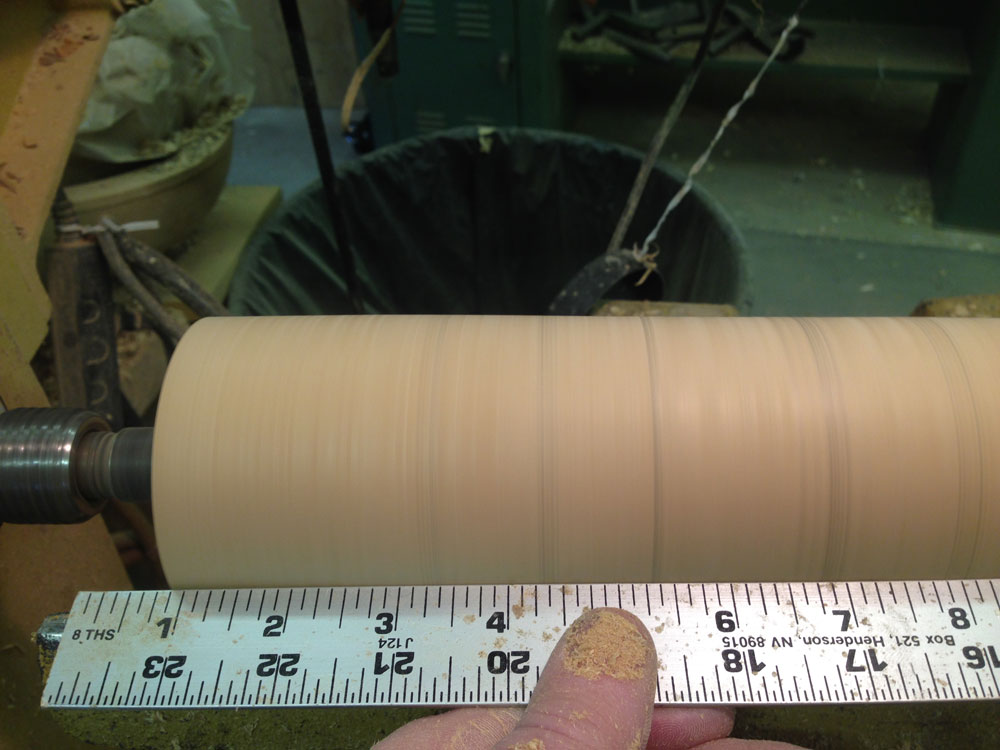
which focused on turning and preparing the tapered columns.
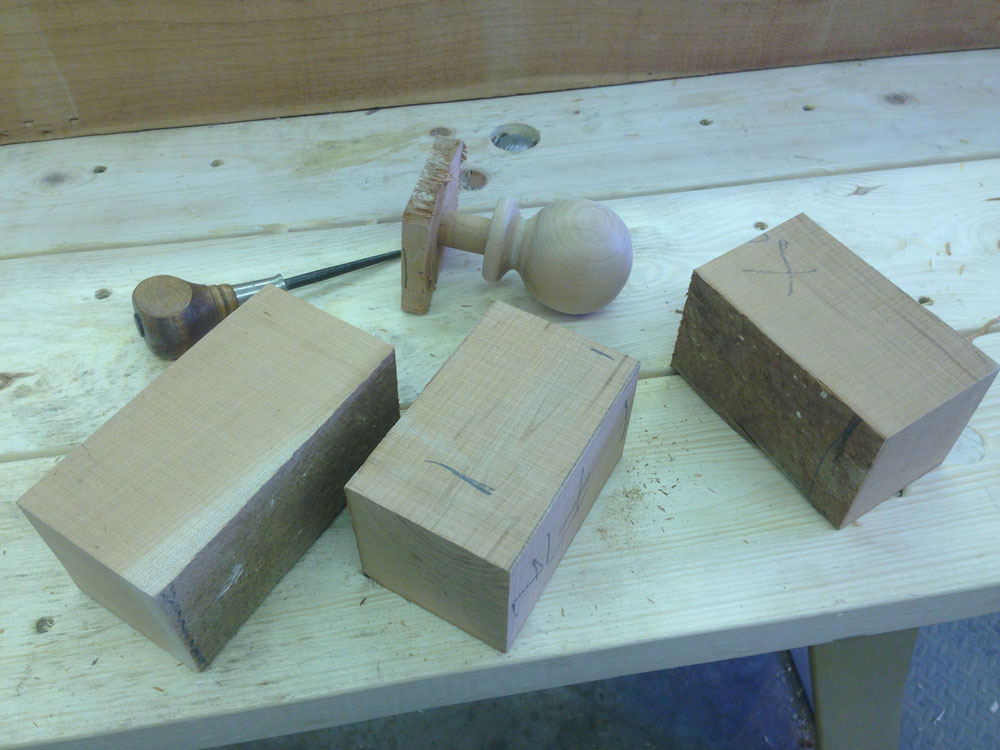
Before starting on the actual pieces, cut three, four, or more blocks of a lesser wood to size and practice the cuts outlined below. The most sophisticated measuring tools for this part of the project are your hands and eyes. The symmetry of the ball flowing into the reversing curve of the cove should be an image of artful beauty rather than a forced and measured feat of engineering. Once the practiced motions become comfortable and familiar, tackle the cherry blocks with courage and confidence.
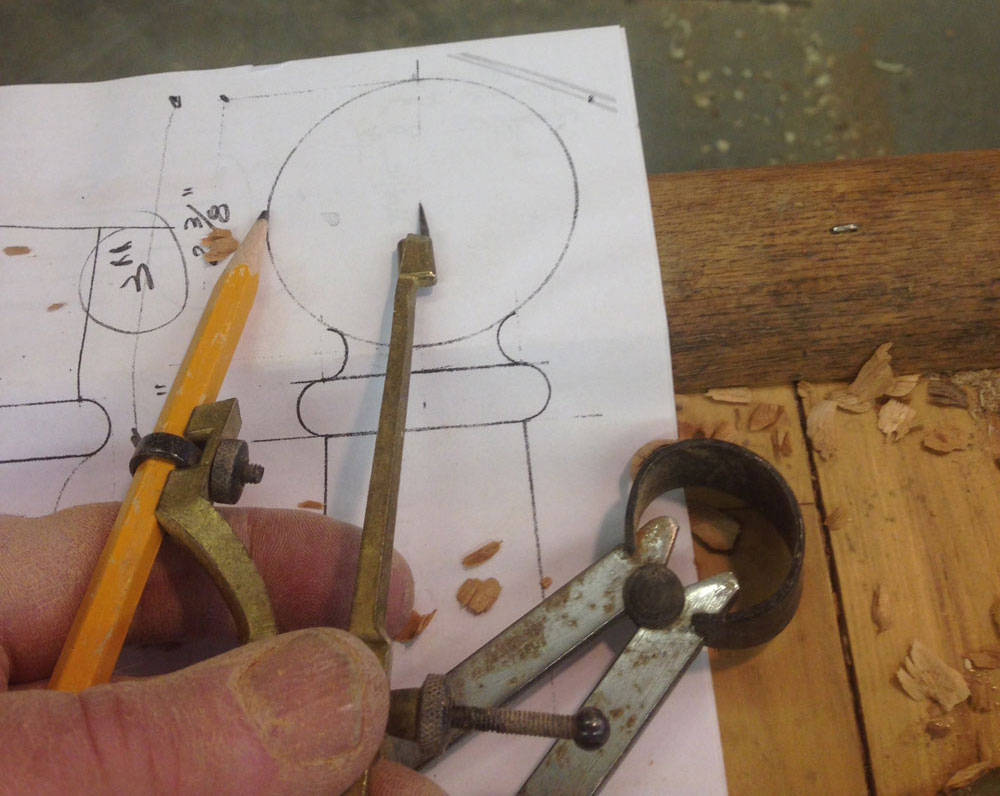
Working from a full-size measured drawing makes this part of the job reliably accurate. While these finials will be above the sight-line and spread to the outer corners of the bed, they are critical images as a person takes in the entire image of the bed. They, like the measured height of each horizontal transition point of the legs, will only stand out if they are not identical in appearance. The sharp detail of the bead, the spherical roundness of the ball, and the backward sweep of the cove will please the eye and functionally disappear into the larger wholeness of the bed.
One way to practice this and other similar shapes, roughing with a gouge and smoothing with a skew, is to turn a series of eggs, apples, pears, and – of course – this finial.
Mounting the squared block in a self-centering four-jaw chuck ensures a firm, well-positioned blank for the work that will also give the turner access to the end of the ball when making the final skew cuts. The other method of leaving a waste block on the right creates a challenge that either risks tear-out at the top or the creation of a secondary facet circle near the top. Both mar the top of the finial which while not on immediate view (except for someone seven feet tall) unfortunately reflect back on either the cabinetmaker or turner.
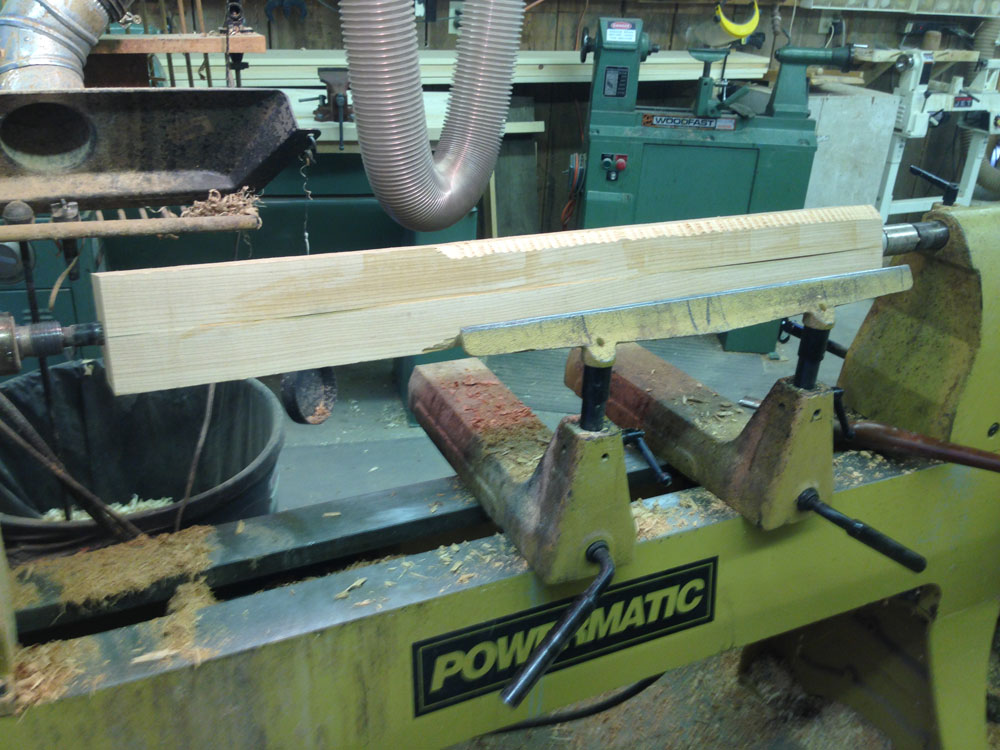
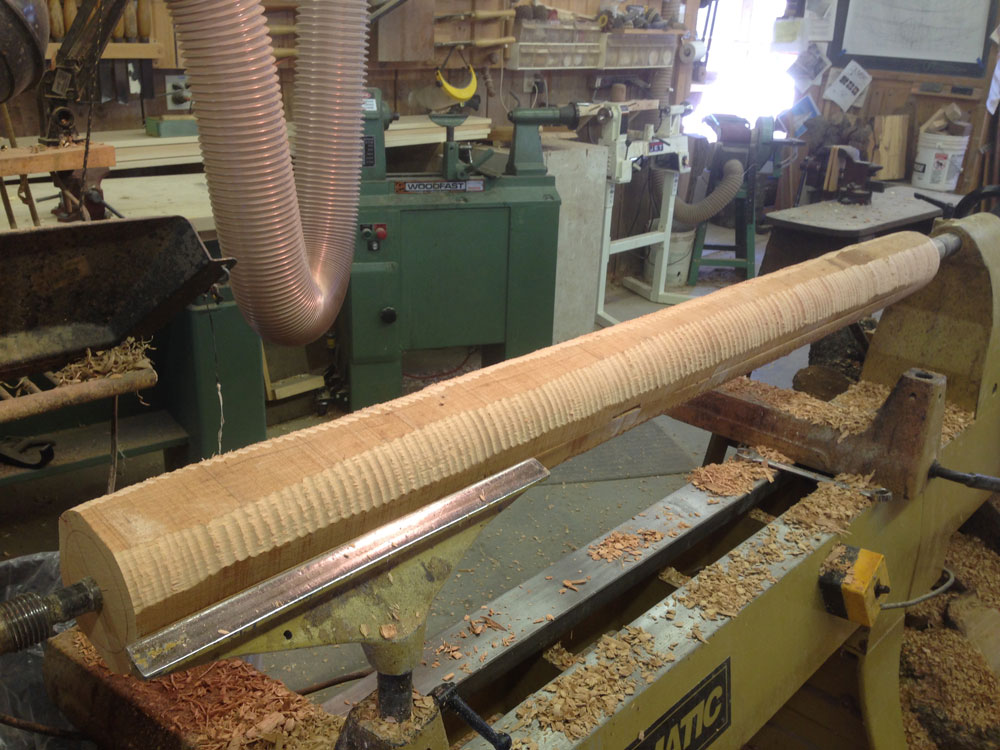
With a
roughing gouge, turn the blank to round leaving it slightly larger than the planned diameter of the finished ball.
With your
compass
set from the drawing, mark the critical transition points on the wood. This is where accurate measuring and cutting will make or break the final product of four identical finials.
Working with the
3/8" beading tool
and a carefully set
caliper, make a shallow cut that will later be deepened to form the 3/4" tenon (or pin) that will position the finial on top of the tapered post. With only four to make, it is well worth checking the set of the caliper each time to be sure it has not moved. When there are many more pieces to make, it is worth creating a template of the cuts or using the trusty open-end wrench of the correct size. The adjustable calipers have a way of re-adjusting themselves at just the wrong time without the turner realizing it.
Using a
small roughing gouge, rough the ball while remembering to leave it proud (slightly larger) and shape the deep cove to its finished diameter, again checking this with another well-set caliper. Although for this project I did make a full template, I found the final dimensions too small for it to be effective.
Using the
skew chisel, smooth the ball to its finished diameter from the largest point to each side. This requires an extremely sharp and well-managed skew (which is why practicing can be such a help), and the assistance of a carefully cut template at this point can build confidence and reveal slight irregularities that can be skewed to finished roundness.
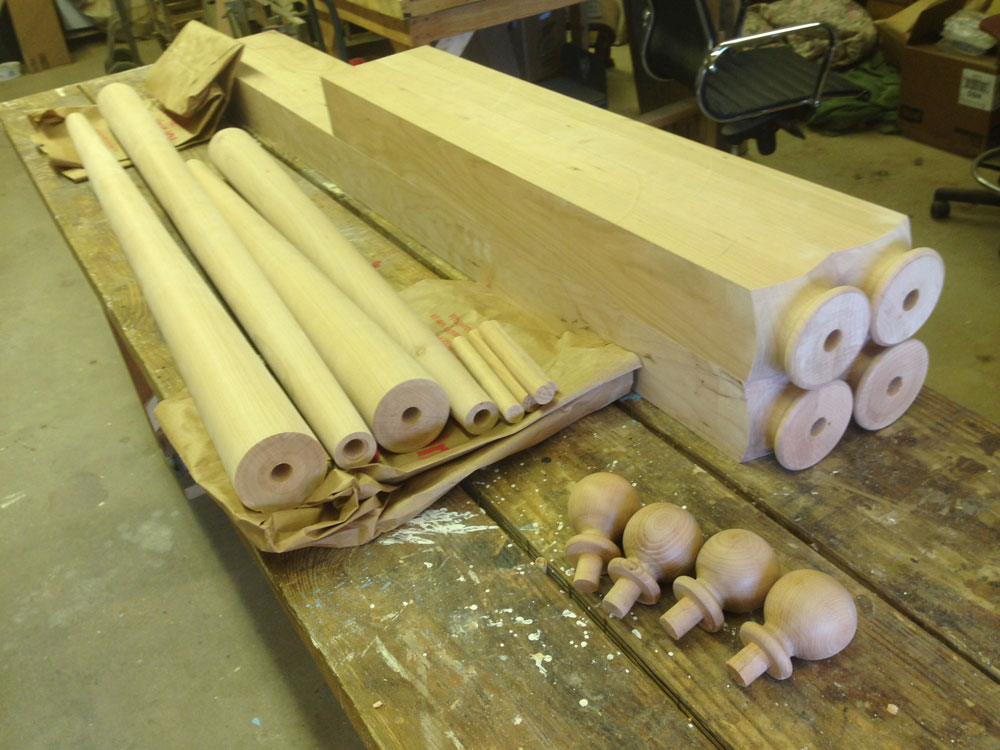
The assembled turned parts appeared to be a bundle (kit) of the bed, but the final completed bed demonstrates the artistically pleasing vision of the designer/cabinetmaker, Geoffrey Warner.
Partnerships like this are twice rewarding in both cooperation and friendship based on a shared passion for working wood in our own ways.
Located in Castine, Highlands Woodturning gallery and shop offers woodturning classes and shop time, a gallery of woodturned art, custom woodturning for repairs, renovations, and architectural installations. You can email Temple at
temple@highlandswoodturning.com. Take a look at Temple's Website at
http://www.highlandswoodturning.com/.
Return to
The Highland Woodturner
front page
|