|
A magic wand is a great woodturning project, especially if you need a gift for a young boy or girl. And a wand is pretty darn easy to turn, after all. One long spindle, maybe an inch in diameter, a few roughing passes down the length to get a taper, a few beads at the top to make a handle, and you've got a magic wand. Well…except it isn't really magic, is it?
To make a real magic wand, a magical core is required. That's what Garrick Ollivander put inside each magic wand he made and sold at Ollivander's Fine Wands in Diagon Alley.

|
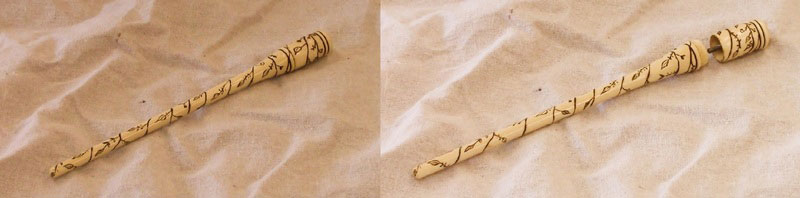
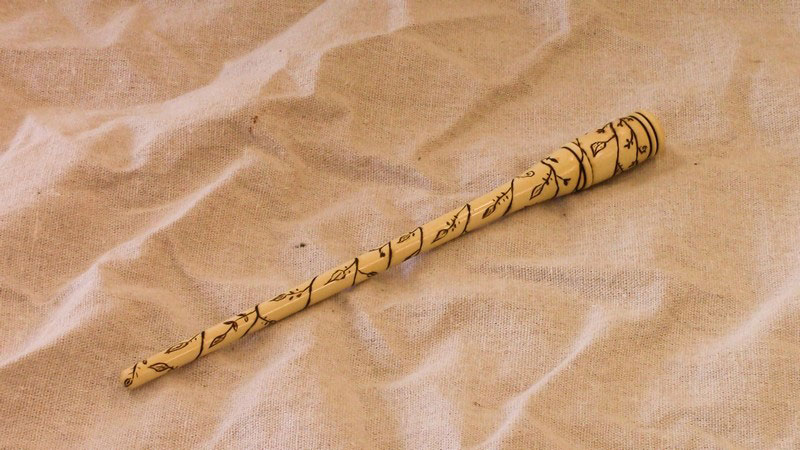
Figure 1 - A Hermione Granger magic wand
closed (left) and open (right)
|
In this article, I'll show you how I made a magic wand with a secret compartment to hold the magical core. This wand isn't just any magic wand, however…it's a Hermione Granger magic wand, made of "vine wood", with a dragon heartstring magical core. (If you're making a wand for a young boy, however, you might want to go with a Harry Potter wand, holly with a phoenix feather magical core, or a Neville Longbottom wand, cherry with a unicorn hair magical core).
Materials
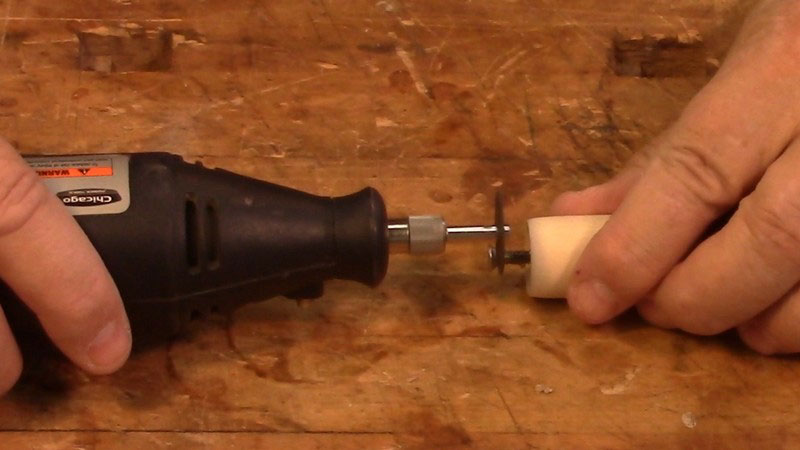
It doesn't take much in the way of materials to turn this magic wand. I used a 1"x1"x18" spindle for the wand (I used holly for the Hermione Granger wand. For other wands I used bubinga, purpleheart or walnut – the pictures below are mixed from several projects). I also used two pieces of hardware: a
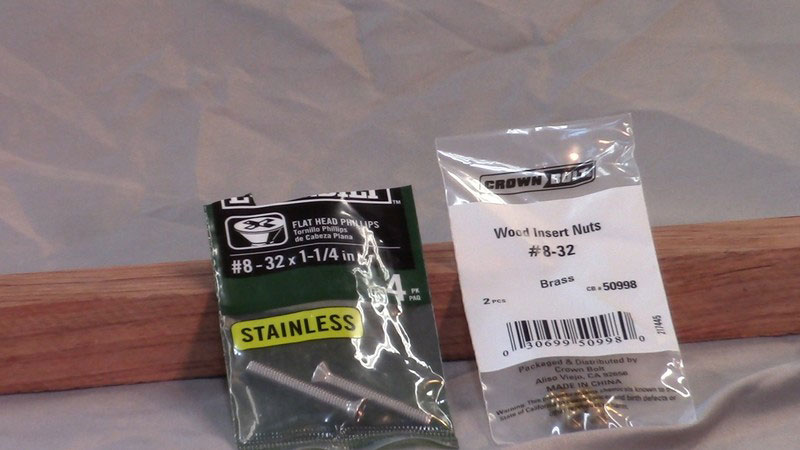
#8-32 threaded insert
and a #8-32 machine screw. The wand is turned in two pieces (a body and a handle), then the threaded insert is put into the body and the screw into the handle – the handle then screws into the body and is seamless when tightened down. The hole in the body for the threaded insert is longer than the insert, leaving room for the magical core to be contained inside the wand's body.

|
Figure 2 - I used a threaded insert and a matching screw to allow
the wand handle to be removed from the wand body
|
I also used some craft wire to make the dragon heartstring magical core. (Real dragon heartstrings are hard to get hold of these days, especially since the dragons hired a lobbyist and had Congress declare them an endangered species.) I had both silver-colored and gold-colored 18-gauge wire, and intertwined them - everyone knows that dragons love gold and silver.
Initial Turning
I cut about 10" from my 1"x1" spindle for the wand body. The actual length isn't too critical – 10" is probably the minimum you'd want, otherwise the wand won't look correctly proportioned. Then I cut a 3" long piece for the handle. I left some extra length on both pieces to allow for my inevitable mistakes (it's those pesky mistakes that are the real reason these pictures are of two different pieces of wood).
I roughed down the body of the wand to just under an inch (about the maximum I could get from a 1"x1" spindle). Then I cut a 3/4" diameter tenon on the tailstock end of the body – this will match a mortise on the handle end, which gives a more seamless fit between the handle and body.
|
|
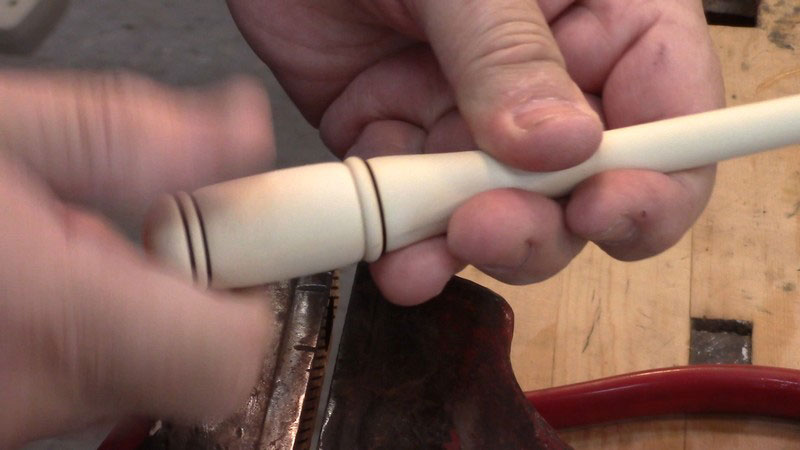
Figure 3 - I turned a 3/4" tenon on the handle end of the body
|
After tapering the body of the wand from top to bottom (I left it blunt at the pointy end – it is a toy, you know), I cut a bead right below the tenon. This also helps disguise the fact that the handle can be removed to access the magical core.
|
|
Figure 4 - I cut a bead right below the tenon on the body
|
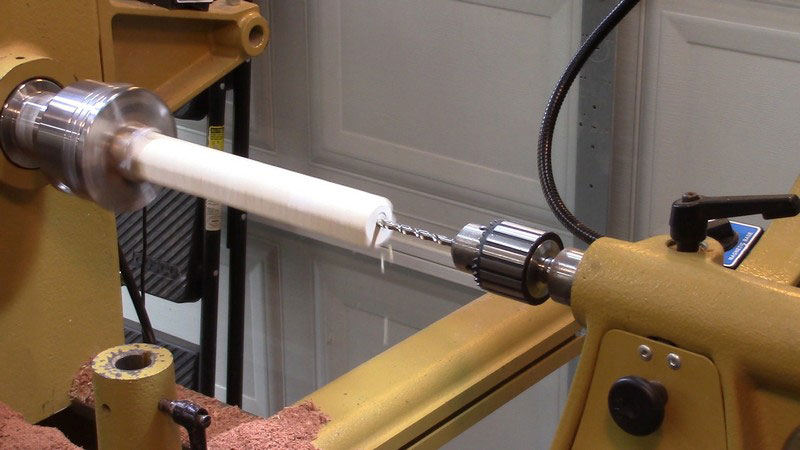
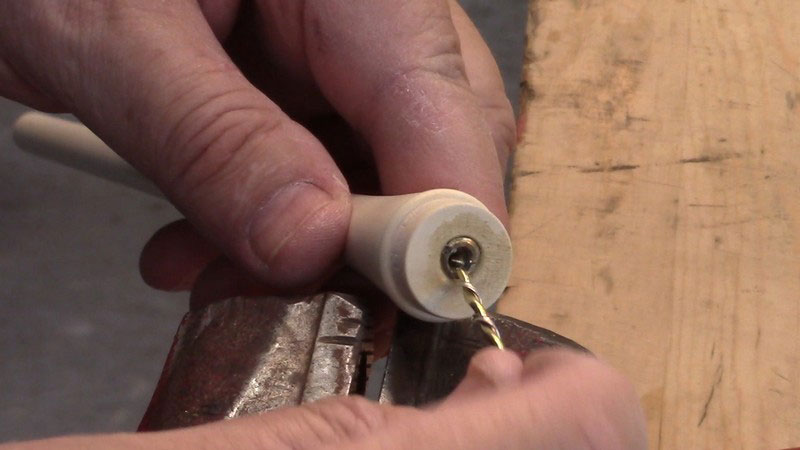
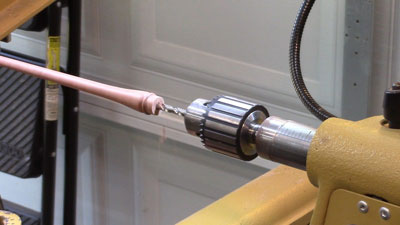
I drilled a 15/64" hole in the body, right through the tenon. This hole will accept the threaded insert. The depth of the hole should be about 2"…partly for the threaded insert to screw into, and the rest of the hole to hold the dragon heartstring magical core. (If you're doing this, be sure to check your threaded insert; its diameter could be different than the one I used).
|
|
Figure 5 - I drilled a 15/64" hole for the threaded insert
|
Do as I say, not as I do
Remember those mistakes I mentioned earlier? You're looking at one of them. By drilling the hole after shaping the body (leaving only a quarter inch or so at the headstock end of the body piece), the wand body shattered at the narrow point. Oops!

|
Figure 6 - Drilling the hole shattered the small end of the wand -
back to the drawing board!
|
If at first I didn't succeed…
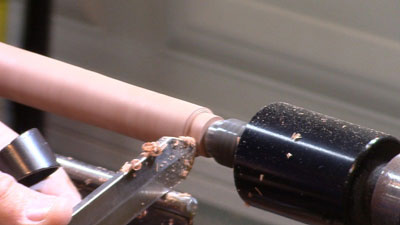
I was out of bubinga, so I switched to a spindle of holly I had been hoarding for a long time. This time, having learned from my mistake, I drilled the hole in the body first, while there was still sufficient wood to prevent any breakage.

|
|
Figure 7 - Another body blank - this time, I drilled the hole FIRST!
|
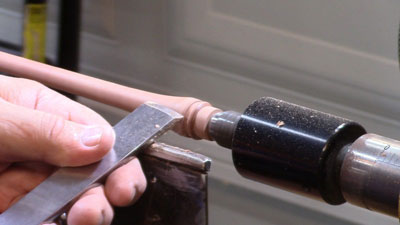
After re-doing everything I had previously done, I had the body done (again). As you can see, I added a burn line right below the bead, and I cut a slight bevel at the top of the hole to make it easier to get the threaded insert started.
|
|
Figure 8 - The completed new body
|
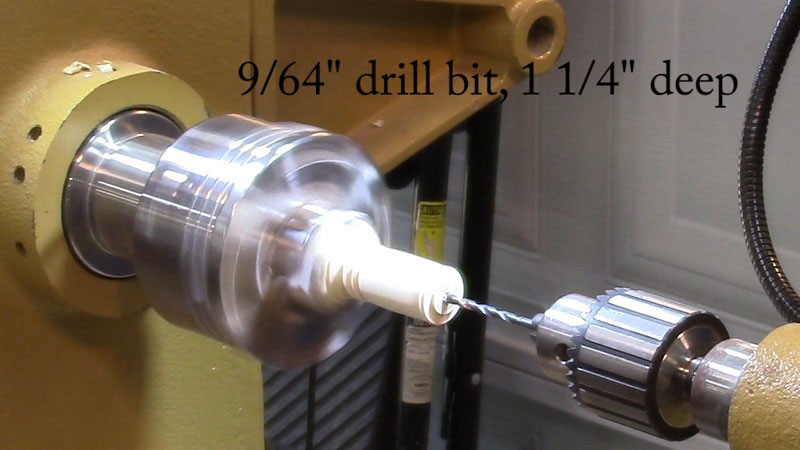
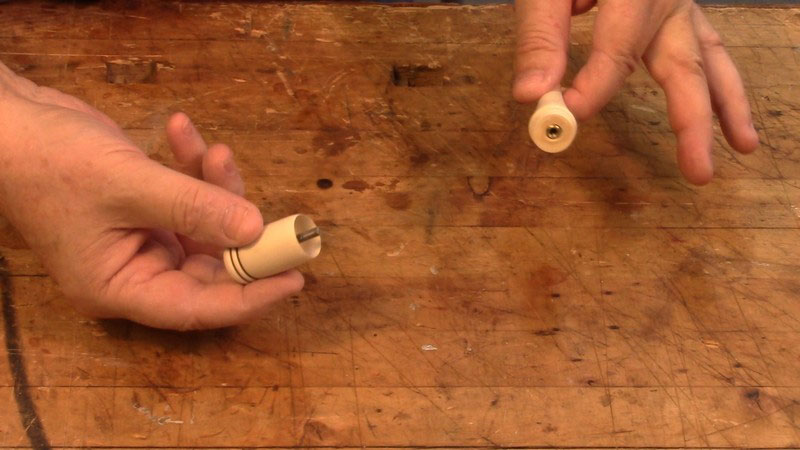
The Handle
I chucked my 3" length of holly that would be the handle, turned it down to round, added a bead at the body end (toward the tailstock in the picture), cut a couple of beads to decorate the top of the handle, then drilled a 9/64" hole 1-1/4" deep into the body end of the handle. This hole will receive the machine screw that will attach the handle to the threaded insert in the wand's body.

|
|
Figure 9 - I drilled a mounting hole for the #8-32 machine screw
|
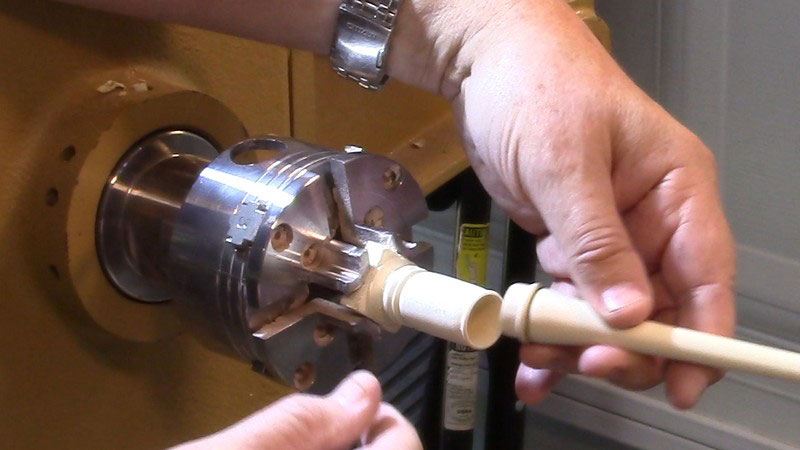
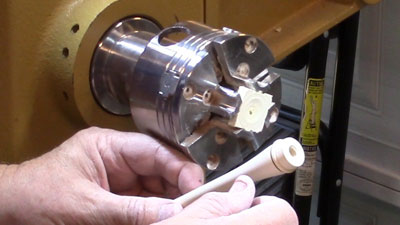
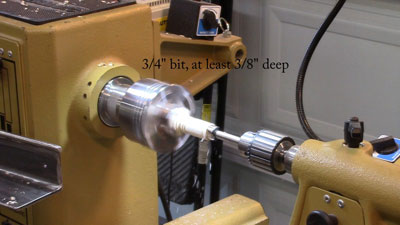
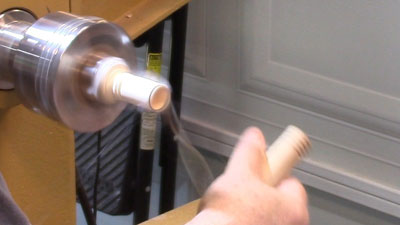
One more hole is necessary in the handle – a mortise to fit the tenon on the end of the body. As mentioned earlier, the tenon on the body fitting into the mortise on the handle assists in making the handle\body joint invisible. I drilled a 3/4" hole to match the body tenon.
|
Figure 10 - The hole to receive the body tenon is 3/4" in diameter,
and should be at least 3/8" deep
|

|
|
Figure 11 - This is how the body fits to the handle
|
Oops Again
Well, I hate to keep bringing up the mistakes that I said just might happen. But another one just happened. While burning a line at the bead on the bottom of the handle, I was a bit too enthusiastic, and burned right through the bead, cutting it off.
|
Figure 12 - I wasn't careful enough burning a line at the edge of
Instead, I cut off the bead
|
Fortunately, all was not lost (just the bead was lost). Although the bead was gone, the body still fit very nicely into the handle. So I'm willing to forget about the bead if you are.
|
|
Figure 13 - The handle still fits!
|
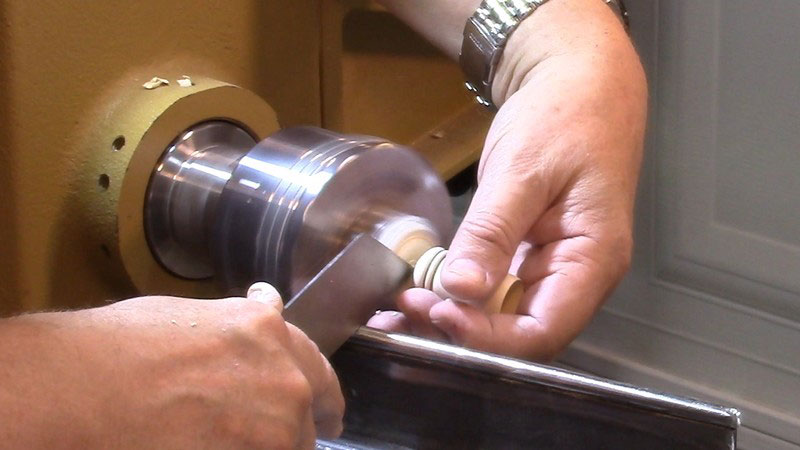
After some sanding, the handle was done, and I parted it off with a
narrow parting tool.

|
|
Figure 14 - I parted off the handle with a narrow parting tool
|
Assembly Time!
The threaded insert must be driven into the body of the wand and the matching machine screw must be driven into the handle of the wand.
|
Figure 15 - Preparing to put the hardware into the body
and handle of the wand
|
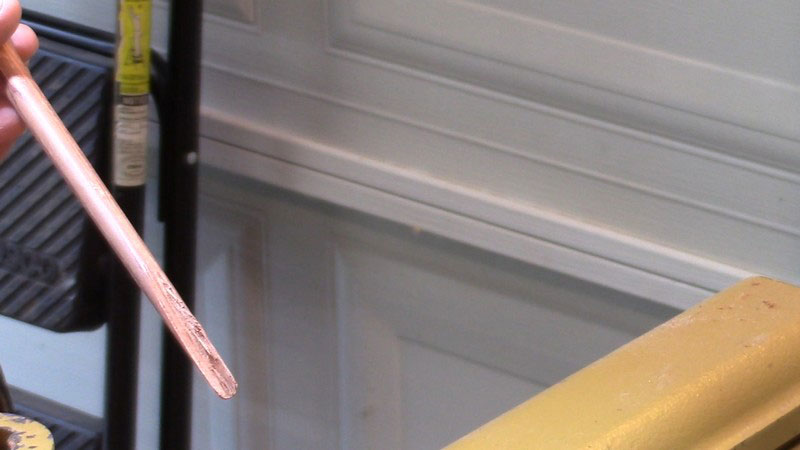
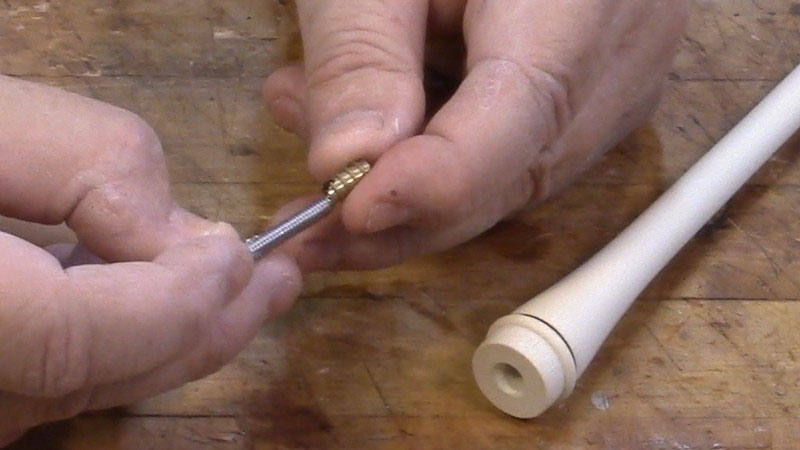
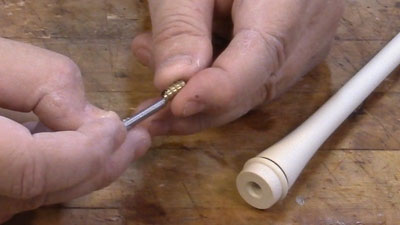
Although the threaded insert has screwdriver slots in the top, they will break off as soon as any resistance is met. So I used the machine screw to drive in the insert. Before I tried that, I lubricated the top of the screw with some wax to make it easy to remove it once the insert was all the way into the body.

|
|
Figure 16 - I lubricated the top of the screw with some wax
|
I then screwed the insert onto the screw and tightened the screw all the way down. That gave me a solid means of screwing the insert into the handle.
|
|
Figure 17 - I screwed the insert onto the screw...
|
|
|
Figure 18 - ...and tightened the screw all the way
|
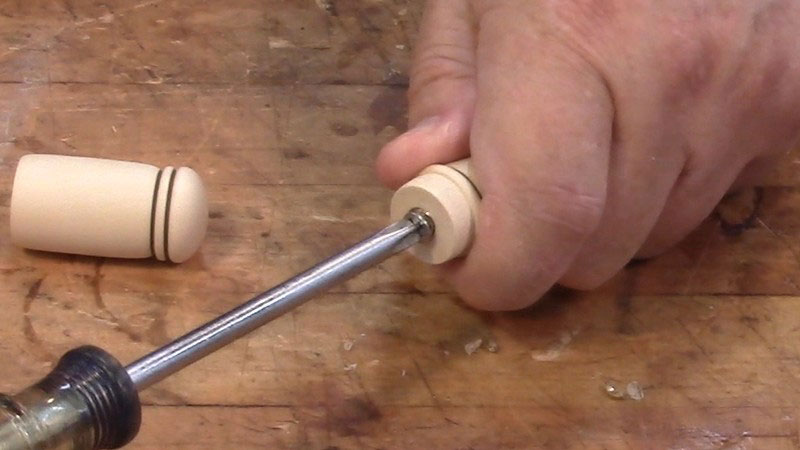
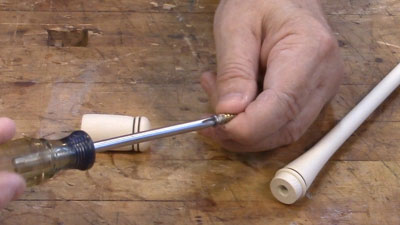
It's really easy to get the insert started crooked, so I was very careful as I started screwing it into the handle.
|
|
Figure 19 - I screwed the insert carefully into the hole in the body
|
The insert must be screwed down level with the wood. Then, because of the wax on the screw, I had no trouble removing the screw without the insert also unscrewing.
|
|
Figure 20 - I screwed the insert in until it was level with the wood
|
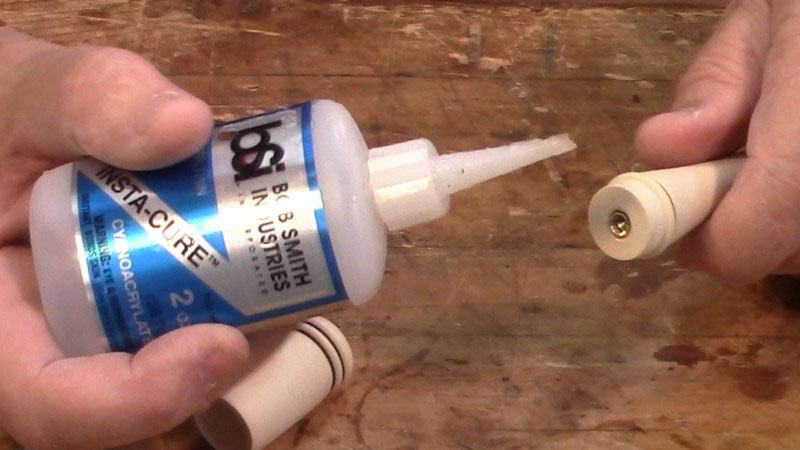
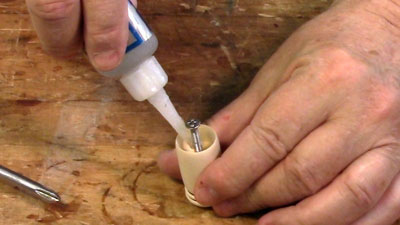
After getting the screw out, I very carefully put some
thin CA glue
around the edge of the threaded insert.

|
Figure 21 - I glued the insert in place with some thin CA glue,
being careful not to get any inside the insert
|
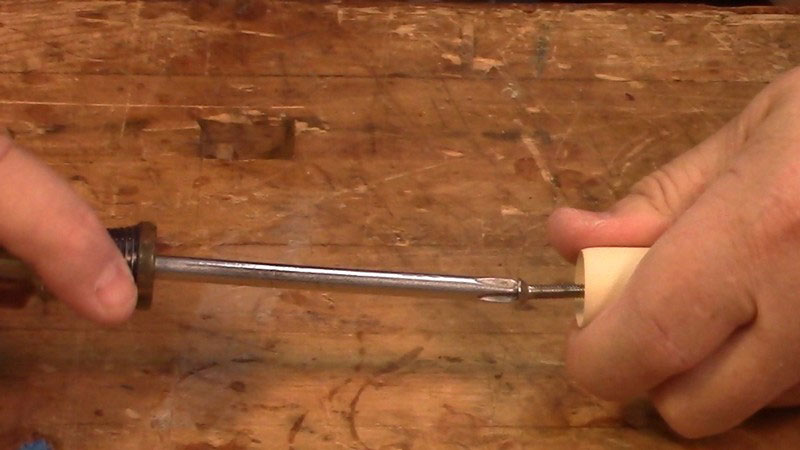
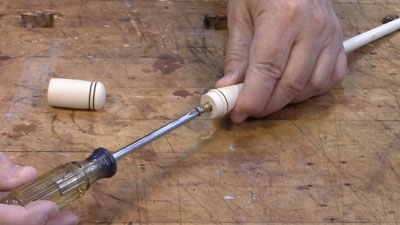
Next I drove the machine screw into the hole in the handle. It's just as easy to get this started crooked as it was the insert, so again I proceeded slowly and carefully, making sure I had the screw going in straight.

|
|
Figure 22 - I screwed the machine screw into the handle
|
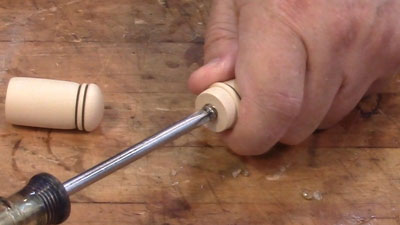
I left about a quarter inch of the screw above the edge of the handle, and then dripped some thin CA glue down into the handle to secure the screw to the wood.
|
Figure 23 - I put some CA glue in here as well, so the screw would
not loosen when screwing the handle on and off the body
|
Now if you're alert, you may see a problem here…the screw head is still on the machine screw, and it isn't going to screw into the threaded insert like that. I used a small
rotary tool
with a cutoff disk to cut away the head of the screw. I could have used a hacksaw, but that would have put a lot of sideways pressure on the screw, possibly screwing it up (ha! a little woodturning humor there) in the handle.

|
|
Figure 24 - I used a rotary tool to cut away the head of the screw
|
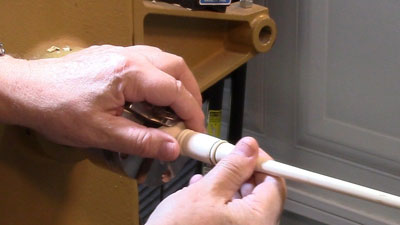
The handle can now be screwed into the body.

|
Figure 25 - The handle with the screw in it can now be screwed into
the threaded insert in the body
|
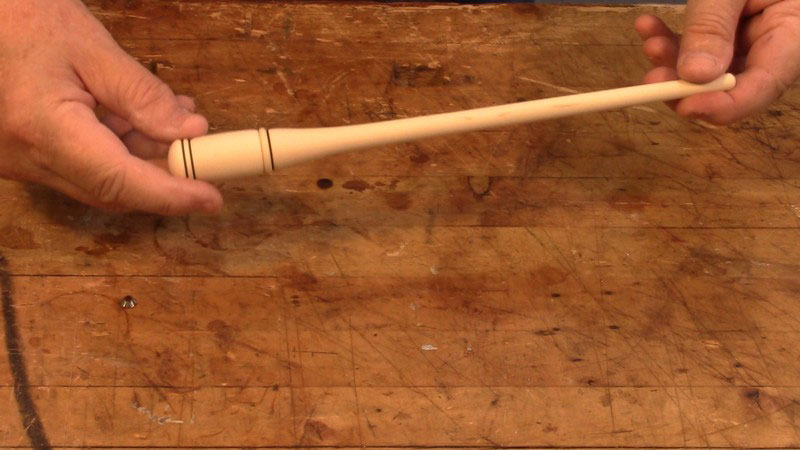
When screwed down tight, the joint between the handle and the body is virtually invisible.
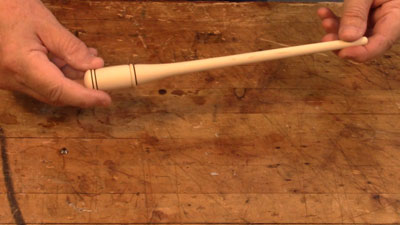
|
|
Figure 26 - The assembled handle and body
|
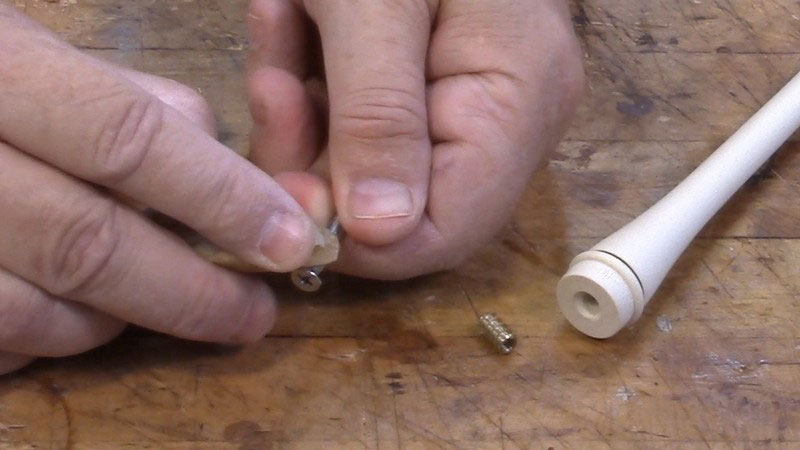
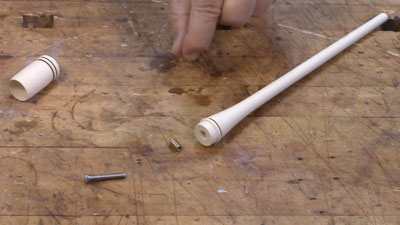
With the handle removed, the opening in the threaded insert is ready to receive the magical core…remember, the hole for the threaded insert goes down an inch to two into the body, specifically to make room for the magical core.

|
|
Figure 27 - This is where the magical core goes
|
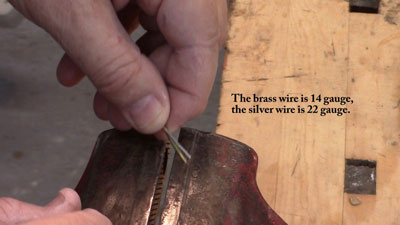
As I mentioned earlier, the magical core for Hermione Granger's wand is a dragon heartstring. Most dragons aren't too happy about giving up a heartstring, so I decided to fake it with some craft wire. The silver and gold-colored craft wire I started with (and showed earlier) was too large after being twisted together to go into the hole in the insert. Fortunately, I had a few pieces of 22 gauge silver wire, which I intertwined with the gold-colored wire, and that proved small enough to go into the insert. Only a short length is needed, of course; I used about an inch or so.
|
Figure 28 - The two pieces of wire being made into
a dragon heartstring
|
I twisted the two pieces of wire together with a pair of pliers, with one end of the wires clamped in a vise. I cut it to length after twisting the pair together.
|
|
Figure 29 - I twisted the two wires together
|
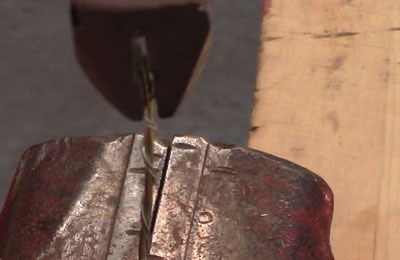
The completed heartstring fit nicely into the body of the wand. It's magical now! It can, of course, be removed at any time, to renew its magic, or just to show off to young friends.

|
|
Figure 30 - The heartstring is inserted into the body
|
With the dragon heartstring inside the wand and the handle screwed back on, we're finished! Well, not quite. Remember Hermione's wand is made of vine wood (whatever the heck that is).

|
Figure 31 - The handle is screwed back on, securing the
dragon heartstring in place
|
Okay…vine wood…vine wood…well, the only solution is to make some vine wood by using a
wood-burner
to burn a vine pattern on the wand.

|
Figure 32 - I used a wood-burning tool to burn a vine pattern
onto the wand
|
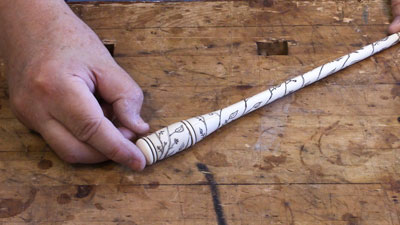
|
Figure 33 - It was a bit tedious, but I burned a spiraling vine-and-leaf
motif all the way down the length of the wand
|
Only the finishing remained. I used three coats of a wiping varnish, which is known for resisting the severe wear-and-tear caused by casting spells and fighting evil wizards.

|
Figure 34 - I applied several coats of a wiping varnish
to finish the wand
|
You may think this is a lot of trouble to go through for a magic wand, even a Hermione Granger magic wand, but I can assure you that the young person who receives the wand will be absolutely thrilled with its authenticity. To drive that point home, I made a "Certificate of Authenticity" (using Microsoft Power Point), signed by Garrick Ollivander himself.

|
|
Figure 35 - I made a certificate to prove this is the real deal
|
You want to be very careful to do a good job on this wand, because the recipient now has the power to turn you into a toad.
If you have any questions you can email Rick at
rickandcathymorris@gmail.com.
Return to
The Highland Woodturner
front page
|