Building an Electric Bass Guitar: Part 3 - Making the Fretboard and Neck from Scratch
by Lee Laird
Click on any picture to see a larger version.
CLICK HERE
to read Part 1 of the Electric Bass Guitar Build- Design Considerations
CLICK HERE
to read Part 2 of the Electric Bass Guitar Build- Creating the Neck
This is the third part of a multi-part article, relating to building a
Bass from scratch. The previous two sections are available in the
preceding month's newsletters (at the links above), for anyone wishing to either
start from the beginning or to just see what took place earlier. On we go…
Earlier, I made some pencil marks along the centerline of the center piece
of the body/neck, corresponding to the 24th fret location and the edge of
the nut, closest to the fingerboard. I bought a nut blank (one that is
completely rectangular, compared to one that came with the grooves for
each string already created) from an online company
stewmac.com
and I
set it up across the neck so it aligns with my mark. To make sure it was
oriented correctly, I also placed my small square against the side of the
neck area, and referenced both the square and my mark at the same time.
With both in line, I held the nut gently in place while marking on both
sides of the nut with a sharp marking knife. (You can mark initially with
a fine pencil and then follow up with a knife, but it is easy to have a little
slip in accuracy.)
For the next step, I removed the nut from the neck.
Taking a small square (one that will at least reach the full width
of the neck blank) and the marking knife, I put the knife's tip into one
of the shallow marks I just made, and while holding the knife still, moved
the square up so it just touched the knife's blade at the same time,
referencing square against the neck. I held the square securely, with no
body parts (fingers, finger tips, thumbs) in line with the square's blade.
I made enough passes with the knife, while registering the knife in the mark
each time, until it was around 1/32"-1/16" deep into the neck. I then did the same
on the mark made on the opposite side of the nut. I like to use a small
super-sharp chisel to evacuate the material across the neck, between my
two marks, but I work it in from both sides so it doesn't break out the
fibers. You could use a small router plane with your chisel instead (if you don't feel
comfortable in keeping this area completely flat and level). This small recess for the nut is something I
always do but may not be 100 percent necessary. The reason I do this step is so
the nut will have a verified reference position, which diminishes some chance
of future inaccuracy during a build.
Since the center body section is still square, it is the perfect time to
use the
Festool Domino
to create what I'll use as alignment aids during
the glue-up process when the wings are attached to the center section. I
placed one of the wings up against the center section, making sure the
wing was aligned with the marks I'd made earlier for positioning. Using a
large square (one that can reach across the width of the center section
and at least part way across the wing) while referencing against the flat side
of the center section, I made two fine pencil marks across the joint where
the wing meets the center blank. These marks will be the center of each
domino and I positioned the dominos so there would be little chance I
hit them, no matter what modifications I might make in the future.
|
|
Wing held to center section and marks applied.
|
I removed the first wing from the bench and aligned the second wing on the
other side of the center section. I then repeated this process so all three pieces
were marked. I used the "old" smallest cutter for my Domino, since I'm not
looking for any real strength enhancement from the Dominos and the little
dominos will easily fit almost anywhere. Since I planned to add some
curvature to the back of the Bass's body I made sure to keep that in mind
when setting the distance from the fence down to the cutter, as a partial
domino on an exterior surface would look pretty lousy. Before making the
"holes", I verified that the depth of cut was sufficient for the domino I chose
to use. I'd hate to have slathered glue onto the three parts only to find
the actual dominos were too long and prevented the wings from reaching the
center section. One other caution is to make a practice joint, especially
if its been a while (or the first time) since you've used your Domino. Next, I aligned the center mark on the fence of the Domino with
each of the marks previously made, and then created the holes for the Dominos.
|
Wing pulled away from center section slightly,
to show home made "Domino".
|
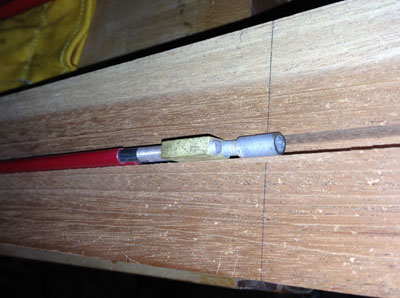
As a side note, I wanted to see how the three sections looked together, so
I pulled out four dominos to put it together. Surprisingly, the dominos
didn't want to go into their holes. They had absorbed some moisture from
the air, even though they were kept in a sealed bag, and had expanded in
size. I've run into this once before, and when I was ready to assemble, I
nuked the dominos in our microwave, which dried them out and shrank them
enough to go together easily. For my testing purposes, I made up a
couple of pieces from some scrap that was almost perfect thickness. And it only took a couple extra minutes (shown in photo above).
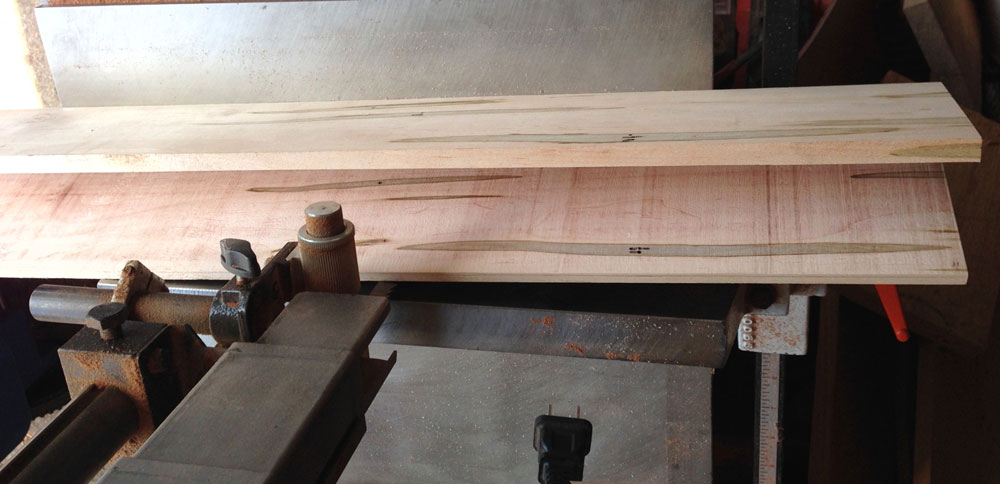
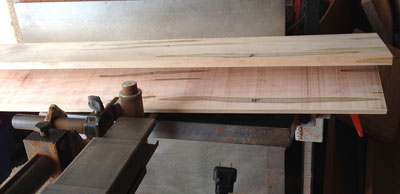
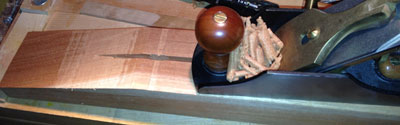
Next up, I started working on the fretboard for the Bass. I decided I'd
make the fretboard for this instrument instead of buying one where all of
the fret slots were already cut, as well as having already applied a radius to
the top surface. I had a piece of Ambrosia Maple that was long enough and
wide enough to easily accommodate this fretboard size. I looked at the
grain markings on the board, and found the side that looked best, then
planed that side so it was perfectly flat. I marked the board for about
1/4" thickness from the planed side, which is a little thick as I knew I'd
need to plane it down to remove the saw marks, as well as flattening the
glue side.
|
Ambrosia Maple board cut to 1/4" thickness,
to make a fingerboard.
|
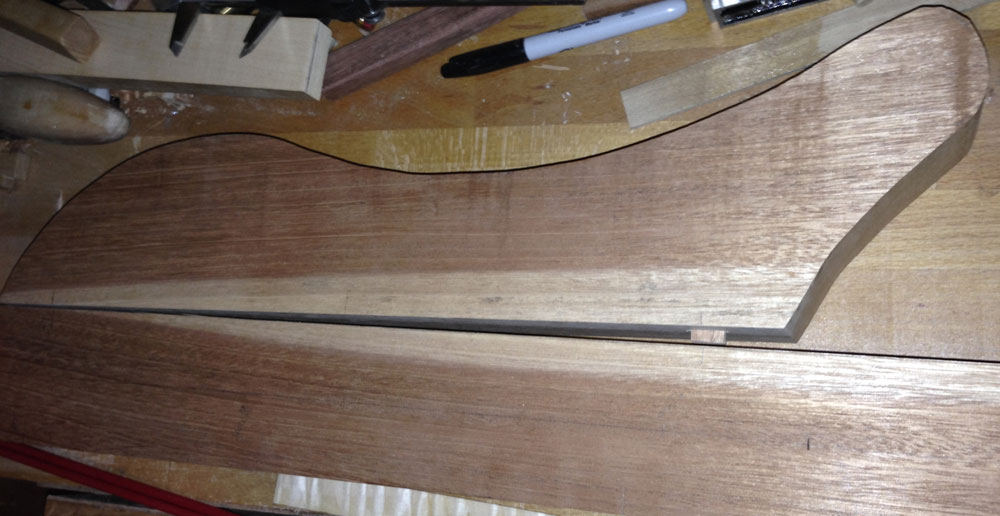
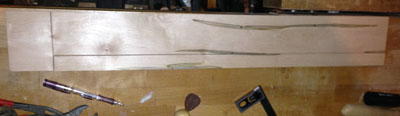
After cutting the board to the 1/4" thickness, I measured and cut the
width to about 1/2" wider than the final width at the widest end.
|
|
Upper right section is the portion that will be the fingerboard.
|
A little time with the hand plane removed the saw marks from the just-cut
edge, and allowed me to bring it to square with the top and parallel to
the opposite edge. I measured and found the center of the board, and then
marked it in pencil. I squared off one end of the board, where it would
rest against the nut of the Bass, and planed it smooth. Most fretboards
have some amount of curvature (from side to side), that both feels good in
use and works well for stringed instruments. The curvature I wanted on my
Bass's fretboard was approximately a 12" radius. I cut a piece of scrap
wood to this shape to use as a template when drawing the shape on each
end of the fingerboard. I took a 13" piece of string and tacked one end
onto a board, measured out 12" and with a pencil, drew an arc, keeping
slight tension on the string. I cut this out at the band saw and used a
spokeshave to bring it down to my line. I made a tick-mark on my
"template" at approximately the center point of the arc, and set this so
it matched up with the centerline on the fretboard. I shifted the template
until each edge was intersected equally, and then drew the arc on the
fretboard ends.
|
End of fretboard showing the signs of planing down
towards the arc.
|
Paying attention to the grain of the fretboard, I planed the outside edges
down close to the arc, and then worked incrementally towards the center of
the fretboard. I used some sandpaper to remove any slight contours that
remained and then sanded up through 600-grit for a great feeling
fretboard.
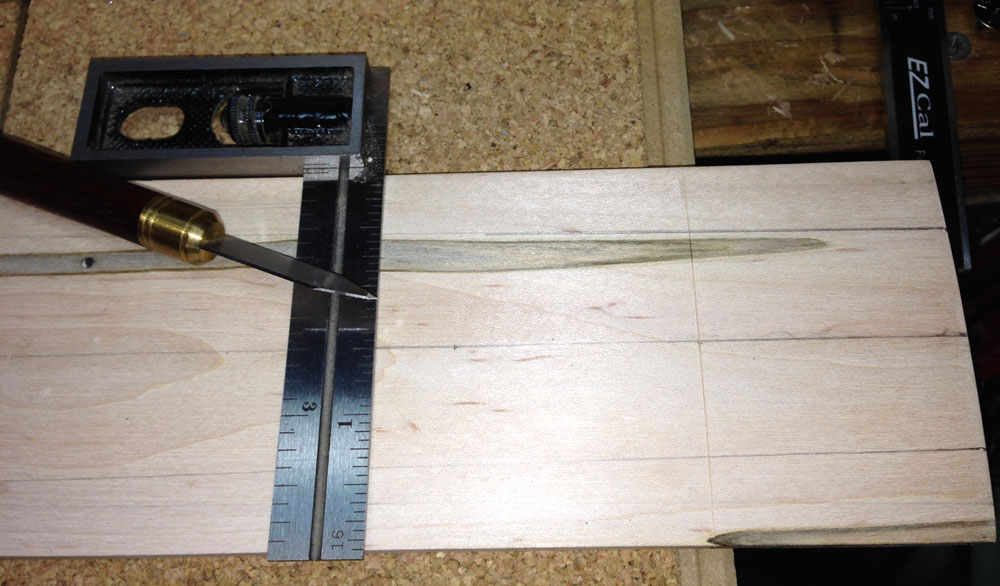
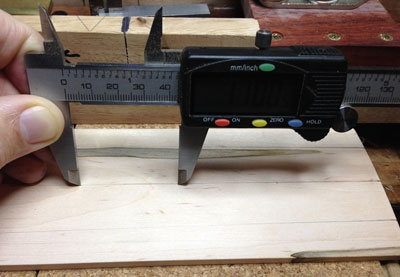
Now it was time to think about cutting the slots for the frets. The first
step is to lay out all of the fret locations, which is crazy precise work.
I have a chart that provided the measurements from the center of one fret
to the next, and all are shown to the third digit to the right of the
decimal! I ended up using a digital micrometer to help retain accuracy.
The first fret was 1.906" from the nut, so I moved the jaws of my
micrometer out so it read exactly the same value on the digital screen,
and locked it in place. I pushed one of the legs up against the end of the
fretboard, at the centerline, and touched the other leg to the centerline
down the board. I used a fine marking knife up against the inside of the
second leg, and pushed the tip of the knife lightly into the wood. I
changed the distance on my micrometer so it matched with the distance from
the first to second fret locations, placed the first leg lightly into the
knife mark made at the first fret location, and again touched the second
leg down on the centerline.
|
|
Using a micrometer to precisely identify fret locations.
|
Using the marking knife up against the inside of the second leg, I
pushed the tip in lightly. I repeated these steps, changing the distances
between frets per the chart for all 24 frets. After making the small mark
for all of the frets I went back with my small square, put the knife back
into its mark, slid the square up so it was square to the edge, and
scribed full-width across the fretboard at each location.

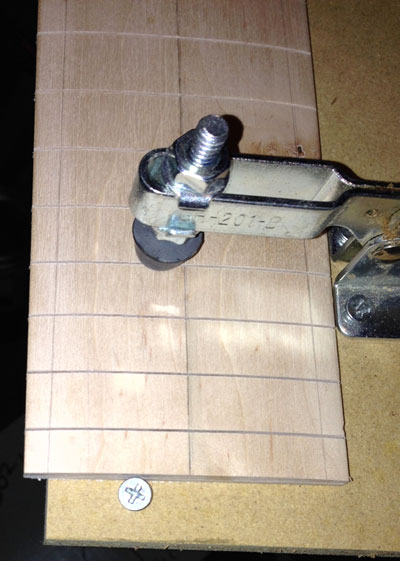
|
Using square and marking knife to scribe fret locations
full-width across fingerboard.
|
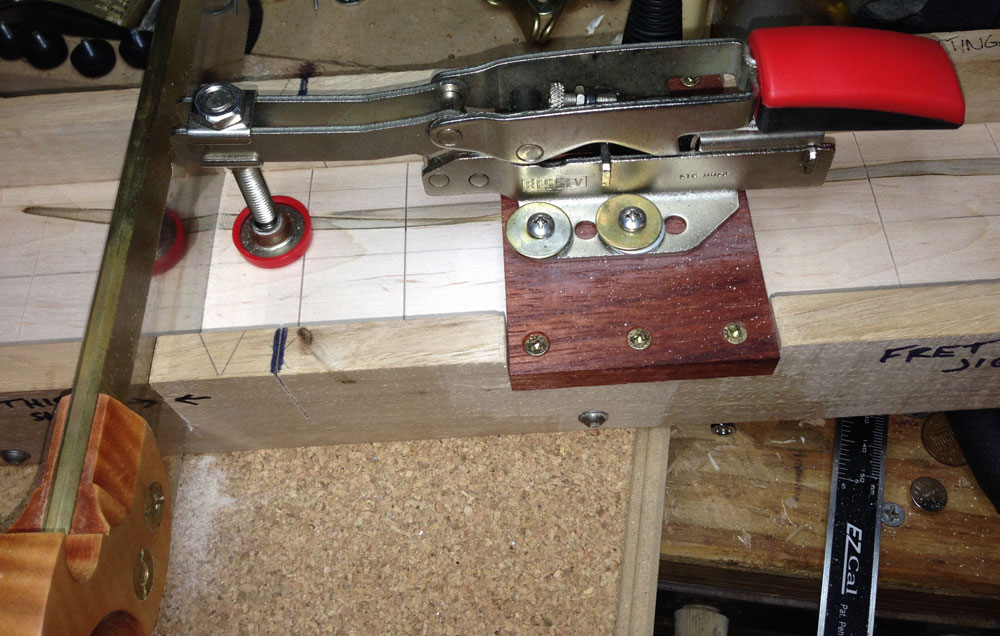
For the next step I made a jig that would keep my hand saw square across
the board, as well as perpendicular. I also installed a clamp, so I could
place the fingerboard exactly where it was needed, and then made sure it
could not move during sawing.

|
Jig for cutting frets with a handsaw,
showing fretboard, saw and clamp.
|
I let the saw plate engage each knife mark, locked it down, and lightly
sawed down each slot. I did my best to keep the saw completely horizontal,
but I'm sure it varied a bit. Ultimately, you just need to make sure you
have cut deep enough for each fret to install completely but not so deep
as to cut all the way through the board. You also need to leave a little
margin for some superglue, which will make sure the frets do not work
their way back out in the future. Each style of fret wire can have
slightly different dimensions, so make sure you test what you have before
cutting on your hard worked fretboard. (As information, I'll probably buy
future fretboards with the slots already cut, unless I am building an
instrument that requires a custom scale or other custom feature, as the
time I spent making the fretboard makes it one of the most expensive
around.)
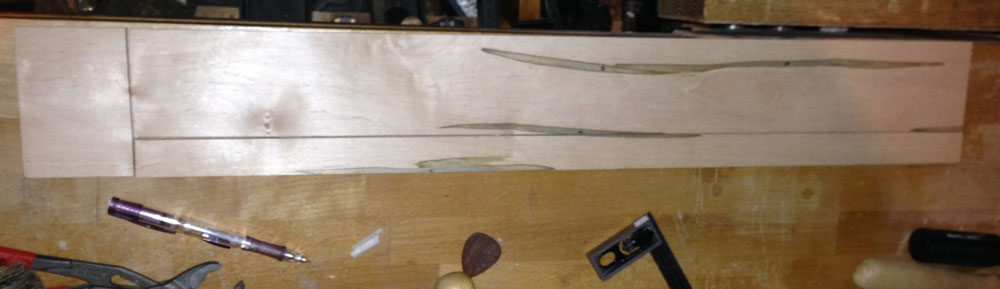
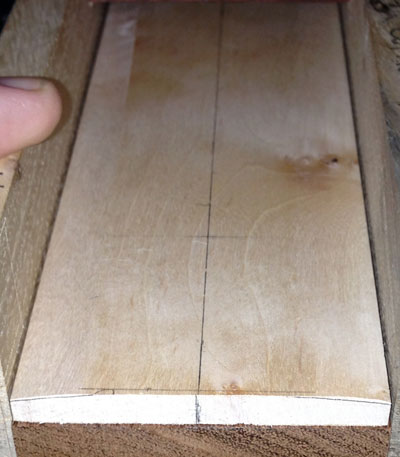
I measured the approximate final width for the neck at the nut end and
marked it equally out from the centerline on the fretboard. I repeated
this with the final width at the bridge end of the fretboard, and then
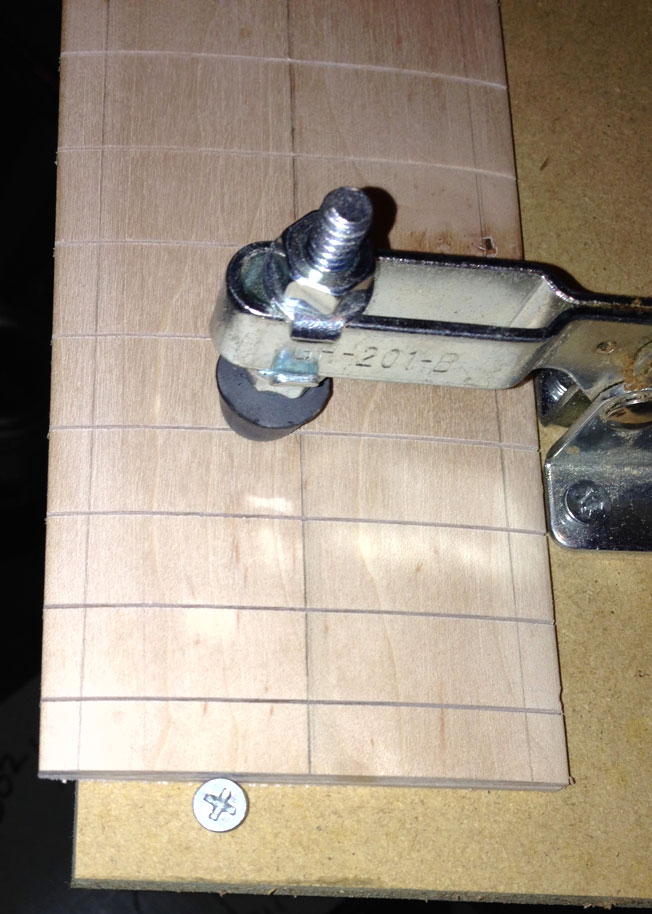
drew a line connecting the two outside points on each side. To cut the
fingerboard to this shape I used a jig I made from a rectangular piece of
MDF that has three clamps that hold the fingerboard in place.
|
Close up of end of the jig.
You can see the line over the jig edge.
|
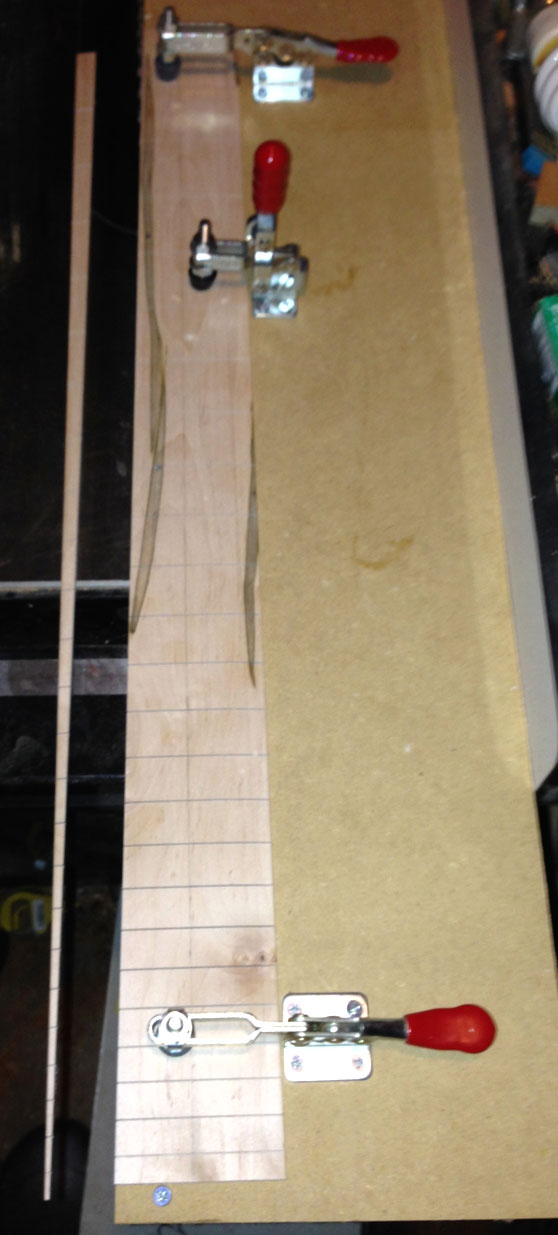
I made certain that none of my clamps were overhanging on the edge of the jig, so they wouldn't come in contact with the table saw blade. The jig also has a
small screw inserted into the top surface towards its end, so the
fretboard blank is against it, which removes any potential for slipping
backwards. I set the table saw fence so the edge of the jig just slides by
the blade (with it off) without hitting it, and locked the fence in place.
I put the fingerboard onto the jig, aligning the edge of the MDF jig with
the points at each end of the fingerboard, and locked the clamps down. I set
the table saw blade so it was high enough to cut completely through the
fingerboard. I made sure to use enough width on my jig, so it didn't bring
my hand too close to the blade. When cutting the fingerboard, I made sure to
keep slight pressure on the jig, towards the locked fence, so it works as
intended. You can also install a vertical handle on your jig, if desired,
but I feel comfortable using the clamp bodies as hand holds, as they'll
never get near the blade. Once the fingerboard was completely past the
blade, I turned my saw off using my left thigh against the emergency paddle,
so I didn't start reaching around with the blade spinning.

|
Post cut with off-cut next to
fingerboard for better
understanding.
|
After completing the cut on the first side of the fingerboard and then
shutting the saw off I unclamped the fingerboard and turned it around so the
markings on the other side would line up with the jigs edge. I repeated the process and
was then finished!
Now that the fingerboard was cut to its final shape I put it onto the upper
surface of the neck. I put the nut into its slot and slid the fingerboard
so the narrow end was up against it. I lined up the center of the fingerboard
with the centerline on the neck, and used a fine mechanical pencil and drew
along the sides of the fingerboard so they were dark enough to see clearly.
Later I'll make cuts along these lines at the band saw.
While the center body/neck blank is still square, it's a good time to
install the truss rod, whether you've made or purchased it from a parts
store. (**Before moving forward, know that I never route for a truss rod
until the actual piece is in my possession, as there might be small
differences in size, that could make for extra work after the fact.) I
took the truss rod and laid it out on the neck, along the centerline, and
positioned it so the adjuster would be accessible through the headstock
design I used. I made a mark at the other end of the truss rod, again on
the centerline, so I knew the exact area I needed to evacuate with the
router. The truss rod I used in this build is a double-rod version (from
stewmac.com), and is the same dimensions, except for its length, as what I
previously installed into the Les Paul I made. This makes it easy, since I
have the router bit that I bought for the previous truss rod, and it makes
the perfect sized slot to install this new truss rod. I didn't need a
heavy-duty router to make the slot for the truss rod, since the router bit
is a fairly small diameter, and I'll be taking it with multiple shallow
passes. (Always remember to lock the depth control, as you don't want the
bit to start diving deeper than intended.) The main thing I look for is to
have a router that has easy depth controls, as well as a solid fence, that
will ride along the side of the blank.
I set the fence so the center of my bit lined up with the centerline on the blank, and then locked the fence. I made
sure to keep some pressure on the router fence during the actual
routing as I have seen bits wander and even though no one would ever see
this error, I don't want anything that might rob the tone of my Bass.
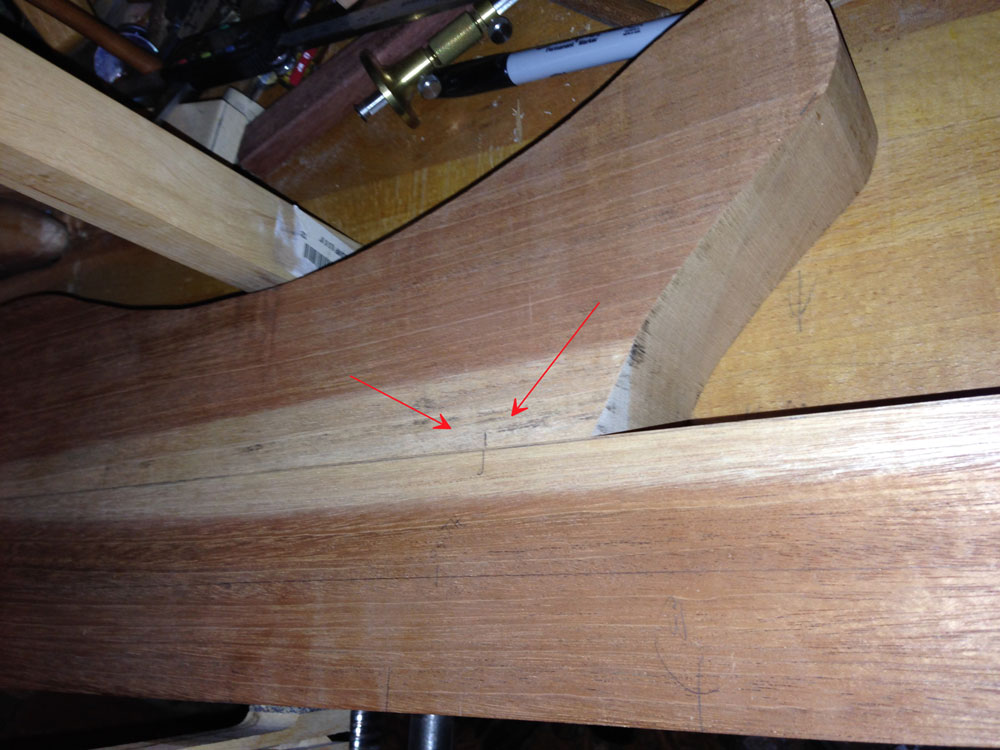
I intentionally left the angled-back headstock cut for later so that the blank
had a flat reference for the router to ride on, well past the location
where routing could stop. I drew the angle of the headstock on the side of
the blank before routing, so I'd know exactly how far down the neck I
needed to route. I routed slightly beyond this end point, just to give
myself a little extra buffer.
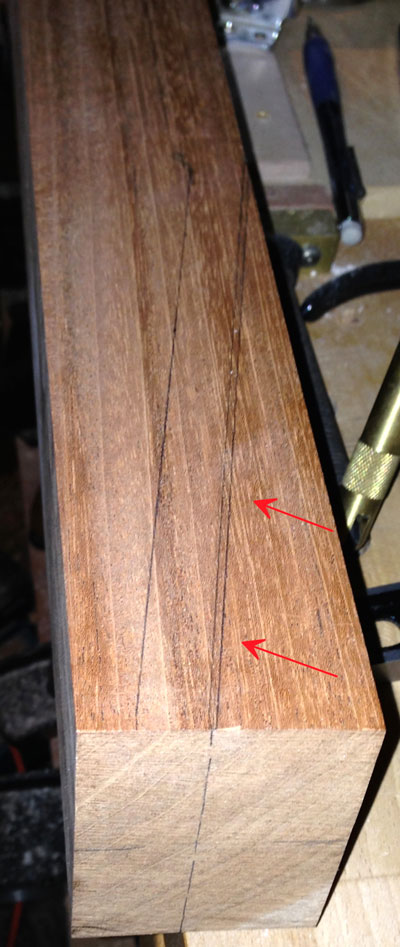
|
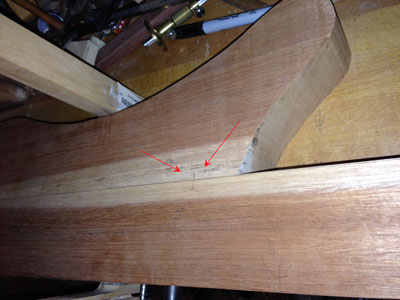
Headstock end of the neck,
with rearward angle drawn.
Red arrows point to
somewhat faint line.
|
When we cut this end of the neck so it angles backwards, the
earlier-routed section beyond this cut will be removed.
|
|
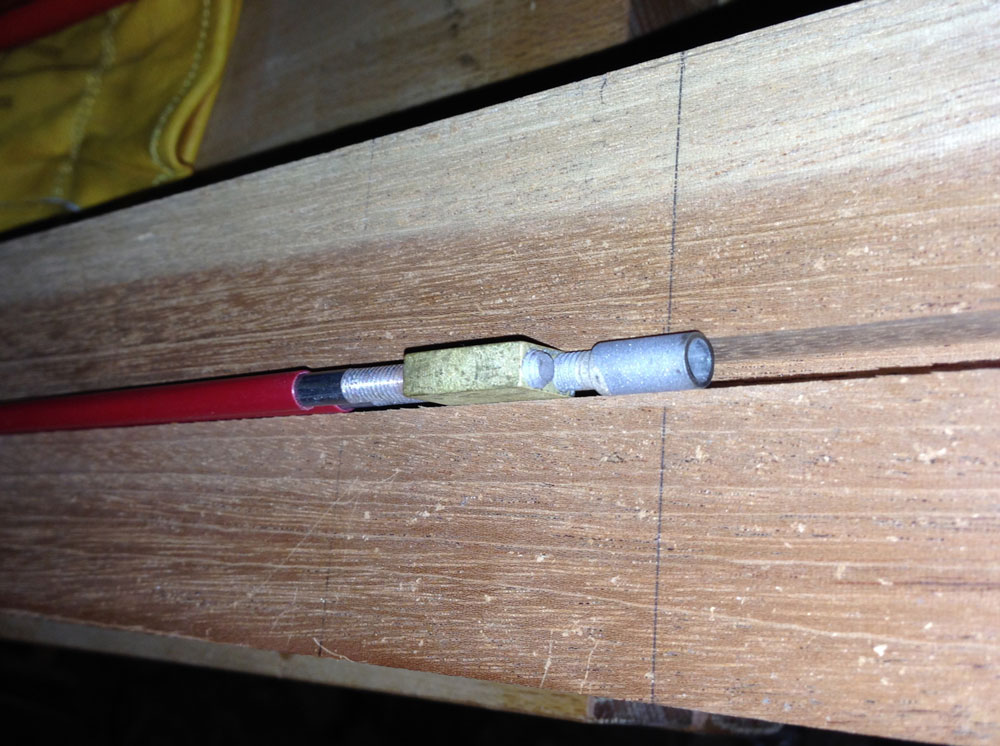
Truss rod at partial depth.
|
Once I got close to full depth, I tested it with the actual
truss rod, as that is the most accurate method to know what is real. I
snuck up on a perfect fit, but even that had a minor issue. The back
section of my truss rod was perfectly flush with the top of the neck, but
the section closest to the headstock was still just barely high. It turned
out the section that was high was actually just that much taller than the
back section, and the adjustment head hung slightly low. When I
determined what was going on, I used a small chisel to evacuate a thin
section of wood in just that region, making everything spot on. The style
of truss rod I'm using doesn't require a filet of wood (as some do)
between the rod and the fingerboard that will get glued on above it
later. If you are using a different type/style of truss rod, check your
installation instructions for guidance.
The last step we'll get through in this segment is to cut the headstock
angle from the lines I drew on earlier. I used the band saw to cut just
outside of my line, and then used a hand plane to clean up the saw marks
and made the surface flat and square to the sides.
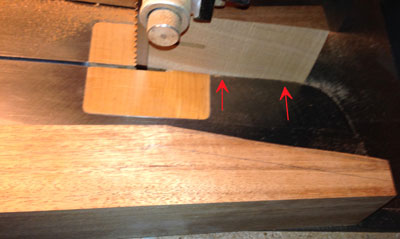
|
|
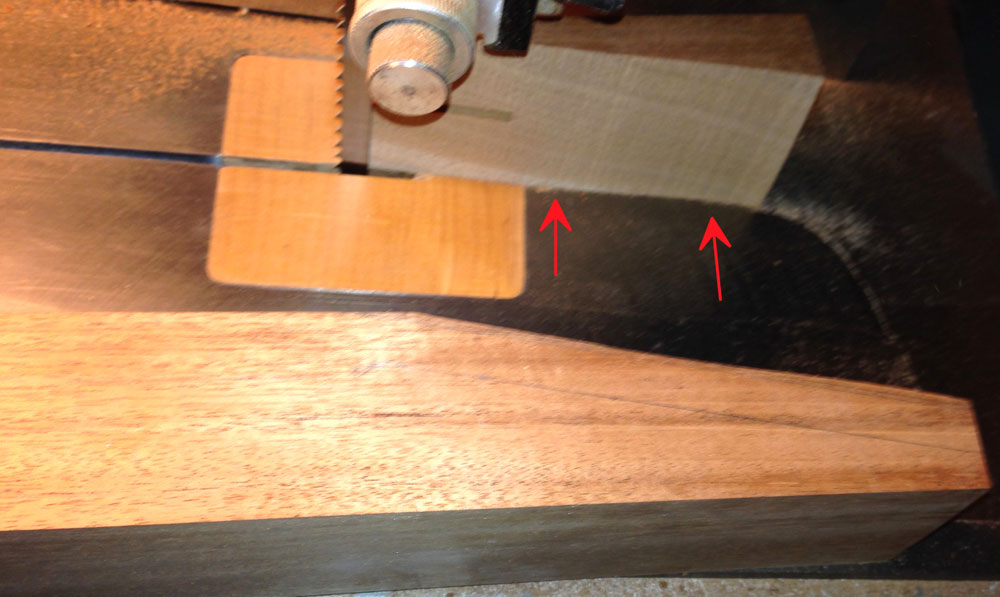
Headstock cut at band saw. Red arrows point to off-cut.
|
|
|
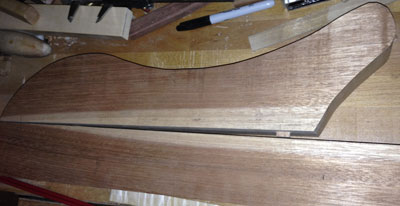
Working towards flat with hand plane.
|

|
Verifying square on flat headstock.
(Red arrows show slot for nut, not
shown earlier.)
|
I didn't cut the back side of the headstock earlier, as I wanted to retain
the support behind the top surface, allowing for the best result with a
hand plane.
In future segments I'll show how a few cuts on the center section will
make it so others don't just see a stick of wood, but can tell that you're actually
making an instrument (or at least its supposed to have that affect). I will also start
work on body shaping (not mine, the Bass's) and one of the most important
parts, shaping the neck.
I hope you enjoyed this article and please let me know if you have any
questions or comments.
Lee Laird
CLICK HERE to learn more about the Festool Domino Joiner
Lee Laird has enjoyed woodworking for over 20 years. He is retired from the U.S.P.S. and works for Lie-Nielsen Toolworks as a show staff member, demonstrating tools and training customers.
You can email him at
lee@lie-nielsen.com
.
or follow him on Twitter at
http://www.twitter.com/is9582
.
Return to
Wood News
front page