|
(Page 2 of 2)
Previous Page
1
2
The Poor Man's Roubo Bench Build - Part 2
To read Part 1 of this series, Click Here
Click on any picture to see a larger version.
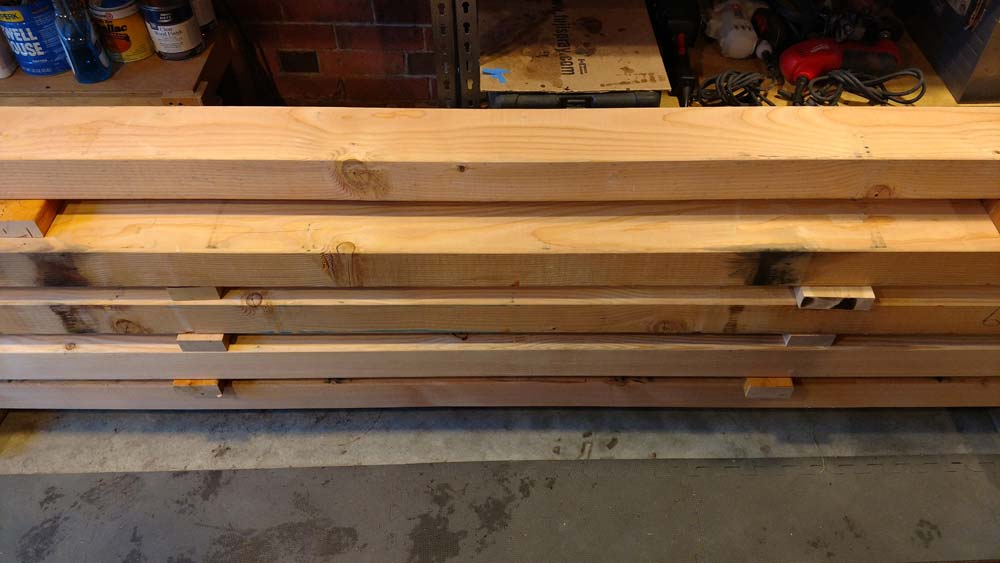
After getting lucky with scoring a number of timbers in a BORG lumber honey hole, I stickered them and let them become accustomed to their new home.
I decided to throw convention out the window and caution to the wind by choosing to use 4"x6"x8' nominal dimensioned lumber that can be had at any BORG (Big Orange Retail Giant) home improvement store.
It is cheap (Around $175 got me enough lumber for the entire bench) fairly uniform in both its quality and dimensions, and I can normally find what I need in one trip.
Normally I would have sourced this material from one of my local lumber yards. I make it a point to get my lumber from local businesses. I feel that support of these businesses is important even though I normally need to pay a little extra for it. I highly encourage others to do the same.
In the case of this bench though, I wanted to see just how quickly and cheaply I could build this beast. So it was off to the local big box I skipped, to roll the dice on what was available.
For the top of this bench what is generally accepted as best practice is to buy several 2"x10" or 2"x12" boards either 10 or 12 feet long. The idea is to pick boards with the pith running right down the middle of the board and for the builder to rip his useable stock from either side of the pith thus giving himself nearly quartersawn boards for the lamination of the bench top.
Indeed, this is what I did for the Scandinavian bench I built last year and it has proven to be a stable and flat benchtop after having been flattened.
In building this bench however, I was feeling daring and...well...lazy. I really did not feel like laminating 16 boards together. It felt like way too many glue joints and too many opportunities for delamination issues and splitting. I really just wanted to slap the thing together and get on with it.
Still, the original plan was to go the traditional route and do the traditionally accepted lamination. However, when sorting through what little stock my particular big box had on hand, I was very disappointed by the dripping wet, twisted and knotty selection of boards. As it happened, the 4x6 stock was far and away better suited to what I wanted to do and lady luck seemed to be smiling down on my slothful nature that day.
As soon as I felt the stock had dried and shrunk and made itself comfortable in The Tiny Shop, I decided it was time to get the ball rolling. The first order of business was to cut the ends square to a dimension that was closer to finished length. I had decided that 80" was about as long as I felt comfortable with in the small space I had available to me.
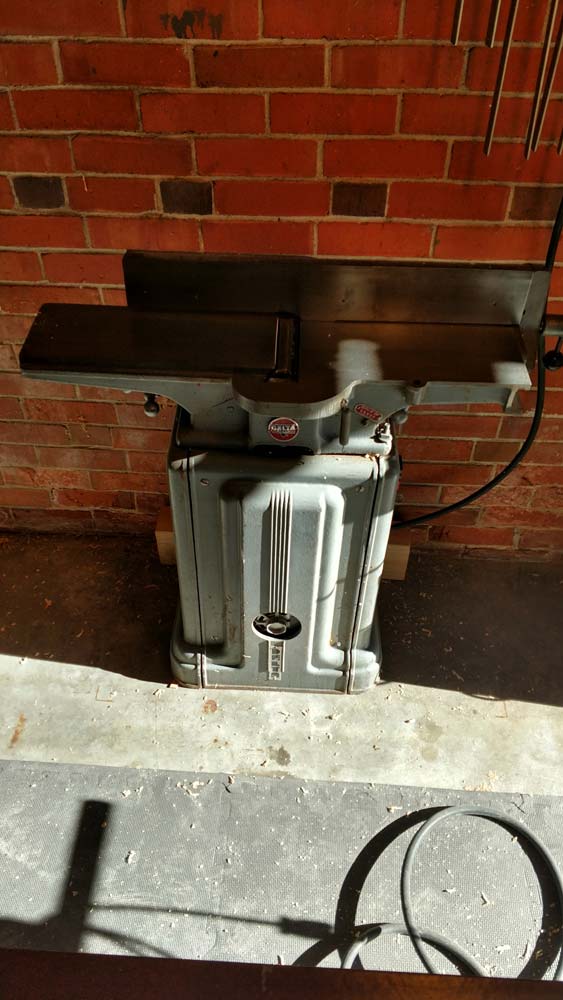
After crosscutting the timbers on my chop saw, I then fired up my beautiful 40's vintage Delta jointer and ran a face and an edge square to each other on it...
Have I mentioned how addicted to vintage machinery I am? How anyone who has ever used woodworking machines can look at this little bit of American iron and not fall immediately in love, is beyond me. It just dares you to try to feed it something it can't handle, though I do lust for an 8" jointer of similar vintage. Jointing long timbers like this is a bit of a chore on a short bed jointer like mine, but with a little body English here, and a bit of gymnastics there, it still gets the job done.
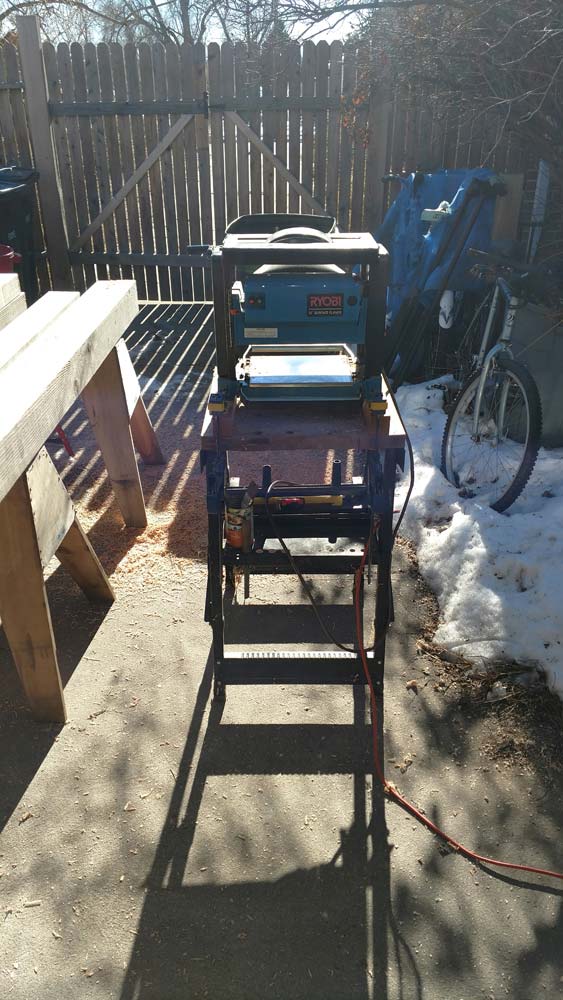
After getting a fine 90 degree angle established on these boards, it was off to plane a parallel face using another machine that never stops making me smile. My forgotten hero, the elderly Ryobi AP-10 planer.
The Ryobi AP-10 is the original lunchbox planer. It dates back to the early 80's and was built like someone was out to prove a point. Stout is the only word I can use to describe a small machine that sneers at everything I have ever fed through it. It just does not have any fear or reservation gobbling up nearly 7 foot long, 3-3⁄4" thick boards. If you listen closely over the screaming motor, you can hear it whistling "whistle while you work."
Now that the boards were dressed, I did not feel the need to rip the remaining edge on my saw. It just got turned down in the glue up since the jointing and planing had diminished the roundover that standard dimensional lumber comes with from the lumber yard. I also wanted to get these boards glued and clamped up as soon as possible since I was trying to avoid them moving too much from having stress relieved in the milling process.
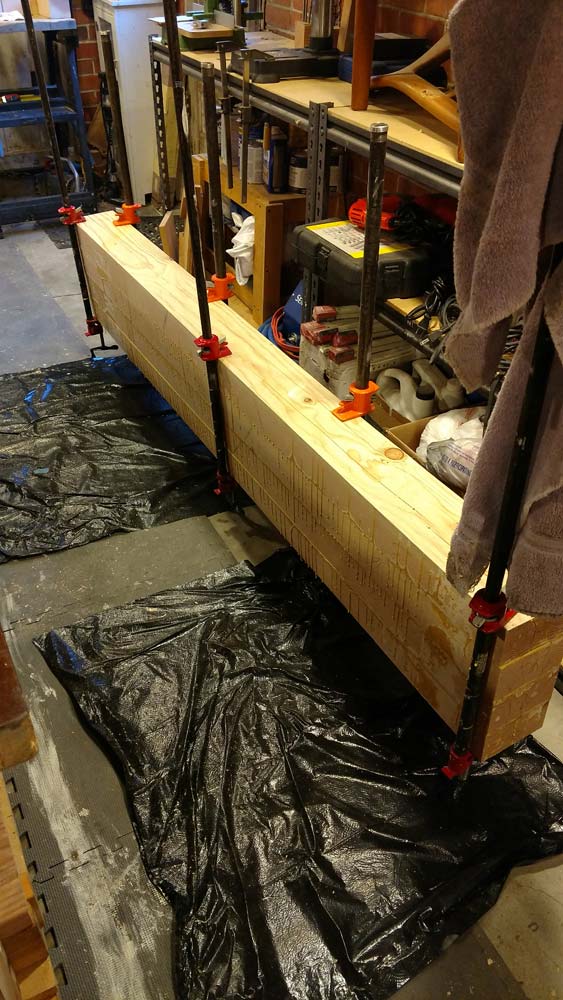
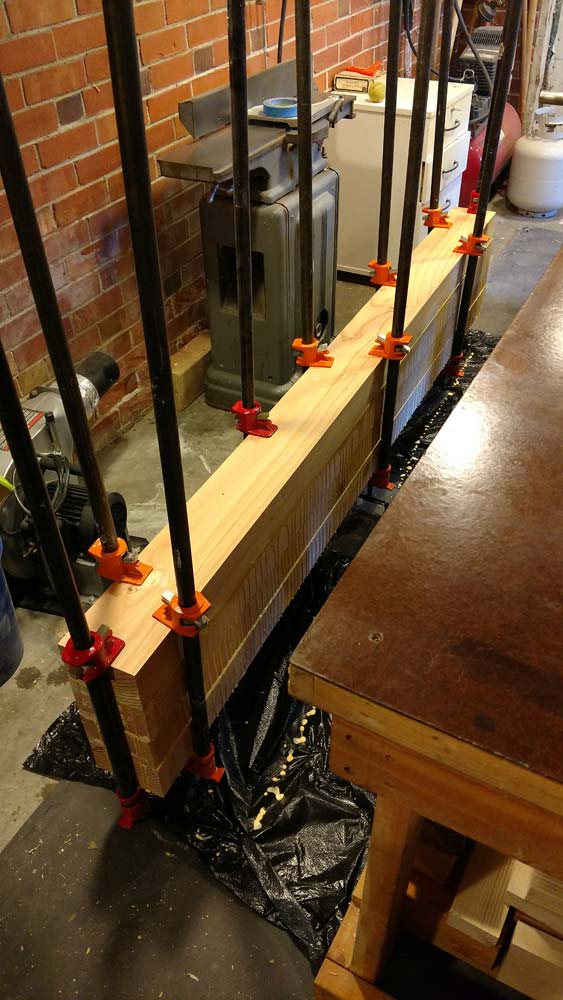
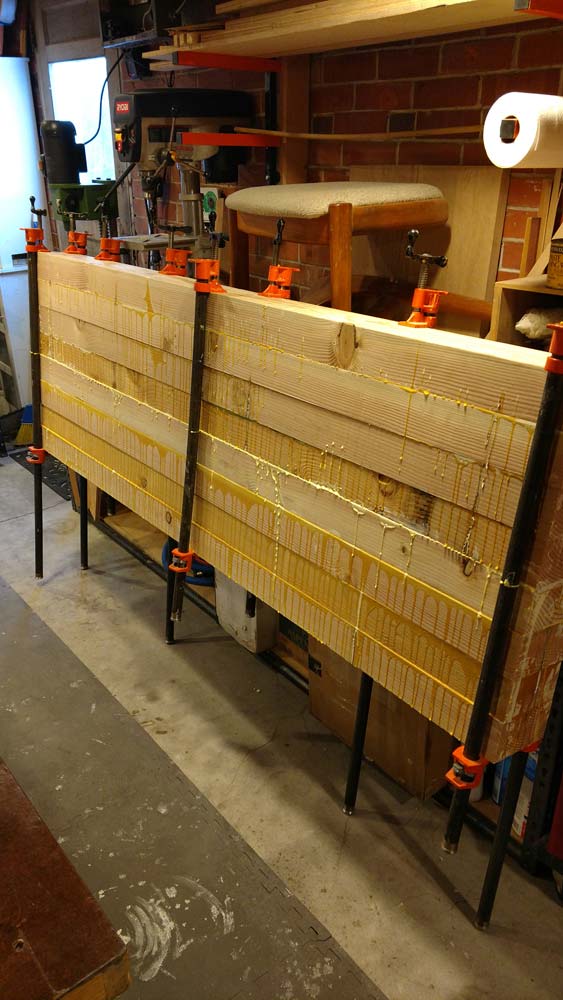
The glue up went better than I had hoped for. I was worried that pipe clamps would not have the huevos to squeeze such thick boards together face to face to get good, tight, glue joints. So I elected to split the glue up into two separate operations. This proved to be a good idea.
In dividing the top into two separate glue ups, it allowed me to use enough clamps on each, top and bottom, to get good contact between the mating surfaces and greatly reduced my stress level and pucker factor. A good call since the number of clamps you generally need for a project is .... all of them.....plus one more. I let the two halves set up and cure overnight. The temptation to move forward once the glue started to set was strong, but with heroic self control, I set them in the shop and walked away until the following day.
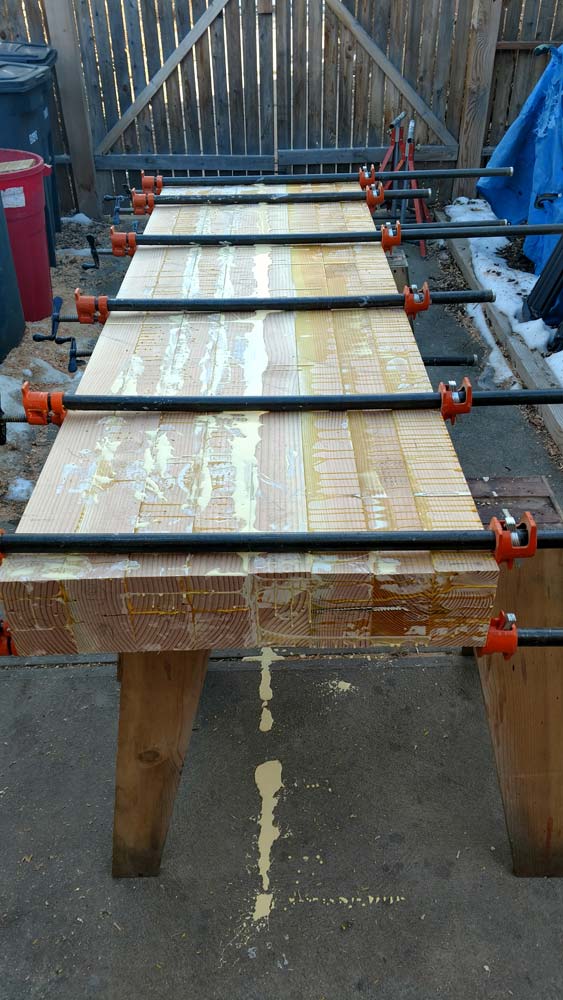
As I am sure you can probably surmise, the next thing was to mate the two halves together. This was the real test of the clamping strength of the available clamps I have.
Since I took the time to joint my glue surfaces nice and flat and square, I found that the last glue line came together very cleanly and easily. I was now a very proud papa of a Nimitz class bench top, though I may have to sleep on it for a while after the Love Of My Life sees the glue on the driveway.
At this point in most bench builds it is time to settle back with a nice cold one, or a cup of hot coffee and relax a little. In my case though, I now had to contend with this monolith strictly within the confines of The Tiny Shop because of a lovely winter storm brewing to my west.
Undaunted, I enlisted the help of my youngest kid to help me muscle the top onto the original outfeed table that this top was destined to replace, in preparation for initial flattening.
A side note, if you are in your dotage, as I am, it is important to have a youngster around to help with lower back destroying and hernia inducing operations like this. To say that my youngest son is well equipped to handle the challenge is something of an understatement. At 18 years old he stands 6'7" tall and weighs in at a svelte 255 pounds. The kid is quite literally a wall of muscle, and I was very grateful for the help. If you have the means, I highly recommend adding this particular class of machine to your woodshop arsenal.
As I have mentioned already, I am not in any way adhering to the traditional rules of bench building.
Purists are no doubt bemoaning the use of these large timbers rather than laminating many more carefully selected boards together.
Trust me, before my conversion to the church of "Why Not " woodworking, I would have been the first to point out all the potential pitfalls of some of the choices I am making for this build.
Relax.
This bench top is GOING TO MOVE. It is what wood does. I have no doubt I will have to flatten this top at least twice more within the next year or so before it finally settles into reliable equilibrium in my shop.
I am good with that.
Knowing that this is going to happen and planning for it is all part of the game. It is important to know and account for this if you plan to defy conventional wisdom and use this type of lumber to build a bench.
I am fairly confident that the glue joints themselves will be just fine as the top dries and does its seasonal movement thing.
Living in Colorado is something of an advantage I think, given that the humidity remains pretty low year round. So if you live in a more humid climate, or live in a desert like Arizona or Death Valley, your mileage may vary.
If the top starts to display signs of splitting, I will just rout butterfly joints into the areas that are coming apart and make them a neat design feature. Or maybe fill them with pigmented epoxy. As long as the thing doesn't try to implode or turn itself into toothpicks, I am prepared for some self inflicted reconfiguration by the beast. It's a workbench and I intend to be fairly heartless with it.
As I mentioned before though, I will be using traditional joinery for the base. I'm not an animal after all.
Nothing makes for a stout and sturdy workbench like deep mortises and thick tenons. While I am skirting some conventions with this build, I will not skimp on the joinery.
Before we get to the joinery though, I still need to get this top somewhat flat. The plan is to take down some of the high spots with a scrub plane or even a handheld electric plane. After that, I plan to take a page out of Tage Frid's book and use a router sled and rails to flatten the bottom first, then the top.
My heroes at Highland Woodworking have an article about
flattening a workbench with a router
.
Highland Woodworking also sells
Tage Frid's three book set
.
If you don't have these books, get them. They are required reading for woodworkers of any skill level.
So, now you know what you can look forward to in the next installment of......The Madcap Woodwright.
Until then, stay joyful and remember that life is too damn short.
To continue to Part 3 of this series, Click Here
(Page 2 of 2)
Previous Page
1
2
John McBride is a professional woodwright, blogger, and writer, living and working joyfully and with abandon in Denver, Colorado.
Return to the
Wood News Online
front page
|