This month I will describe my process for designing a draftsman's table. I came across
a similar design in a furniture catalog and thought it would make a nice project for the
article. I designed this project by eye, making the parts, proportions and scale relate to one
another. Once the model is complete, you can tweak the scale as you see fit and use the "tape
measure" tool to adjust the model to a standard height. You may notice the format of this article has
changed a bit. I hope the new style will be easier to follow. The video tutorial links common in the
previous articles can now be found in the video glossary below. Each article will have a list of the
tools and techniques used in the project. At the end of each project based instruction you will find
working drawings prepared in LayOut, a companion program to the pro version of SketchUp. The
PDF can be downloaded to a jump drive and printed full size (24"x36") at Kinkos or a similar print
shop for a few dollars a page.
VIDEO GLOSSARY
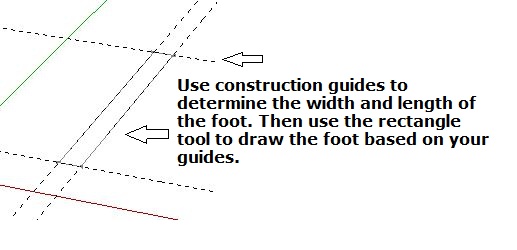
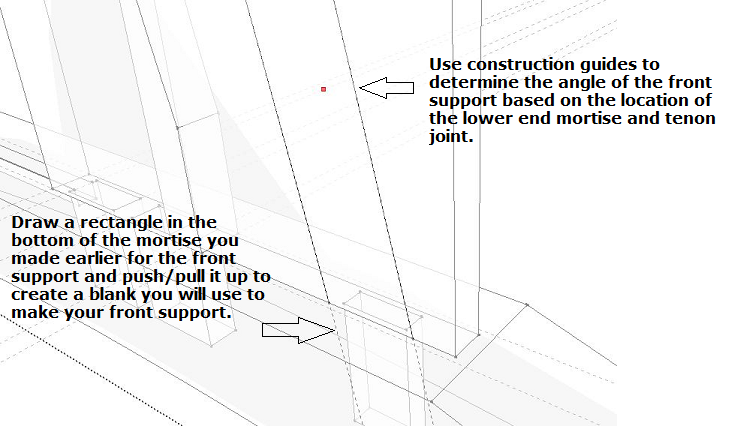
Step 1
***
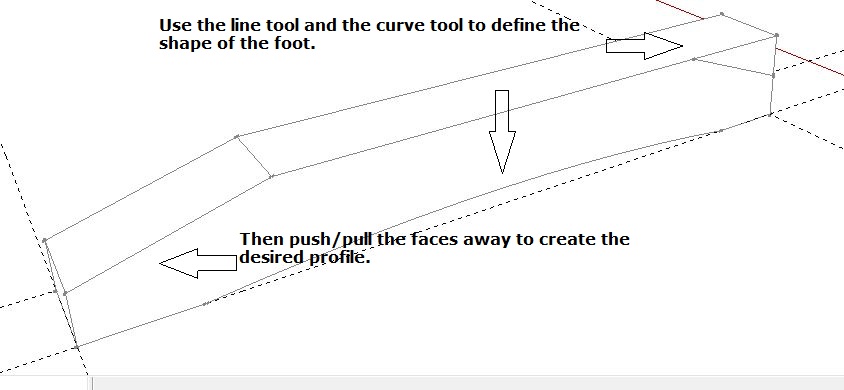
Step 2
NOTE:
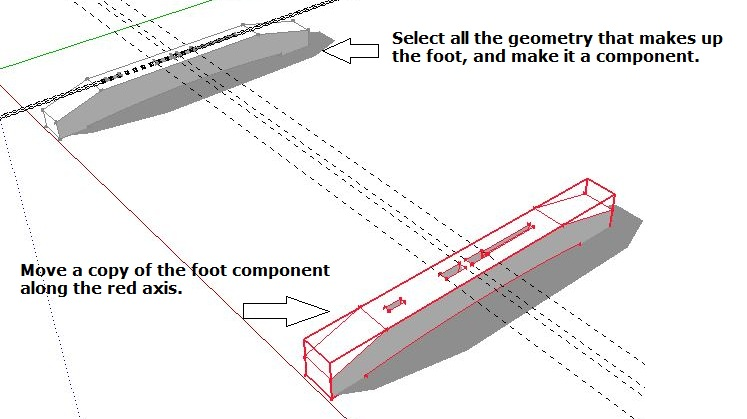
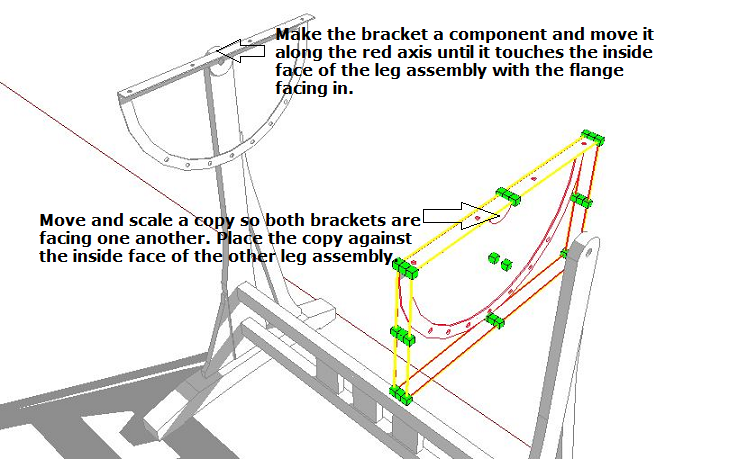
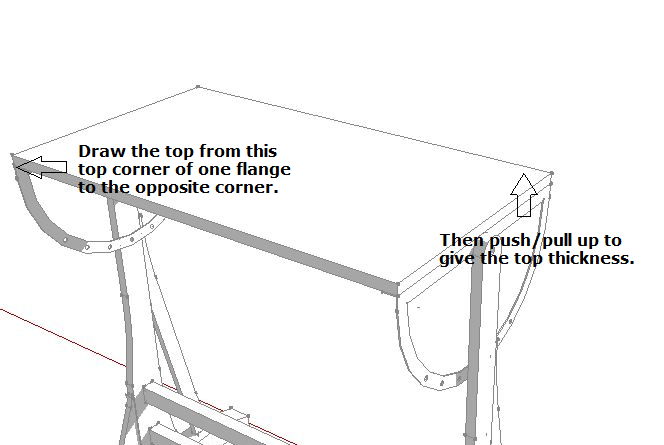
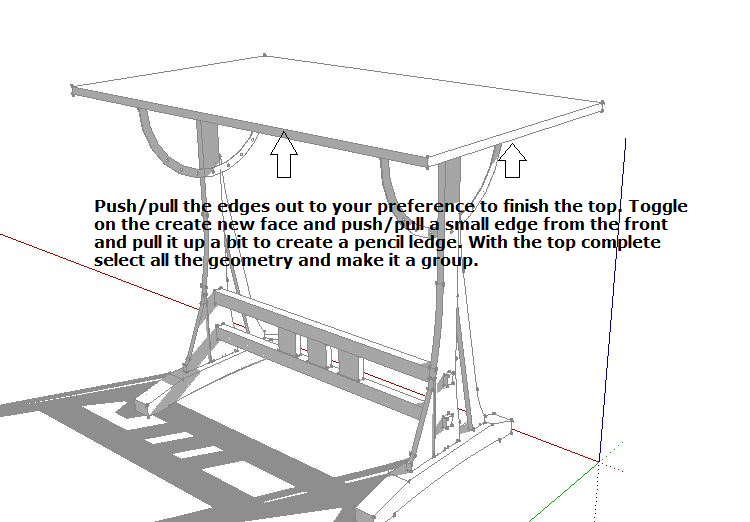
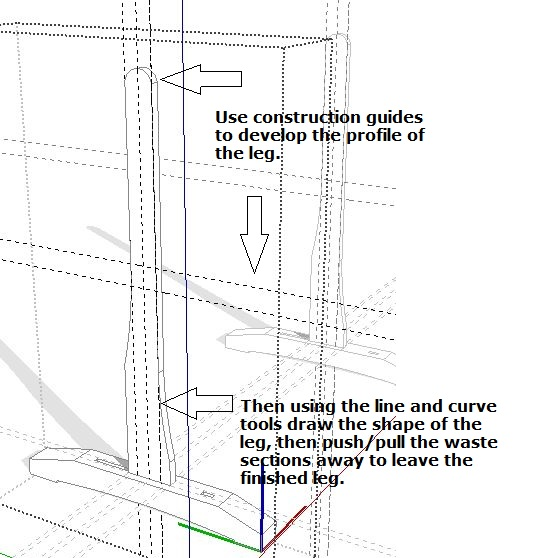
Once a part is created, select all the geometry associated with that part and make it a component.
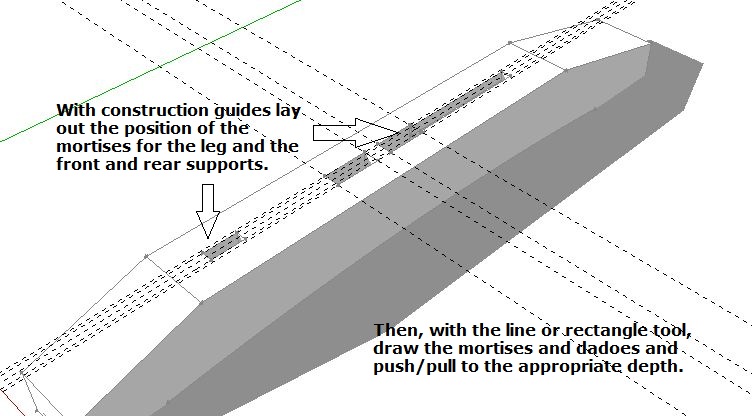
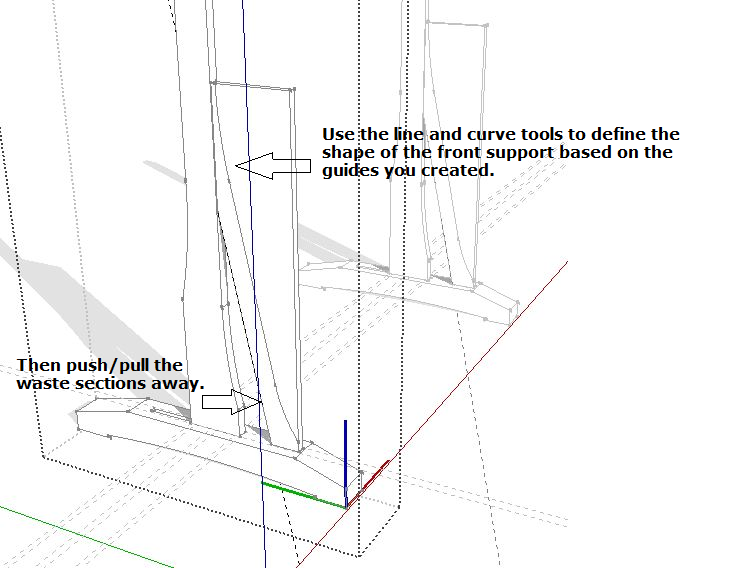
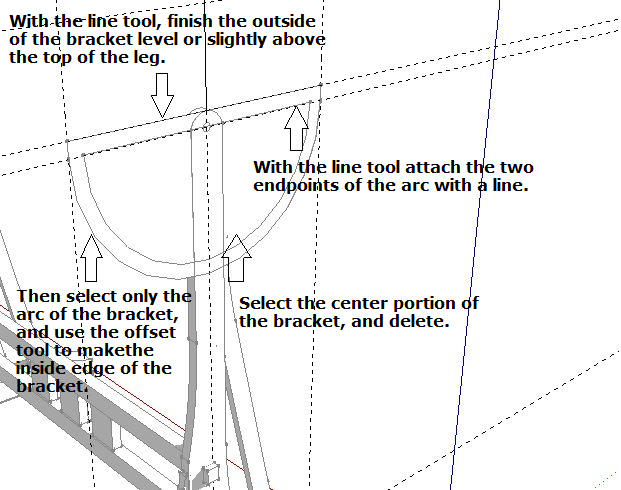
Step 3
Step 4
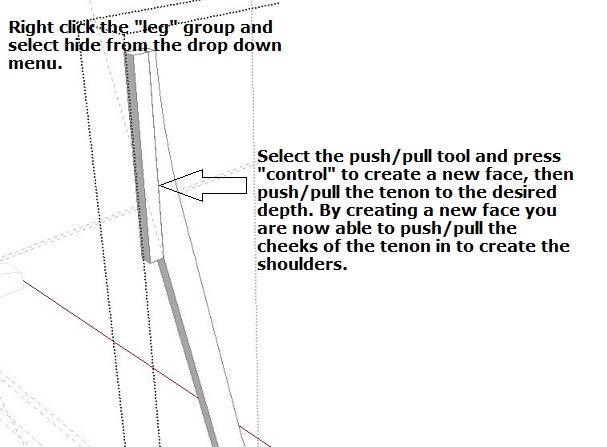
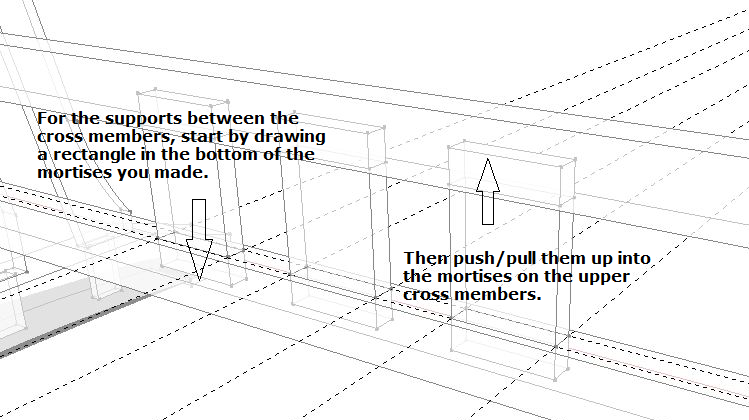
Step 5
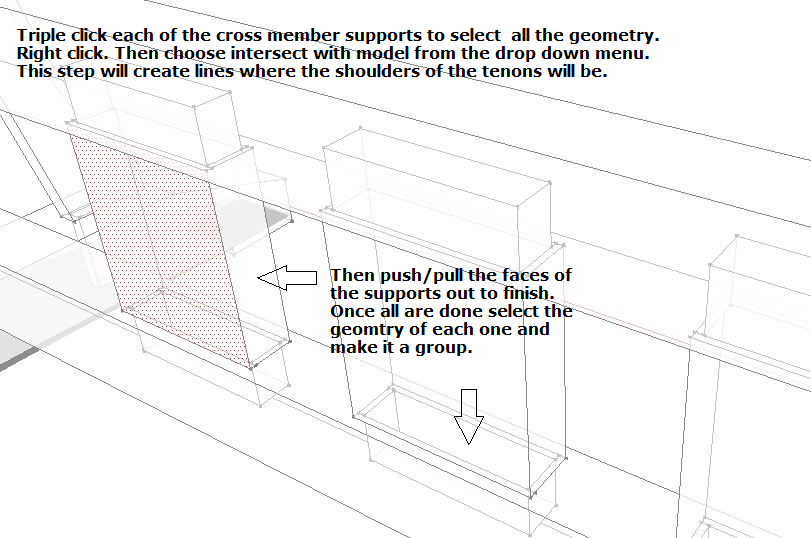
Step 6
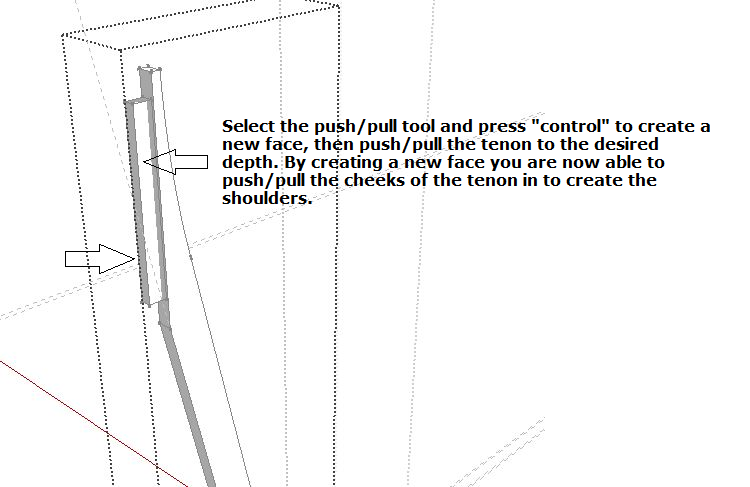
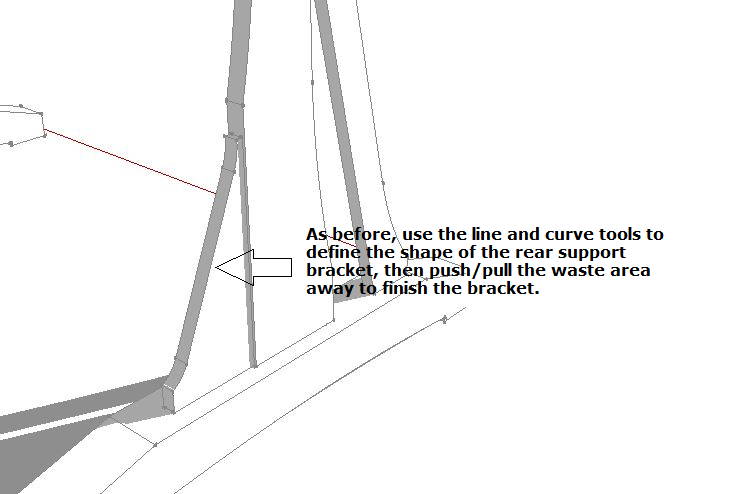
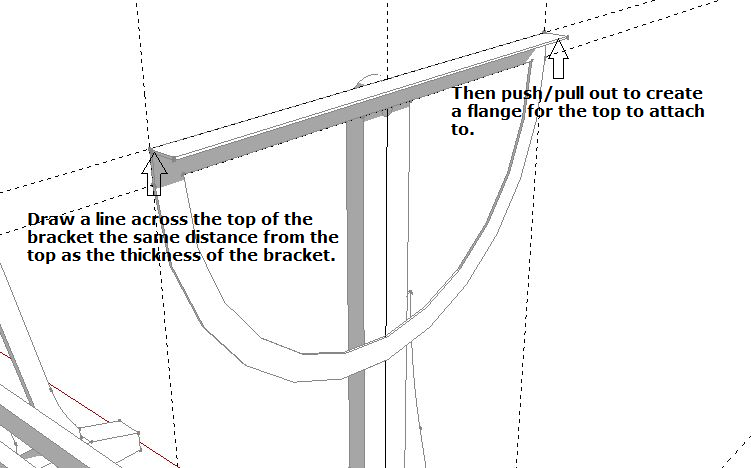
 Step 7
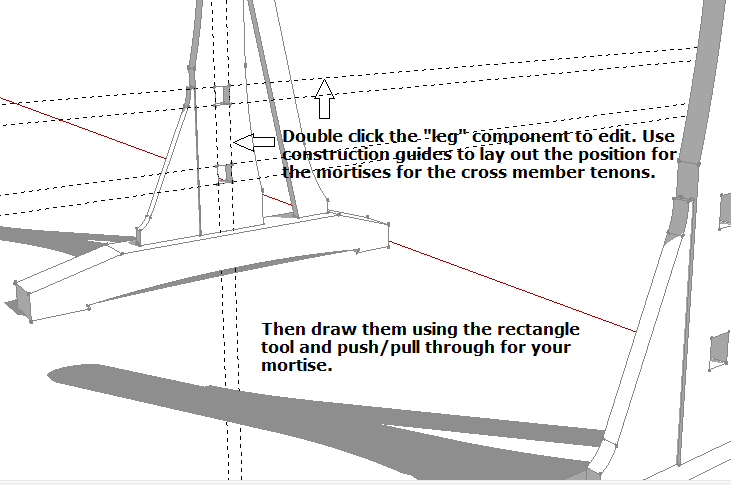
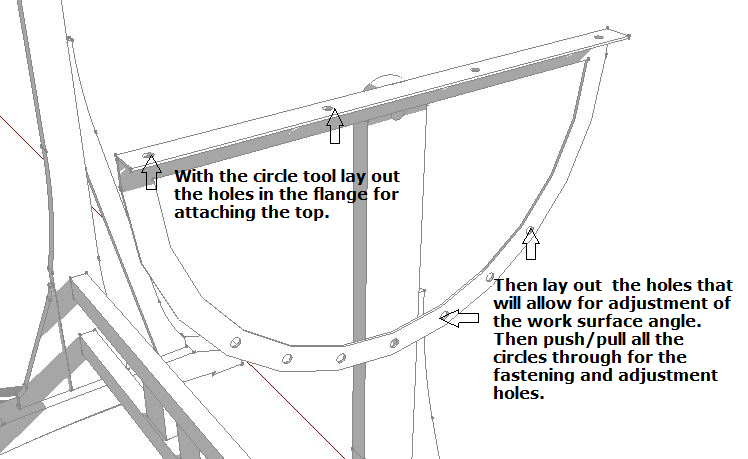
Step 8
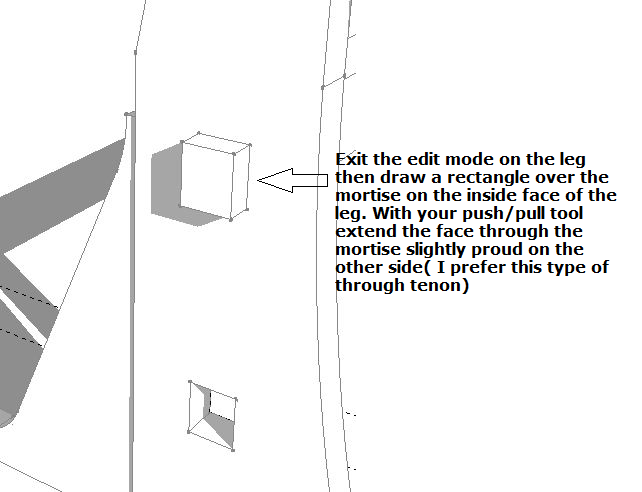
Step 9
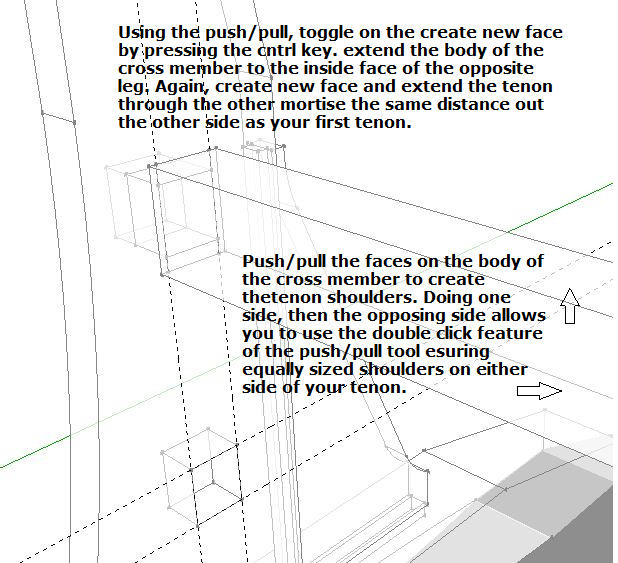
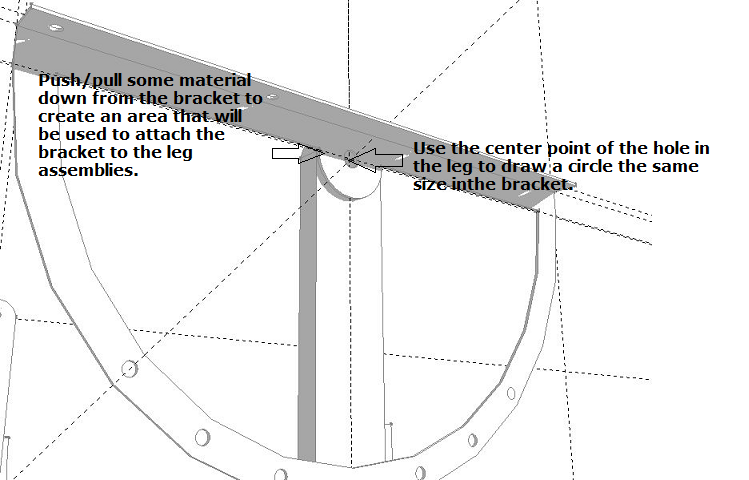
Step 10
Step 11
Step 12
Step 13
Step 15
Step 16
Step 17
Step 18
Step 19
Step 20
Step 21
Step 22
Step 23
Step 24
Step 25
Step 26
Step 27
Step 28
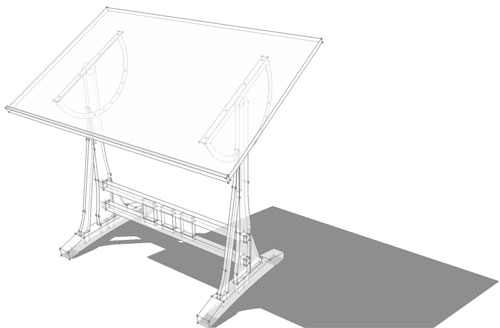
I hope you found this project interesting. I recognize the irony of
designing a drafting table in SketchUp. For me, the table invokes a sense of creativity that is at
home in any shop or creative space. If you would like to try to build a table like this one,
construction documents with general demensions and plan details can be found attached in the
PDF that's illustrated below
.
Feel free to contact me with any project requests by
e-mail
. See you next month.
Previous Wood News articles about using Free SketchUp Design Software:
SketchUp: 3D Modeling for Woodworkers
Creating Turned Models with SketchUp, Part 1
Creating Turned Models with SketchUp, Part 2
Using SketchUp to Design Your Workshop
3-D Furniture Design Using SketchUp, Part 1
3-D Furniture Design Using SketchUp, Part 2
Build a Toolbox: From SketchUp to CNC Machine
Take SketchUp to the Next Level with Ruby Plugins
How to Plan a Kitchen Renovation Using SketchUp, Part 1
How to Plan a Kitchen Renovation Using SketchUp, Part 2
Designing a Work Bench with SketchUp
Sean Headrick, a former Atlantan once seen frequently at Highland Woodworking, now lives
in San Jose, California where he does woodworking and design.
His website is
www.headrickdesigngroup.com
.
Sean was
interviewed by Wood News
in 2007.